
Redesigning the Trailer for a Flat Bottom Boat
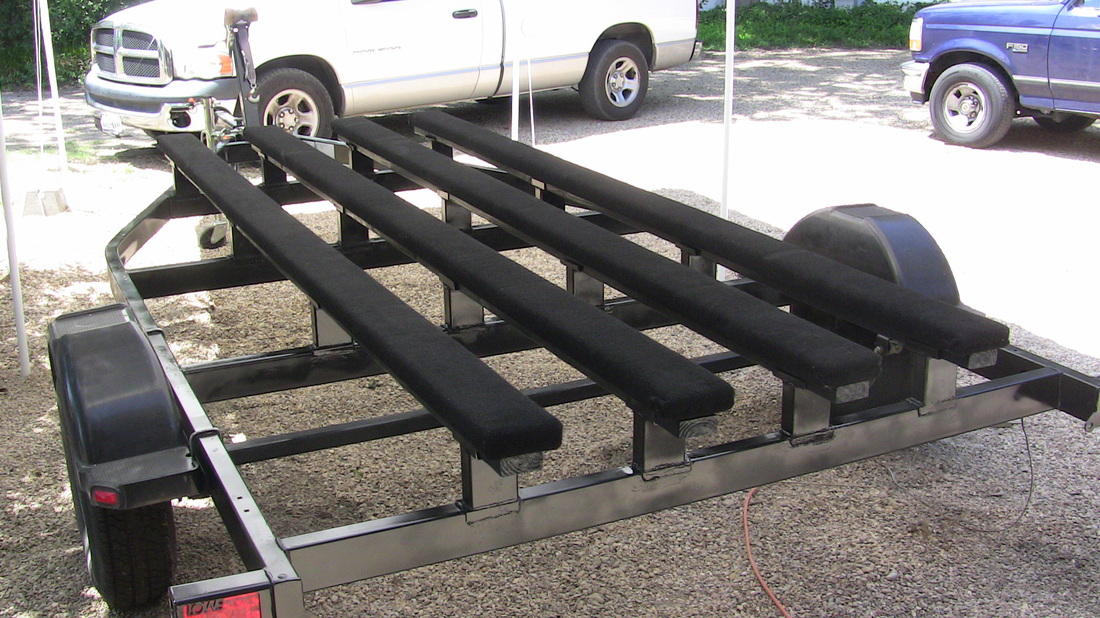
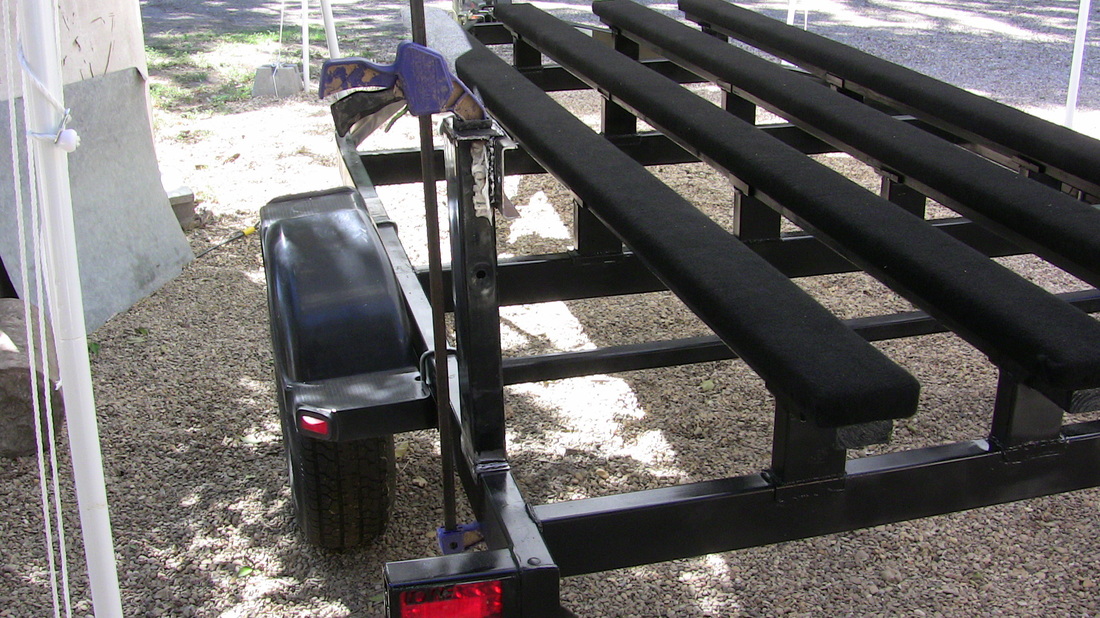
First off, the trailer I bought was for a V-Bottom boat. I had to redesign it for a Flat-Bottom boat. I found a picture of the perfect trailer. It had four bunks to fully support the flat bottom hull. (Bunks are the long carpet covered boards.)
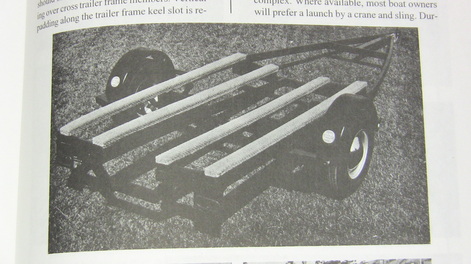
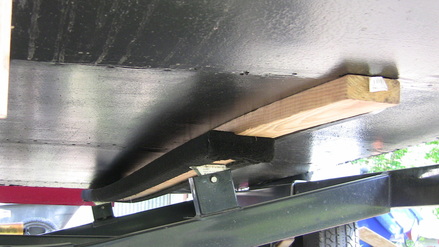
Also the bunks should be longer to help support the front of the boat. Therefore I plan to cut the two V-Shaped beams out and weld in four new ones evenly spaced out. This will allow each bunk to have four support brackets instead of the original two. As you can see in the picture of the first boat, the bunker bows in the middle, I hope the extra brackets and bunks will prevent this. (I had to add the 2x4 to help support the boat, due to the 2" bilge keels along the bottom. They were spaced so that only one would be able to rest on a bunk, so to make the boat level, I added the 2x4. When I redo the boat I will make sure the keels fit between the bunkers with inches to spare.) Most trailers are designed to carry the entire hull of the boat and only leave the outboard hanging over, but since the paddle wheel sits a few inches below the bottom of the hull, I decided to only have the trailer support the cabin and on foward, This will allow the paddle wheel to spin freely for inspections and such.

Stripping the Trailer
Ok, got the lights, the bunks and their supports removed. They were just bolted on. Soon as the C25 gas and cylinder arrive, we can begin welding.
(We will need to learn to use my new MIG welder.)
Purchased the necessary 2"x4"x1/8" thick (11 gauge) steel tubing.
Need to cut them to length and then tack weld them into place.
(We will need to learn to use my new MIG welder.)
Purchased the necessary 2"x4"x1/8" thick (11 gauge) steel tubing.
Need to cut them to length and then tack weld them into place.

Using a Saws-All, we cut off the present V-shaped beams, so that I can replace them with straight beams. It is very important to use good sharp blade, otherwise it will seem to take for ever to cut through the steel beams.
(Believe me, you can definaltely tell a difference.)
(Believe me, you can definaltely tell a difference.)

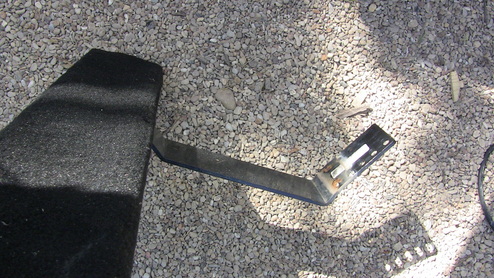
Once the beams are cutt off, you will need to remove the left over beam. Make sure to save the V-Bottom beam. I used them for making my brakets.
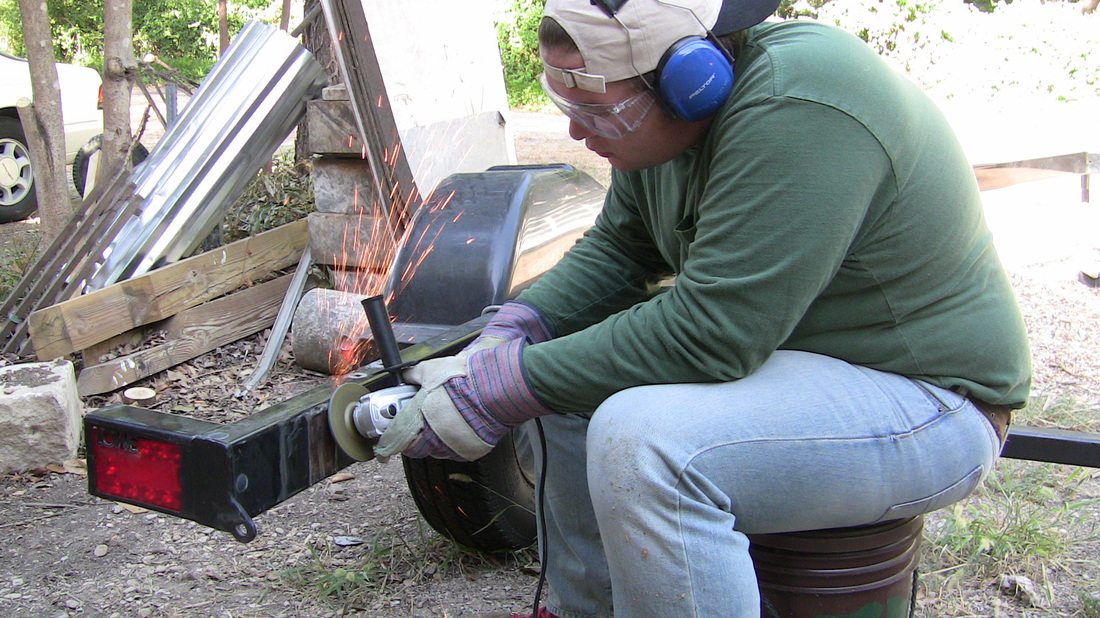
Using a grinder, we were able to quickly smooth out the area for the new beam. Safety is important. Wear ear protection and good pair of gloves. I would also advise wearing a mask over your mouth and nose, because a grinder puts out a lot of small particles.
(Of course you can only get teenagers to wear cool looking protection, apparently the face mask was just not in the now of proper awesome gear.).
(Of course you can only get teenagers to wear cool looking protection, apparently the face mask was just not in the now of proper awesome gear.).
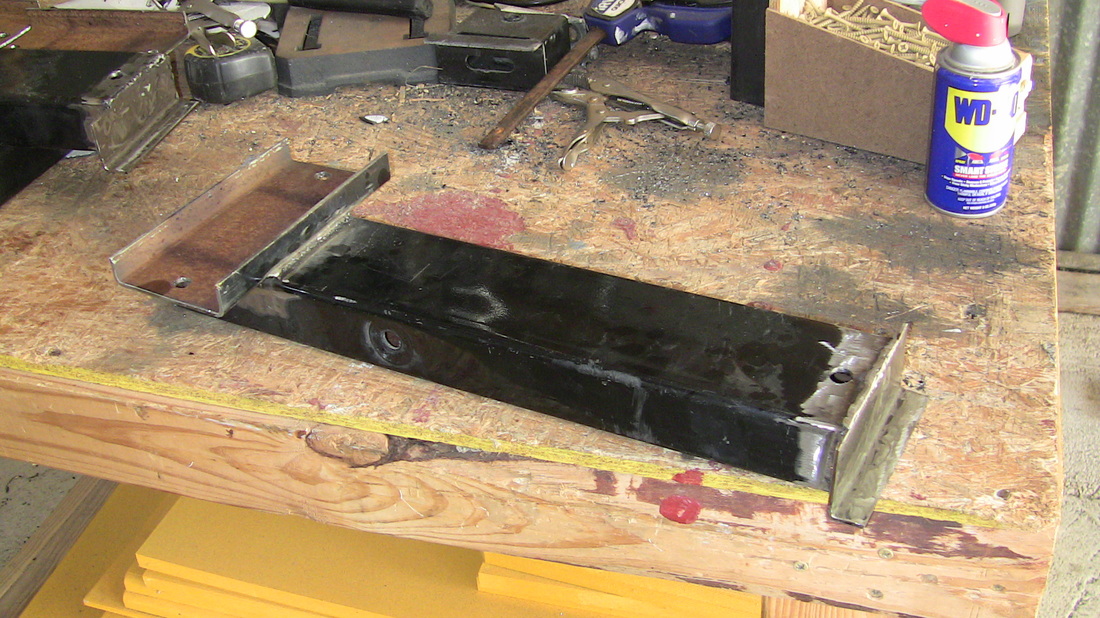
Here the area is ground down smooth and we also removed a small area of paint to either side. I suggest spraying a fine layer of WD-40 to prevent the area from rusting before you get to finally welding on the new beam.

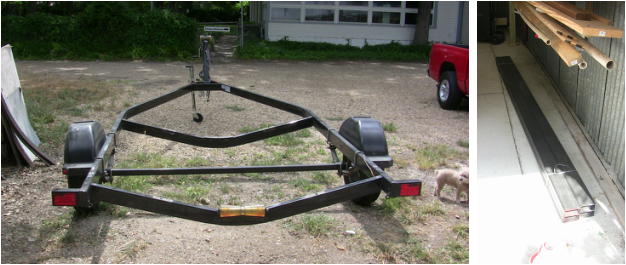
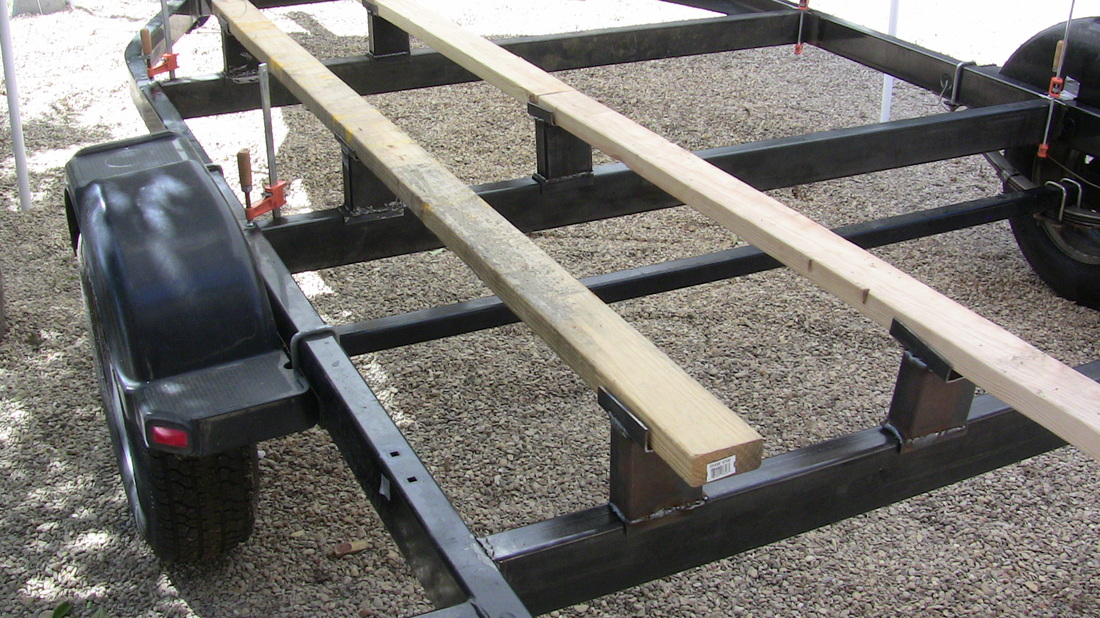
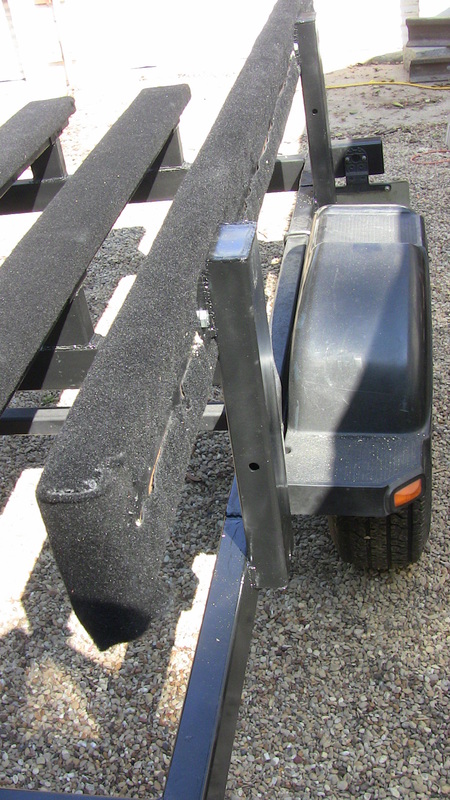
Here is the trailer with both V-Bottom beams removed. Also all the areas for the new beams have been prepared. I plan on placing four new straight beams 4 feet apart.
Test Fitting the Straight Beams
I plan on welding the rear beam first. Cut to size, and held on by clamps, this beam is ready. (Note: It is best to use metal clamps , but if you do not have any, then just weld a partial seam to hold the beam in place then remove the clamp. Otherwise the heat will build up and melt the clamp to the beam.)

First beam done, just three more to go. Will have to clean up the weld seams. Being newbies, we were kind of sloppy. But then that is where the grinder comes in. (Yes, both Marcus and I stood on the beam together to confirm that the weld would hold. It was a game of dare to see who would be the first to place all their weight upon the new beam.) You may note the new addition of a canopy. Well, when it is 105 in Texas, the metal will get even hotter. So to keep the trailer cool enough to be able to work on, I bought one of those cheap tarp tents.
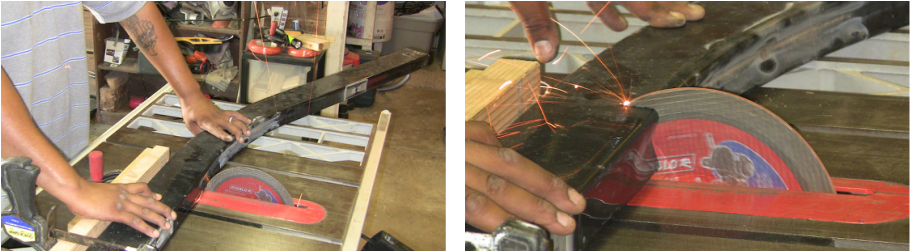
(Note: It took me a bit to get the correct angle cut for the beam to fit on the angled portion of the frame. I suggest using a mitter saw, was easier than freehand or table saw. Also make sure you use a metal cutting saw blade. These are designed to wear down to a smaller size.)
(Note: It took me a bit to get the correct angle cut for the beam to fit on the angled portion of the frame. I suggest using a mitter saw, was easier than freehand or table saw. Also make sure you use a metal cutting saw blade. These are designed to wear down to a smaller size.)
Making the Brackets
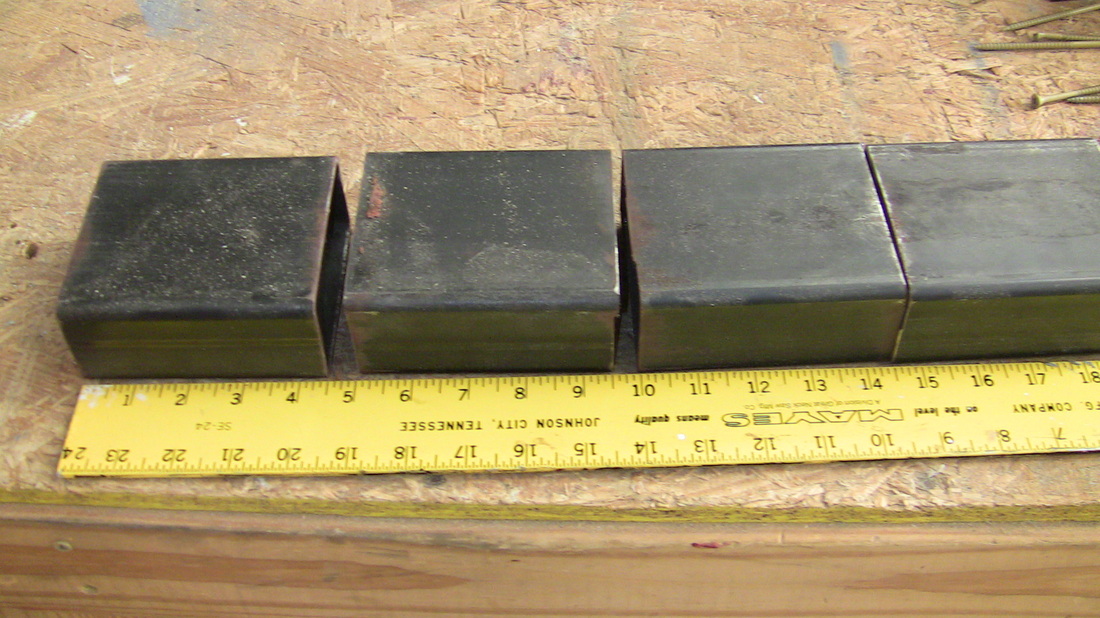
Time to make the brackets. I took scrap beams I had cut off, and cut them into 4.5" sections. I needed four brackets for each of the four bunks, which meant I needed sixteen brackets. I found cutting straight cuts multiple time is easier on a table saw. Again use the metal saw blade. I adjusted the blade to cut a little over half way and used the fence to make sure of the length of the piece. Cut once and turn piece over and finish cut.
Warning: If using table saw, make sure no left over saw dust is in under bin of saw. Saw dust is not only flameable, but saw dust floating around can explode, and very hot flecks of steel can start a fire.
Warning: If using table saw, make sure no left over saw dust is in under bin of saw. Saw dust is not only flameable, but saw dust floating around can explode, and very hot flecks of steel can start a fire.

Each bracket was going to be made up of three pieces. The top piece to hold the bunk firmly. Just cutting a section in half would suffice. Will drill bolt holes on both sides of the upper bracket piece to be able to attach the bunkers to the brackets. Another piece will be the riser, which I was making 4.5" tall. This was the height of the original bracket I had taken off the trailer before. The last piece would be the bracket guide, which would eventually be welded to the straight beams. These only needed to be large enough to sit flat on the beam and yet be able to help ensure the bracket was straight, so I decided to only use a quarter section for those. So I would need 28 sections, 8 for the tops halves, 16 risers, and 4 to be quartered for the bottom. Of course I cut an even 30, just to be sure.

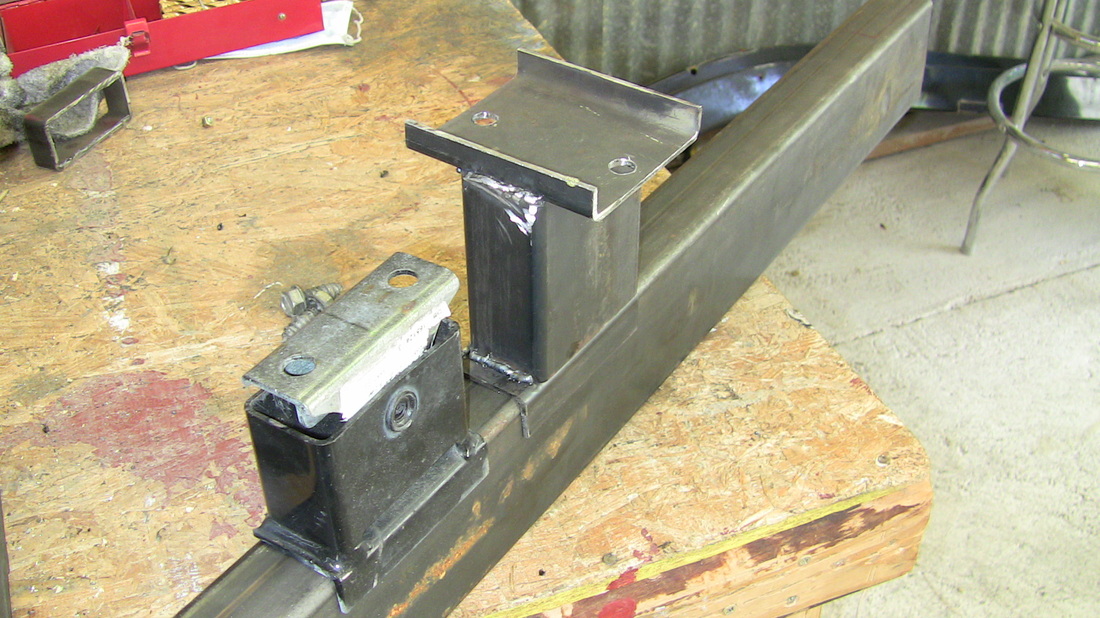
The original bracket with our newly drilled one. Ok, looking at them side by side, I do not know where I got the 4.5" figure for the riser. Oh now I know, 4.5" was perect lenght for the top piece, so I decided to just make it easier on myself by cutting all sections to same size. Wasn't that smart of me, thank you GOD. He has been the inspiration and strength of everything I do.
Welding on the Beams
Place checking the new brackets, I noticed that some thought was going to be given to the section where the frame angled in. I would either only have three brackets fo the outter bunks or I would have to make the very end brackets have an angled guide. Lucky I had cut an extra set of sections. I think I will cut them in half and have the very end backets have an extra wide guide.The quartered guide only had enough base to snuggly fit the riser if everything was straight, but with the extra wide guide, I believe it will work out nicely.

After welding the brackets together, it is wise to always go back and clean up the welds if needed. I wanted to make sure the guide plates would sit smoothly on the beams. Here is another one of my helpers. See, he is wearing all the proper saftey gear. Doesn't he look cool?

As a result of welding several brackets, with confidence I had Marcus begin welding the beams to the trailer frame. Isn't the weld seams looking nice. Practice makes perfect, or at least close enough.
(Word of note: although tape is a nice way to make sure the beams will be placed in the proper place, you need to remove any tape residue before welding.)
(Word of note: although tape is a nice way to make sure the beams will be placed in the proper place, you need to remove any tape residue before welding.)

Here I have Franco cleaning the new beams, preparing them for painting. I know I will have to remove the paint in the areas where I will eventually weld the brackets on, but this way it will also help prevent rusting.
Bracket Placement Test Fitting
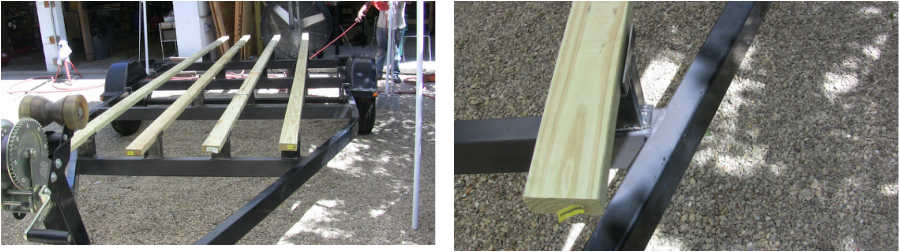
After Marcus inadvertly welded ALL the brackets the same, it was found, during placement testing, that by placing the side brackets all the way to the edge, where the beam met the angled frame, that the spacing of the bunks would still give the boat a solid support.
Welding the Brackets to the Trailer

We first welded the fore most side brackets, right against the angled frame. From here, we next made sure the bunk would be perpendicular to the rear beam (right angle or 90 degrees if you prefer.) Then it is a simple step of placing the brackets and marking their placements.
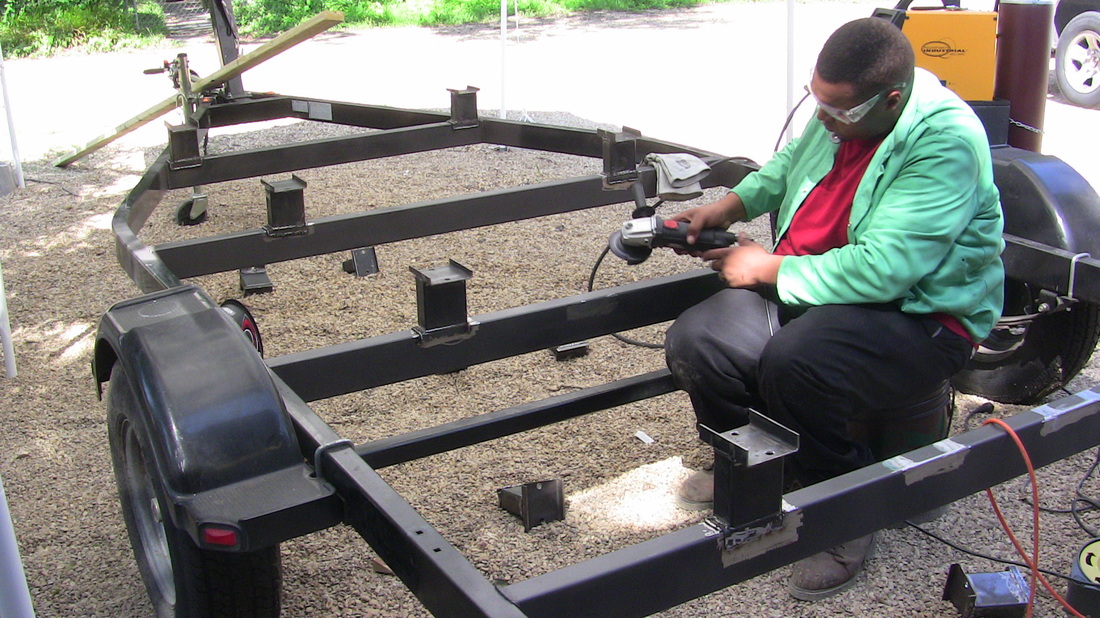
To get a good weld, it is important to have a clean surface, free from dirt and paint. Once again the saftey gear is not stylish enough....well actually the ear muffs broke and I will get a few more pairs after lunch. I, myself, did not wear a face mask, and am now trying to get taste and smell of burnt metal out of my nose and mouth.
Remeber Saftey First.
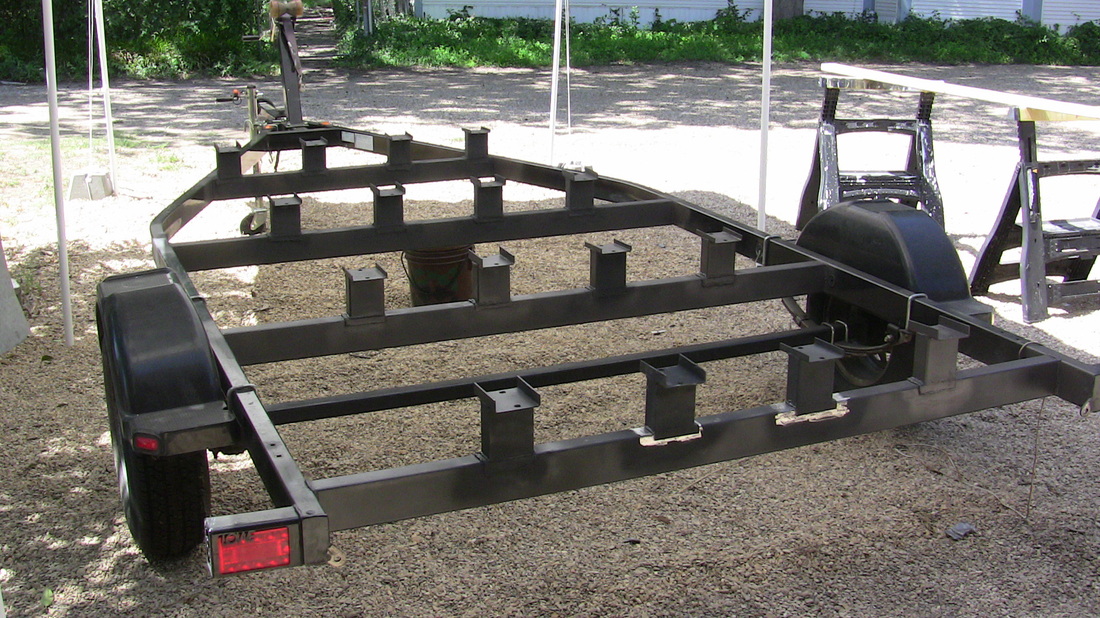
Just two more brackets left to weld onto the trailer frame. I quickly primed all the brackets. That was when I noticed Marcus still had two left. I then regrinded those areas in preparation for tomorrrow's work load. I'd do it myself, but then he's the one who has had all that practice welding the brackets.
Making the Bunks
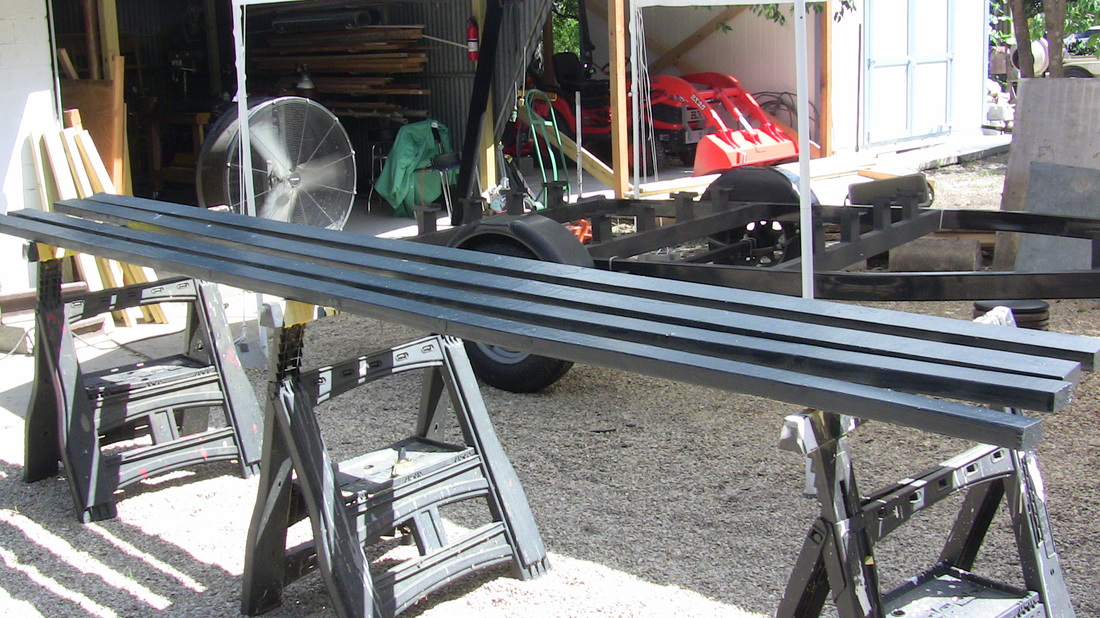
After cutting the wood to length, I then painted the 2x4s. The brackets top piece will hold a 2x4 nicely, but after looking at the original bunks I decided to match them and have the carpeted section be 2x6s. So the plan is to use both. We will bolt the painted 2x4s onto the brackets, and then screw the carpeted 2x6s onto the 2x4s. This will also increase the strength of the bunks. We probably do not need as much support as I am building into the trailer, but Hey, I plan on building part of the boat while it is on the trailer. I want it to be able to hold the boat, my tools, and at least Marcus and myself, while moving around and swinging hammers. On the 2x6, I plan to first cut and glue on a 6" strip of outdoor carpet as a cushion. Then we will wrap a 14 inch piece around the 2x6 and staple it tight.
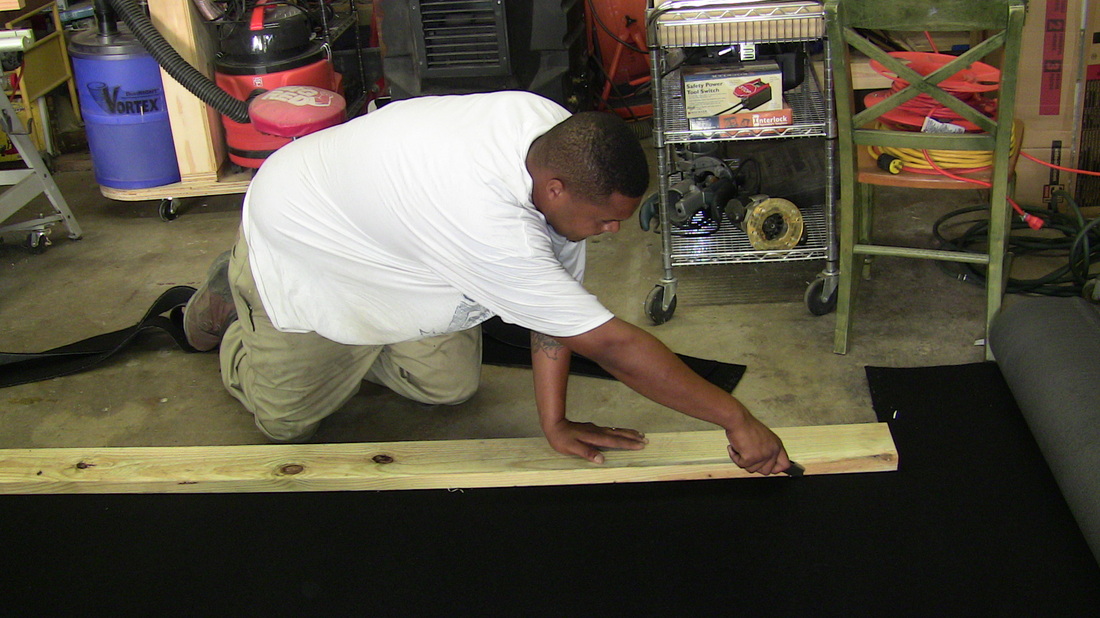
Remember: It is best to use a knife with a sharp blade, or a utility knife with a new blade. Also make sure you are on a solid surface that you do not mind leaving cut marks on. I was told a gentleman went storming into Home Depot demanding that they replace his diningroom table. He was informed that, " Yes they told him he could cut the tile with either a knife or pair of scissors, but no they definately did not tell him to use his table as a cutting board."
Marcus is cutting first a 6" strip to use as a cushion. Then he will cut a 16' strip to be able to wrap around all the sides.
Marcus is cutting first a 6" strip to use as a cushion. Then he will cut a 16' strip to be able to wrap around all the sides.
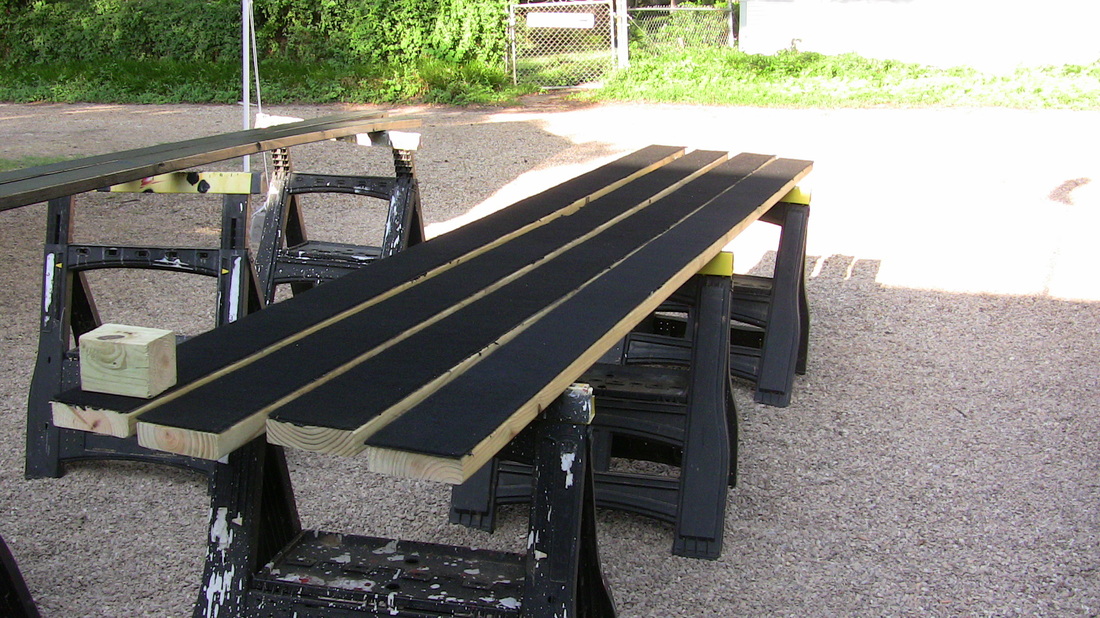
Here is the 6" strip glued to the bunks. Just need to let this dry and then we can begin the outer layer. I had Marcus use the wooden block to insure the carpet was smoothed out and firmly compressed into the glue. We used outdoor adhesive.
Here I am, yes this is truely me to prove I don't just sit around thinking up jobs for Marcus to do, drilling pilot holes and then ratcheting them in. After doing the first few, I suddenly remembered I had a longer extention for the ratchet, thus preventing any more smudging of my new paint job. I decided I had to finally let Marcus have a shot at my camera, if I ever wanted to be seen on my own web page. Of course now I have like 15 shots of me, I felt like I was at a photo shoot.

Here is Marcus finishing up the last of the bunks. He used glue adhesive and then staples to hold the carpet till the glue dried. The way the bunks worked out, the flaps of capret on the bottom of the bunk will be sandwich between the bunk and the wooden support attatched already to the trailer.
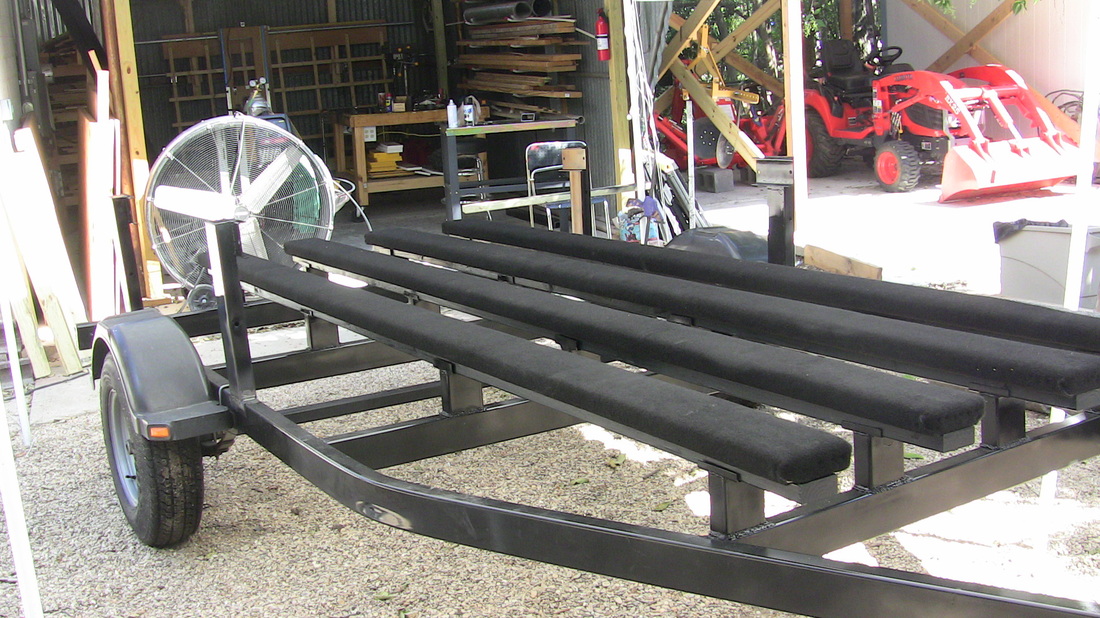
Here is the bunks resting on the trailer. Tommorrow I will screw them all together. Would have done it today, but Texas hit a recorded 105 in the shade, and boy am I hot and tired. Doesn't the trailer look good, all most like it was done by real professionals. All we have left is the two side guide-ons and drilling the holes to run the wiring for little row of red rear marker lights to be installed on the rear beam. Looking at the picture of the flat bottom trailer from the article, the trailer does not have side guide-ons. But I want to ensure that the boat comes onto the trailer correctly, since the rudder will be at the front of the boat and I want it to glide between the center bunks. Beyond that is reconfiguring for the winch support, which will be best done after the hull is built and placed on the trailer. That way we can do it just right.
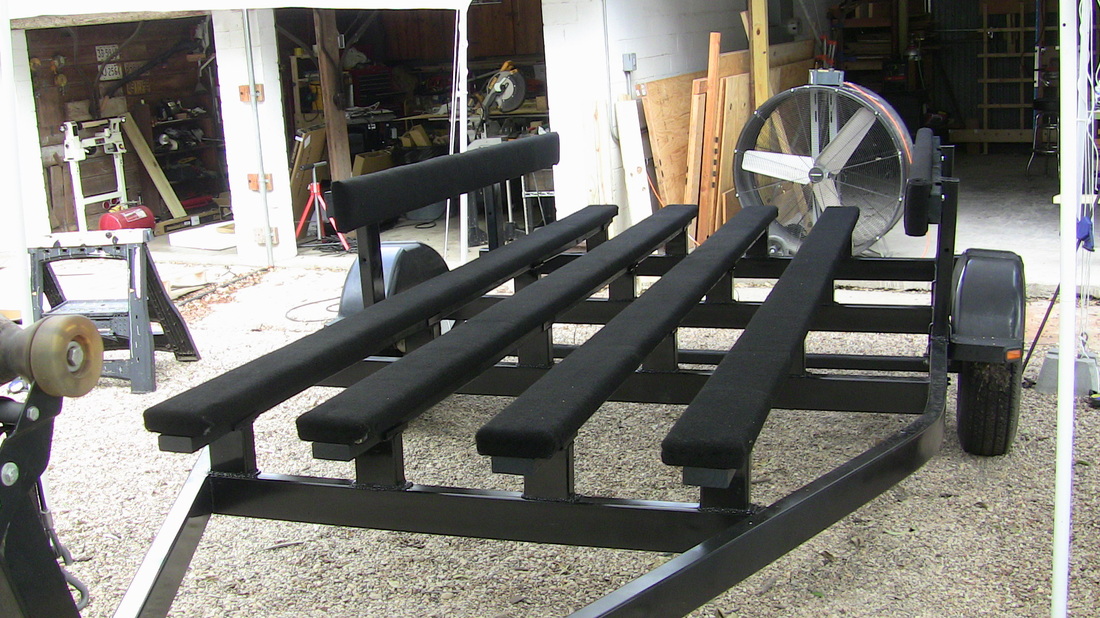
Side Guide-Ons
I was noticing the large gap between the outter bunks and the side frame. At first the worried me, but when we started discussing the placements of the side guide-ons, it was decided it might turn out to be a good thing. I wanted to use the original side guide-ons, but we just could not get the support to bend properly, and after looking at it, we decided it still would not prevent the boat from rubbing against the wheel wells. So we are going to make our own braces with brackets to support an even longer side guide-on. I plan on using the original bunks as the side guide-on bunks. I figure on having the bunks extend past the end of the trailer to better help center the boat onto the trailer. Since the paddle wheel will be off the end of the trailer anyway, it should not be a problem when the boat is on the trailer.

Here a few of my sketches of the guide-on. The bunks are 8" from top to trailer frame. Add 18" for the hull, gives us 26" from the frame to the underside of the extended deck. Subtract 2" for the deck support gives us a 24" clearance that the guide-on support riser has to be able to fit in. I decided to make the riser 20", giving a 4" saftey margin. Figure to make the guide-on brackets the same as the brackets for the bunks, except the bunks will be on the top side instead of directly on the top.
Cold Front to the Rescue
Cold front came in this weekend. It was so nice that the wife and I decided to enjoy it. Can't belive it is in the mid 80's.
Got the bunks screwed onto the trailer. We finally used the pieces that we cut off the trailer. I know I said I used them before, but the excess from the tubing I bought was so much easier to use. As you can see, the bend in the metal made it more difficult to cut. Also once we had them cut, we had to hammer out the bent metal to make it easier to weld.
Here is the guide-on bracket, all welded together. We also drilled a hold at the base so that any water that finds its was into the old bolt holes can drain out. I figure we will weld it to the trailer tomorrow and then I will paint them. We already went ahead and recarpeted the old bunks to use as the guide-on.
I decided to start getting measurement on how big the boat will be. After test placing the guide-on brackets, it was discovered that I actually lost 4 inches instead of gaining them. That is ok. I am planning on adding 8 inches more for the draft making the hull 18" tall. This will double the draft, thus doubling the weight capacity of the boat.
Got the guide-on braces welded on, now only need to clean up the welds and prime and paint them. Then install the guide-on bunks.
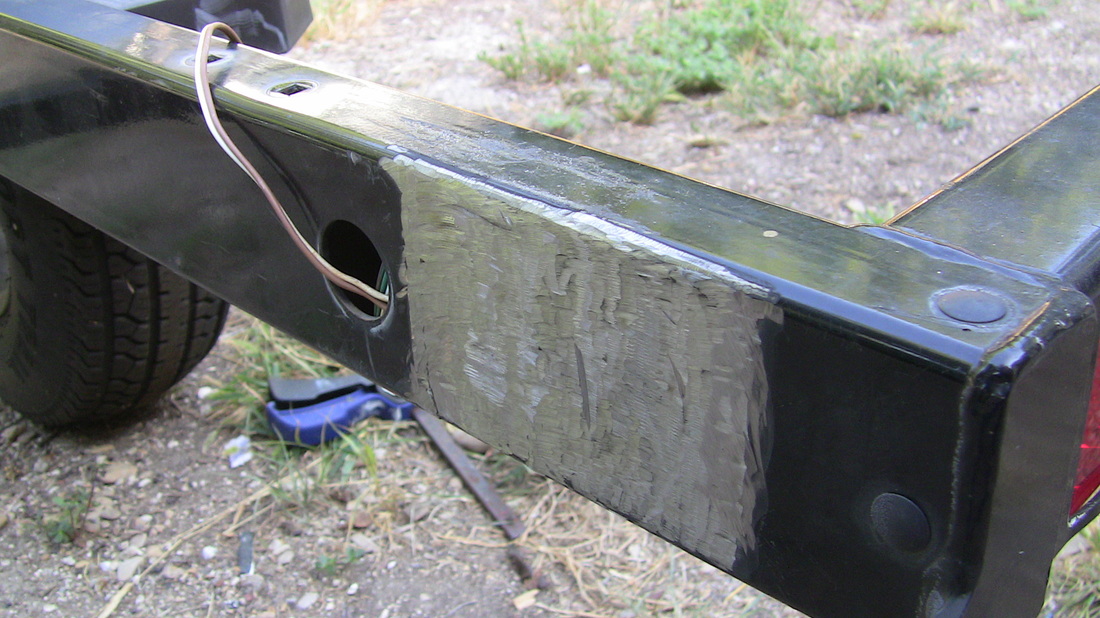
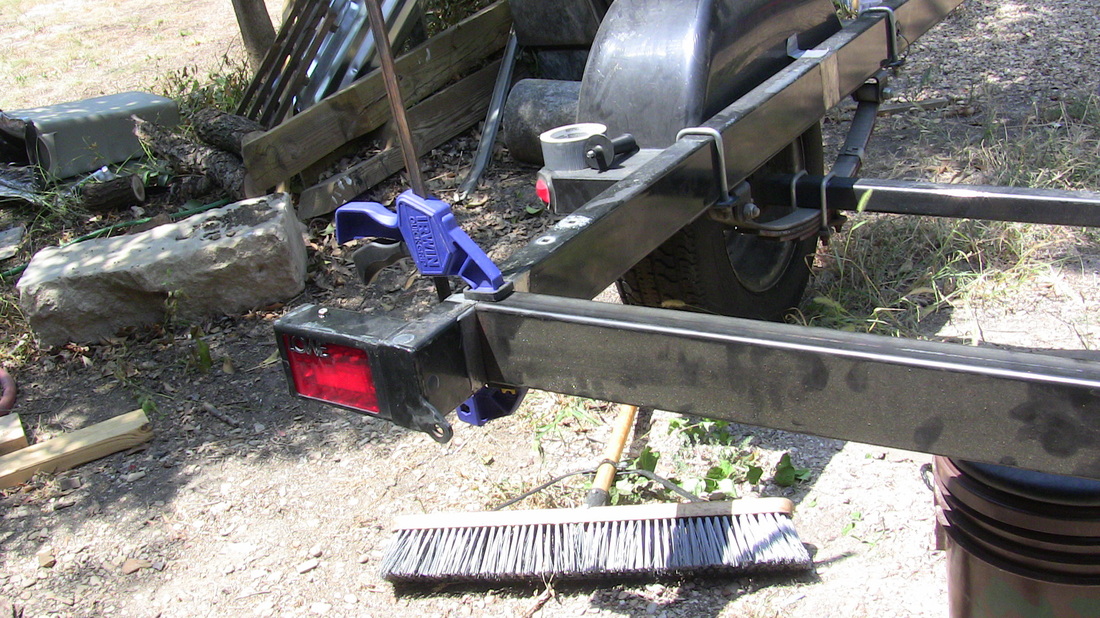
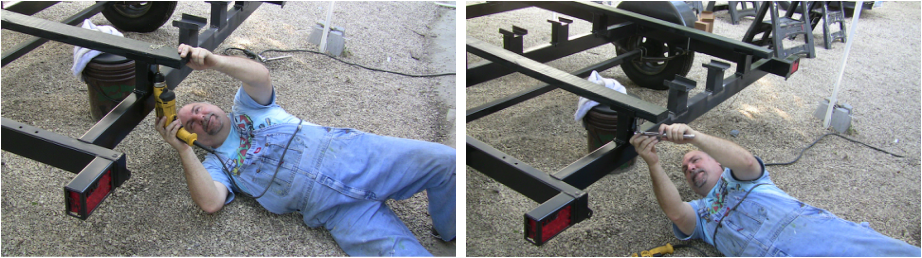
Well, here it is. Pretty much completed. Just need to figure out how to get the damn wire for the rear indicator lights ran through the rear beam. Still have to tweek the winch post, but will do that after I have built the hull and placed it on the trailer.
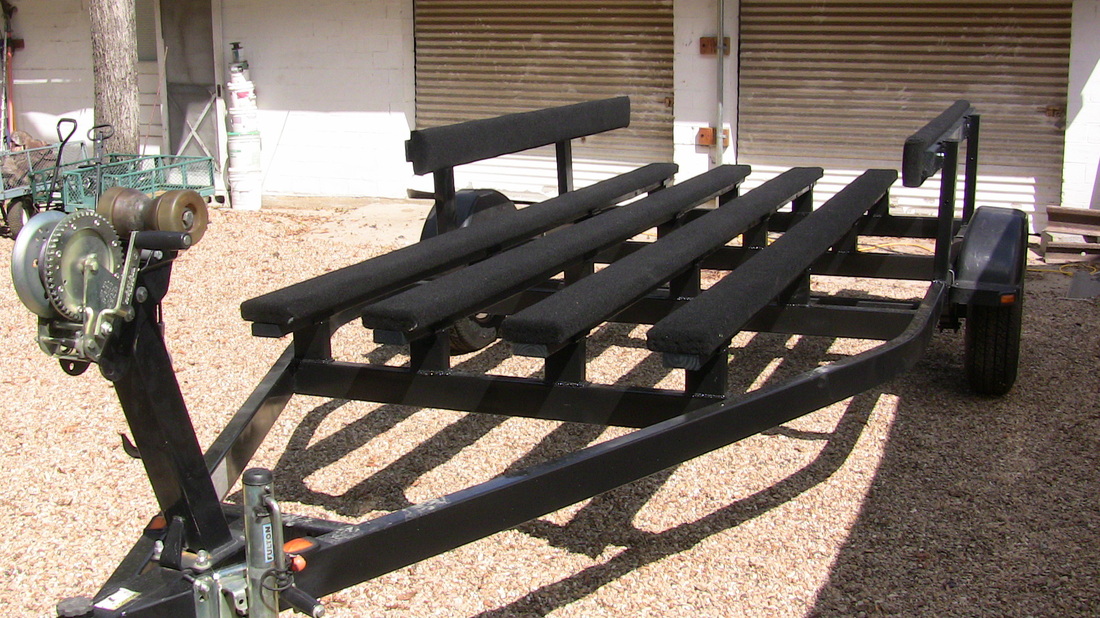
Done! With the Grace of God, was able to wiggle a piece of welding wire in the holes and snagged the other end with a pair of needle-nose pliers. Rear red marker lights installed. Next step must wait till boat's hull is on trailer. Ok, now that I am compairing the picture from the article with the trailer I made....I see I did not really have to have the risers. I probably could have just welded the brackets to the beams and then bolted on the bunks. This would have lowered the hull, so I would not have to go as deep into the water. All righty then. After talking to my wife, we decided to wait till we get the hull built and runner installed, then see how hard it is to float the boat off the railer, before I remove the raisers or anything to the trailer. With the rudder, the raisers may be needed.
I finally decide I was unhappy about the boat being thinner than the original. So I looked at the trailer and removed the guide-on post. I then welded the guide-on post on the outside of the frame instead on top, which gave me 4". I then removed the extra board that was attached to the guide-on bunk, which was required do to the size of the guide-on bracket, and cut the lips off the bracket. This left a straight plate which could then be bolted onto the 6" bunk. This gave me another 3", for a tolal of 7". Now the space between the guide-on bunks is 77" wide. I am making the boat 74" wide, with whatever the fiberglass taked up also. This should still give me around 3" clearance.