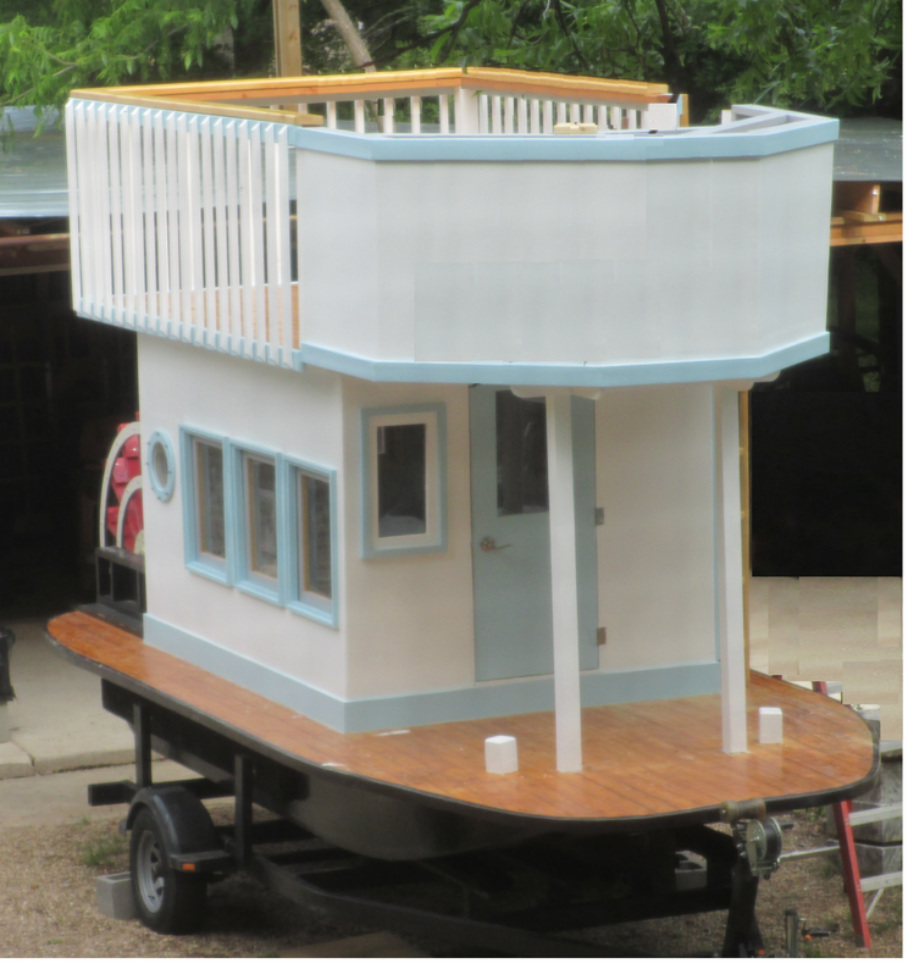
The second deck is clothed and has first layer of resin on. Made first portion of second deck railing.

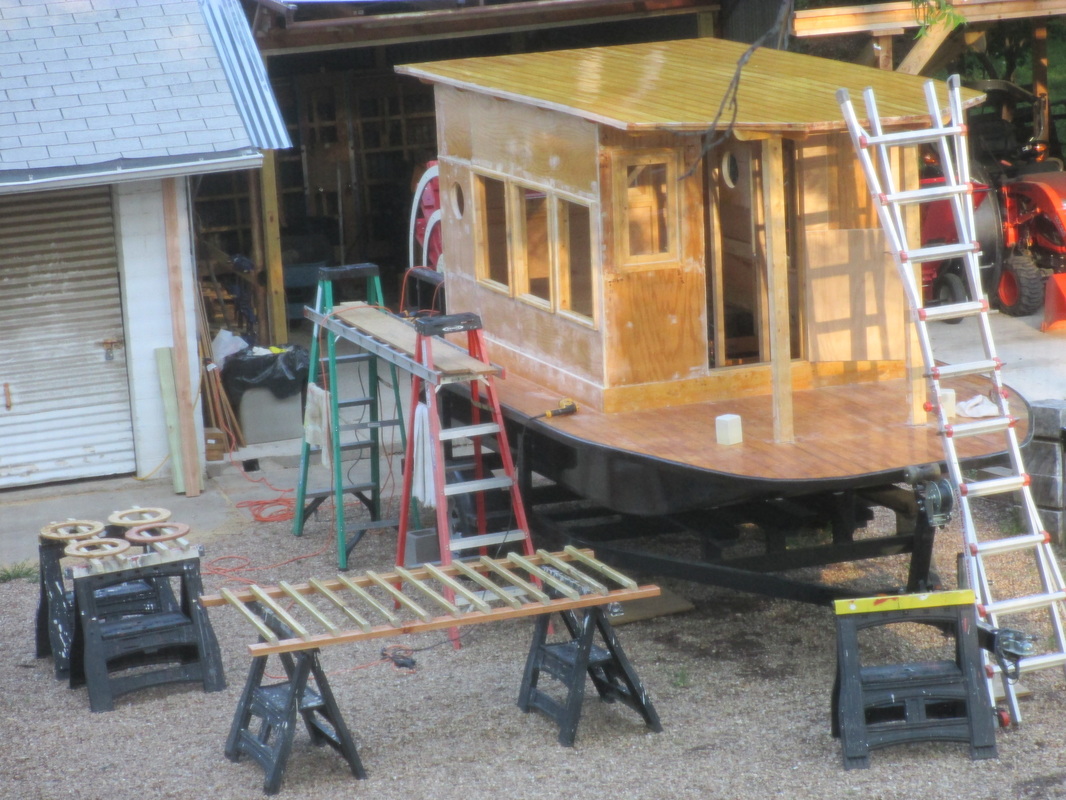
Built rest of railings, and primed cabin. It is taking a lot of time to fill in imprefections sand walls smooth before painting.
Paneled first two walls inside cabin. I promise i will adventurally set down the dimensions of panels and railings.
First coat of paint on!
Ran 1" conduit along back of foward supports. Cut pipe 70", which allows about 1} to stick up above second deck. THis will help prevent water fron running down pipe. The Pipes are for running the steering cables from the pilot house down to the sterrage well.
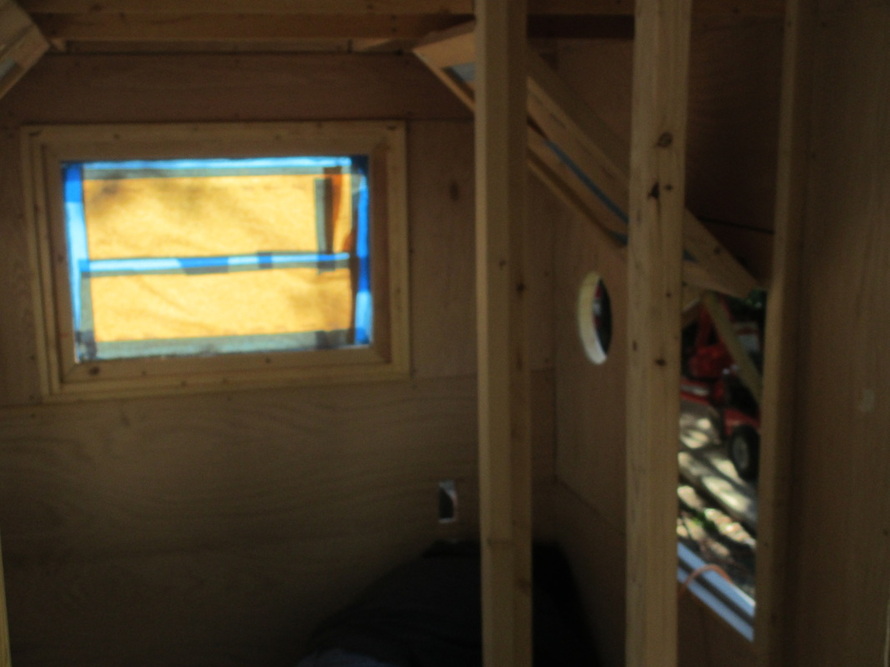
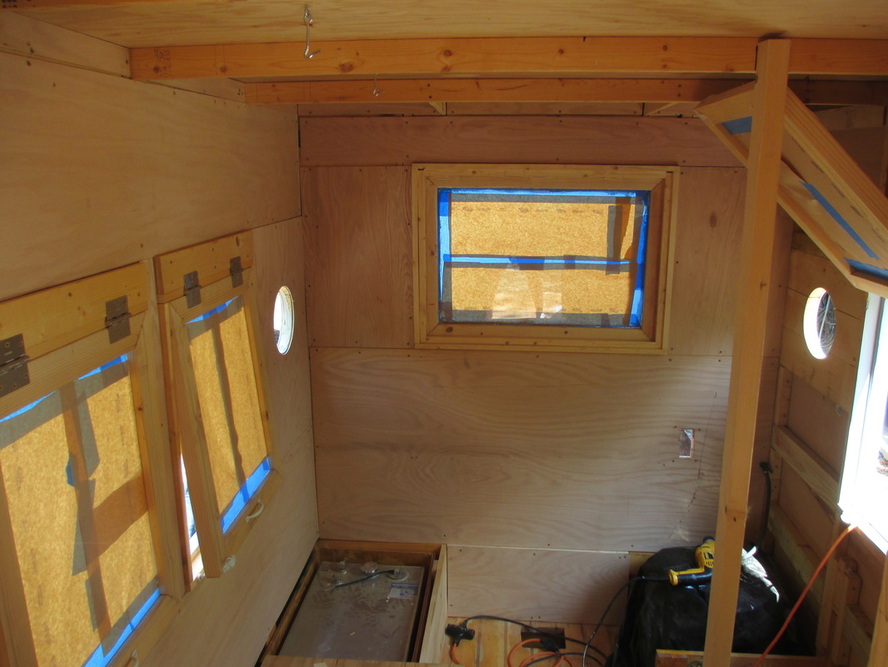
Interior of cabin mainly paneled, with hyst the bathroom stall to go.

Bathroom stall framed and paneling is starting to go up.
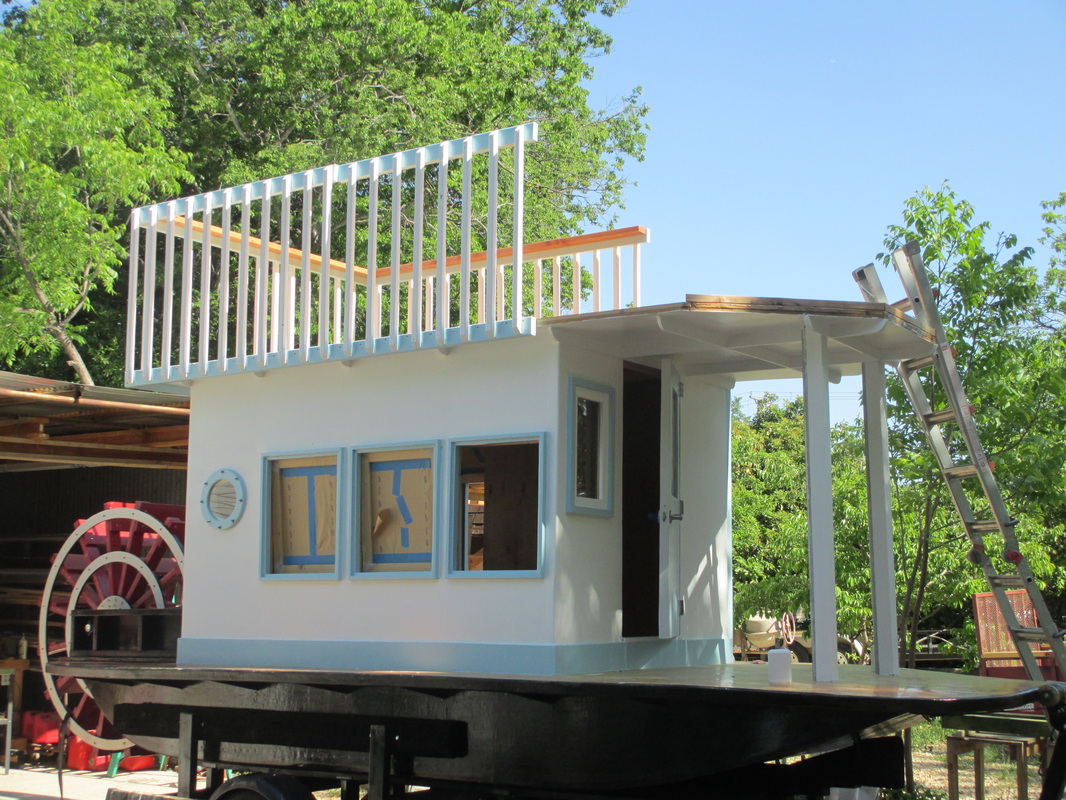
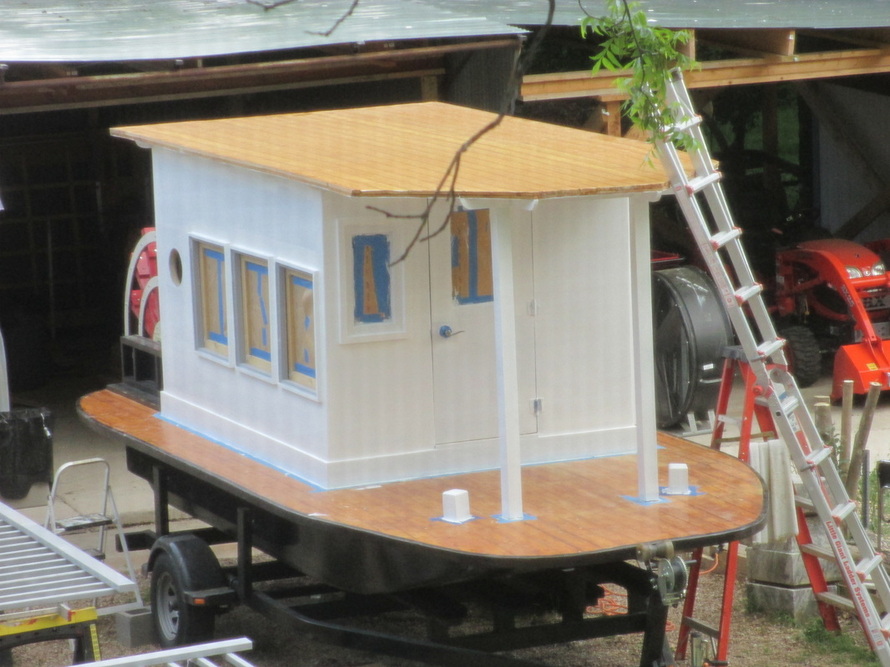
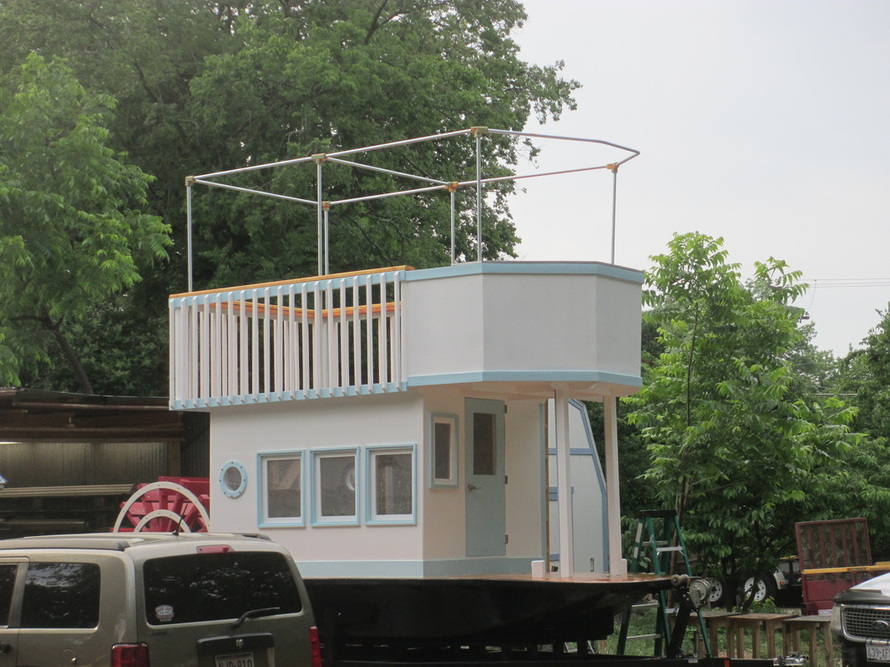
Painted the trim, and installed the railings. Also finally installed the porthole using 1/4" x 4" carrage bolts.

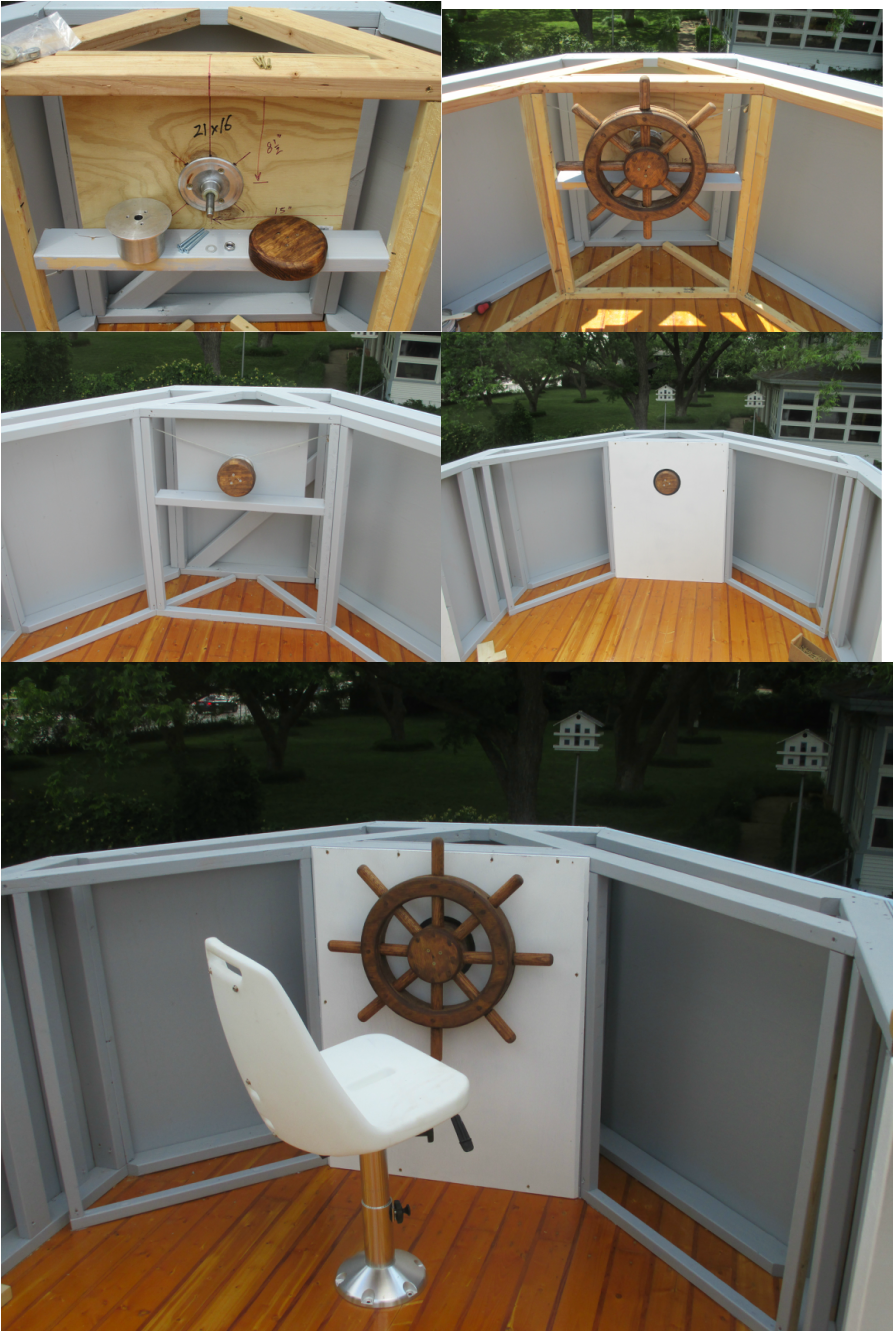
Have frame of pilot house up. Decided the framing needed aditional support.
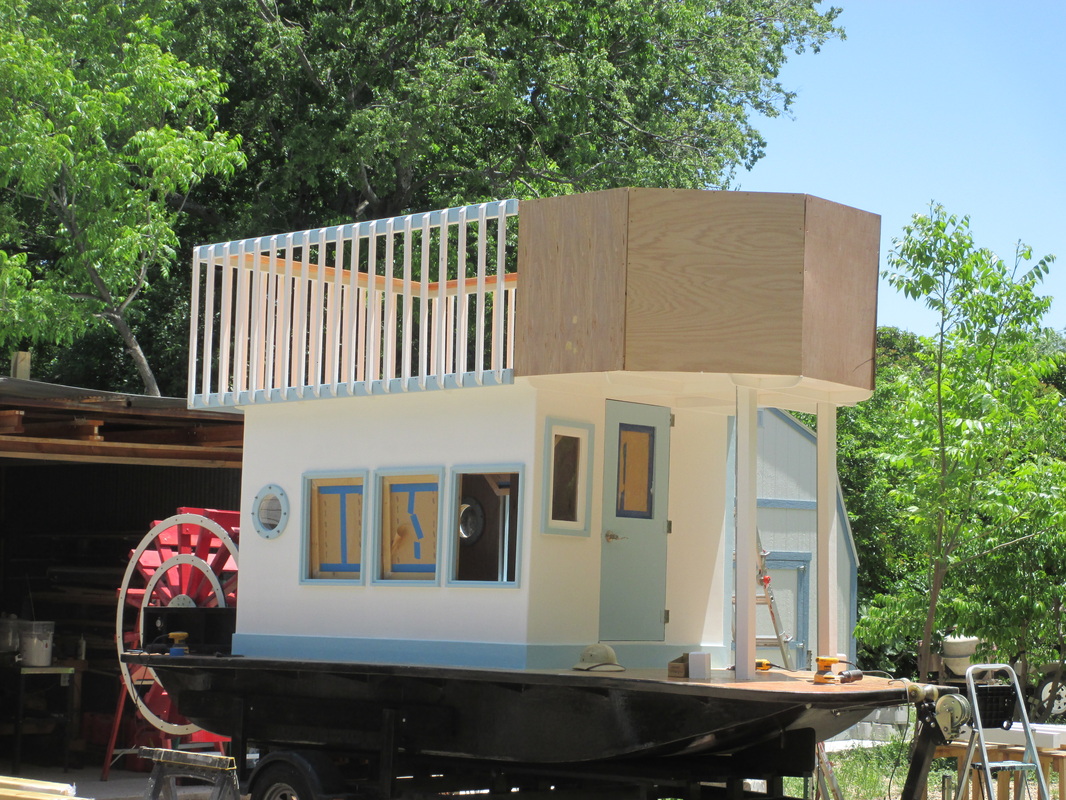
Outer panels of pilot house on. Now need to figure out where dashboard is going to be and then time to hook up steering cables.

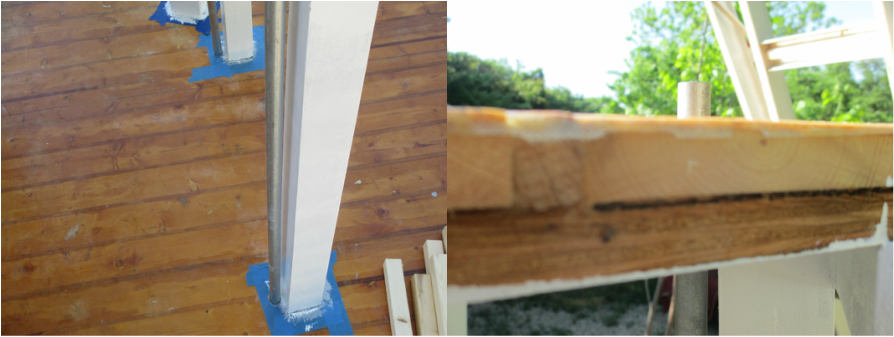
Had bought a captain's chair for my last boat, and it will fit perfectly on this one. Also installed 4"x4" post to help support rails.

Using 1 1/2" dia. wooden rods, I affixed them as handrails for the ladder. I used 1 1/2" 1 1/2" squares as spacers. First I cut the squares 5" long and then drilled a 1 1/2" hole in the center, which then makes a pair od spacers that will fit snuggly to the hand rail.
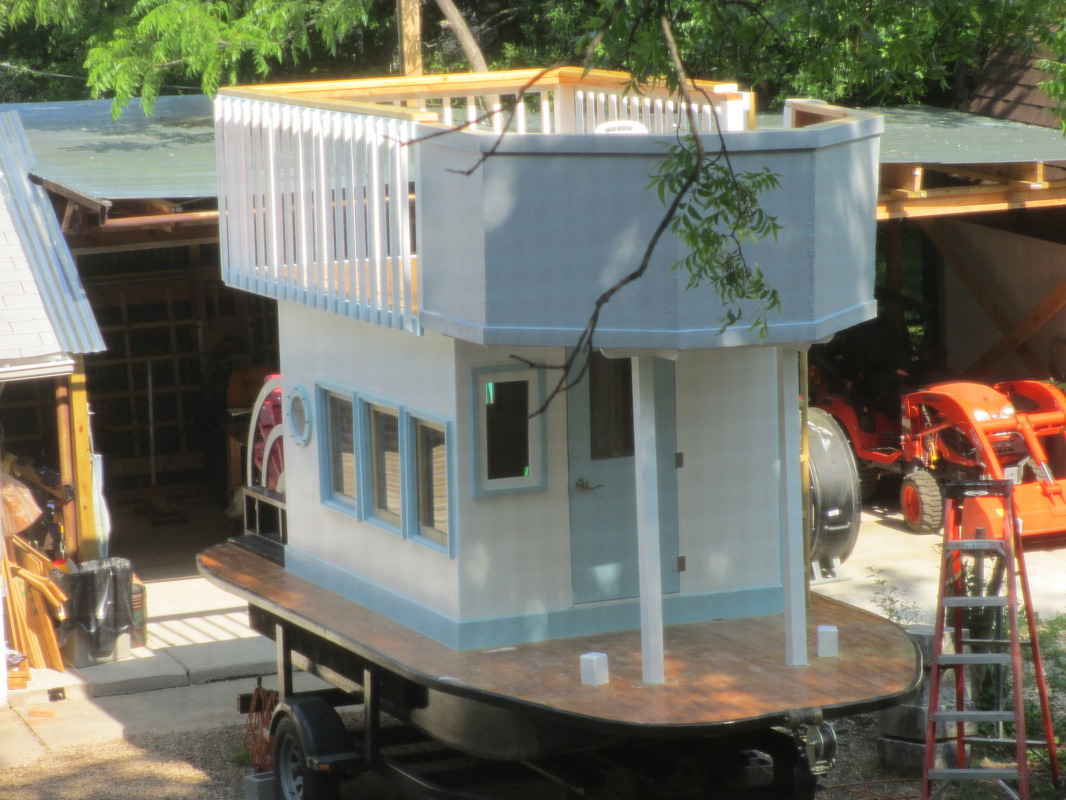
Added trim and primed the pilot house. Next will be to pain it. I nreed to build the running light housings.
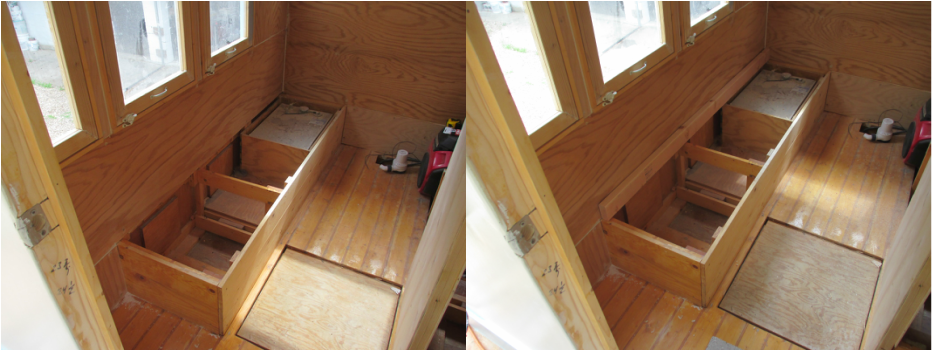
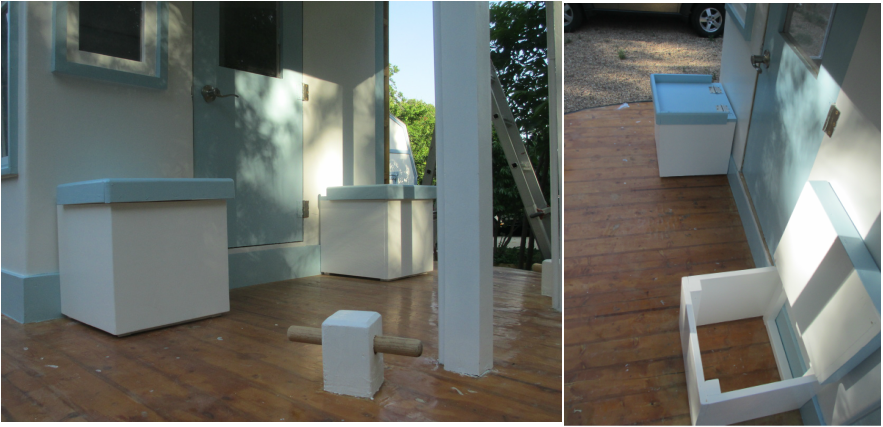
Making the bench top, started with a back board.
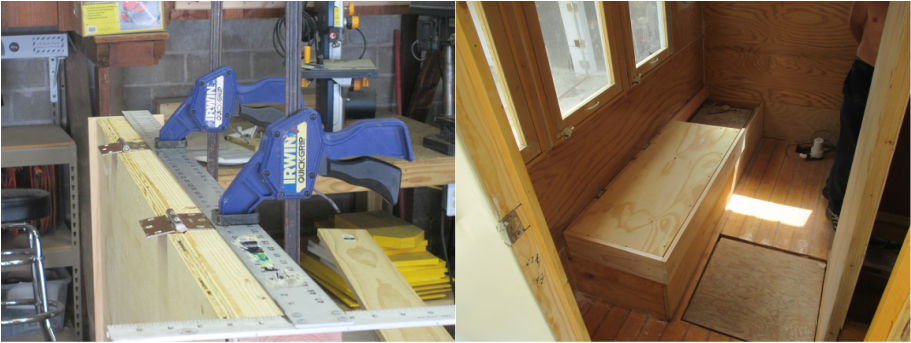
Made the bench lid. I used a T-square to help alignthe hinges. I placed a raised lip to hopefully prevent the cushions from sliding off. I also made the lid a little larger so you can easily grasp the lid and open it to store items inside.
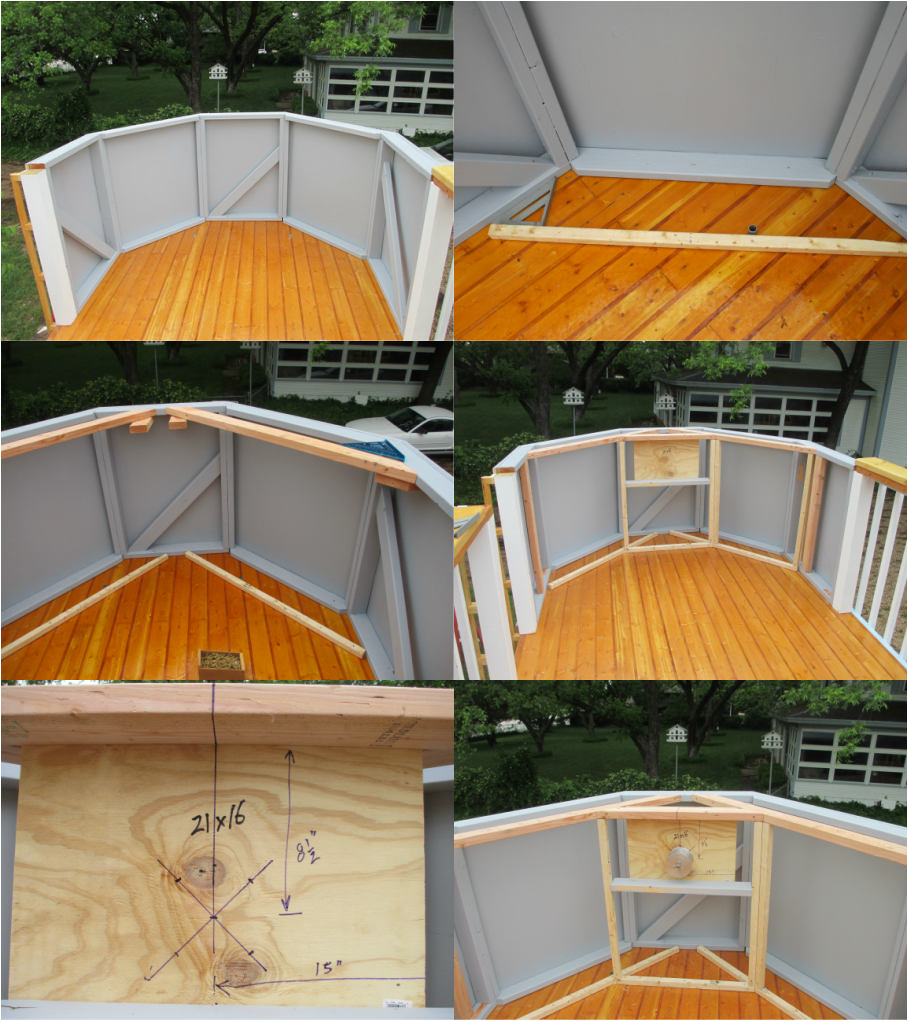
Here is the inside of the Pilot house. First I ake sure the wall wil enclose the steering tube, so I can have the rudder cable fully enclosed. Next I make the back board to attatch the steering drum on.
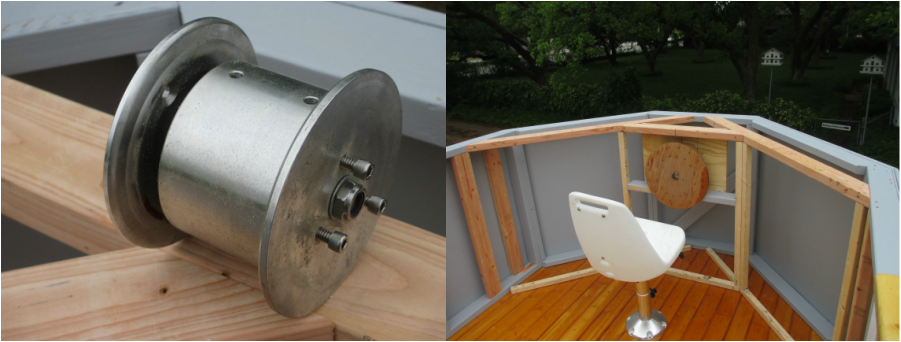
This is the steering drum I got from Glen -L Boats. I placed a mock up wheel on and checked hight with captains chair. Going to make a spoked wheel.
Steering Wheel- I want a good thickness for the spokes, so I had to sandwhich 2"x4" between 3/4" plywood. I didn't have a long enough router bit, so had to route the wheel in sections and then glue them together.
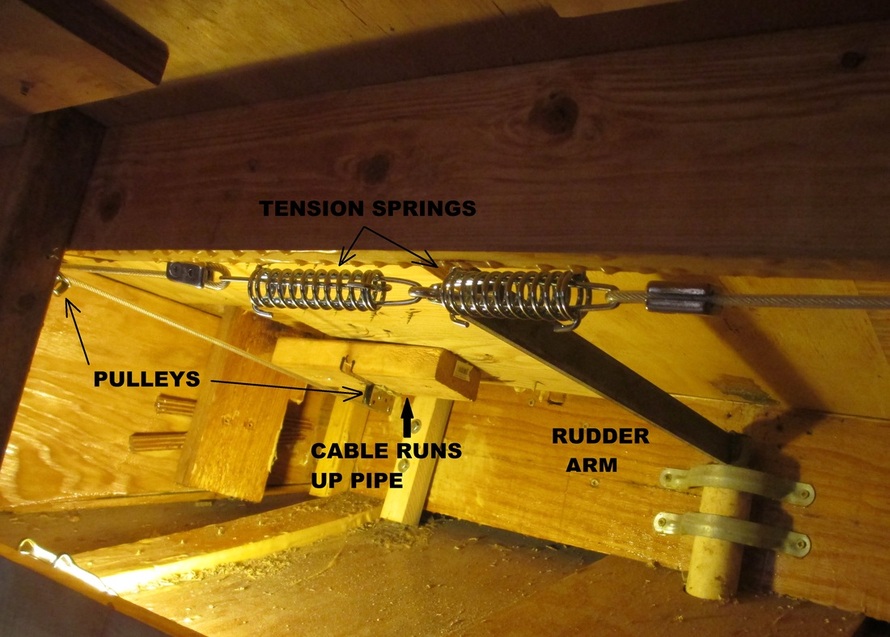
Using a steering kit I bought from Glen-L Boats, I strung up the cable from the rudder arm up to the pilot house.

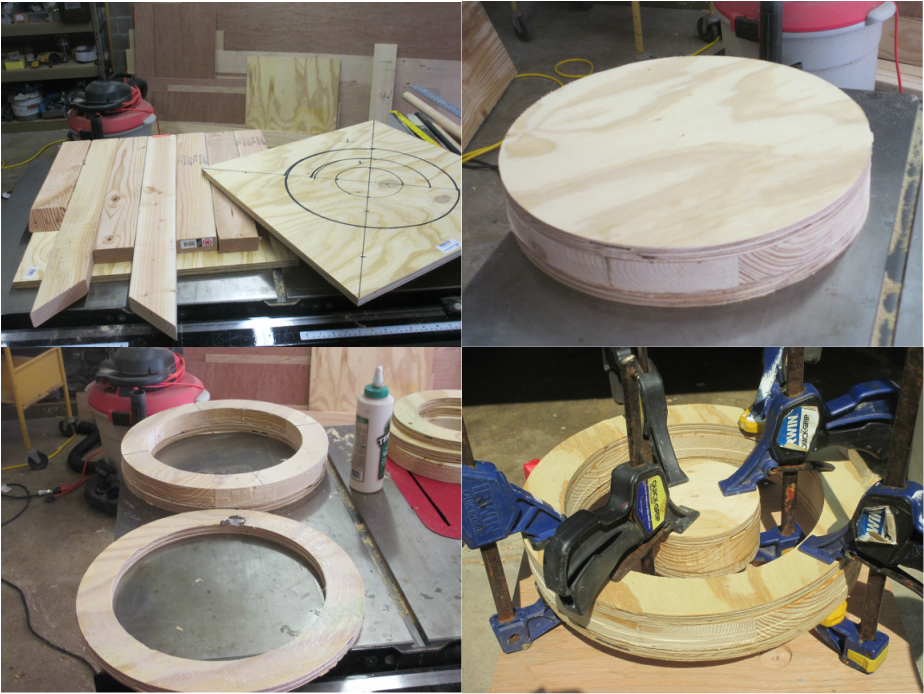
Routed the edges with 1/2" round bit. Wheel looks like either a model of 1950 old sci[fi space station, or a large tinker toy part. Drilled 1 1/4" holes in inner hub and 1 3/8" holes in outer (difference in dia. of holes allows some play just incase holes not PERFECTLY aligned.) Cut 1 1/4" dia rods 10 3/4", and rounded both ends. Using a rubber mallet, I slowly knowed the rods into the wheel, tapping around to make sure they all fit before knocking them in as far as they go. After wheel is assembled I drilled 3/8" holes and used 3/8" x 3" dowels to hold spokes in. Before pounding in dowel, I applied a thin layer of wood glue.
Due to the extra thickness of the cover panel, I made a spacer out of 2"x8". I still need to make teh rest of the dashboard panels, along as the top cover.
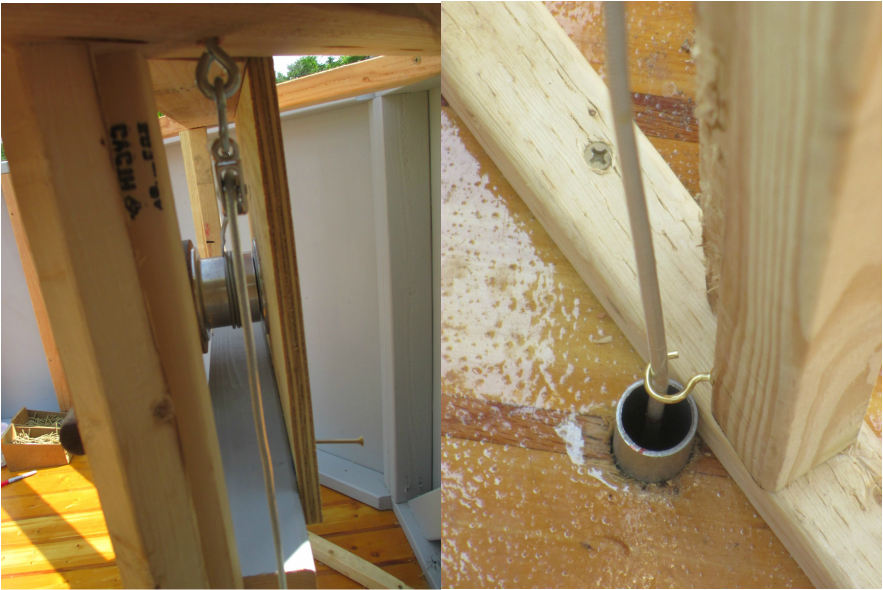
I Using a hook to ensure the cable runs up the center of the pipe, I then ran the cable up to a pulley and then wrapped it around the steering drum a few times before making the trip back down to the other side.
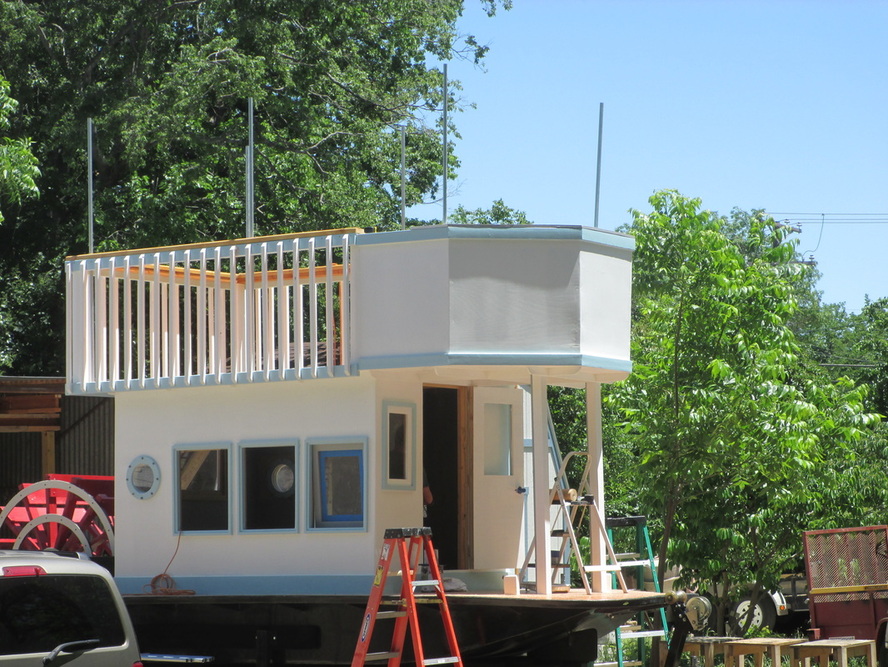
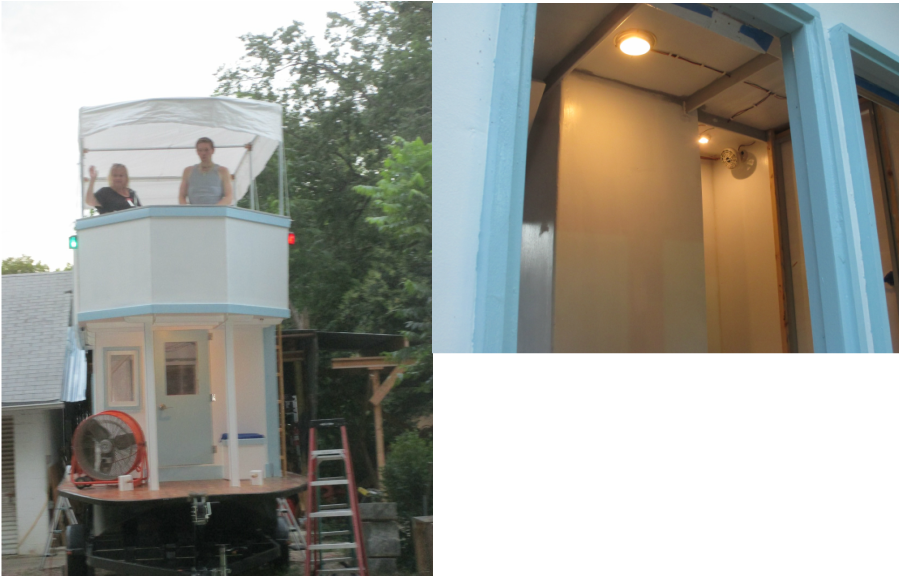
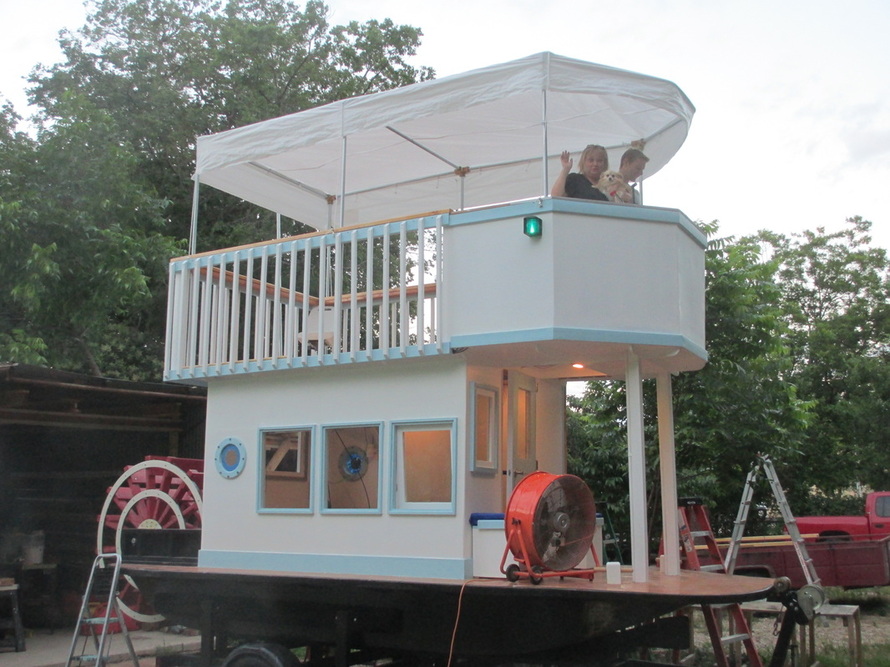
Almost Finished with outside. Got last of trim done, and now need to figure where to paint the name. Still have to install running lights. Going to make a canopy and windshield for pilot house and upper deck.
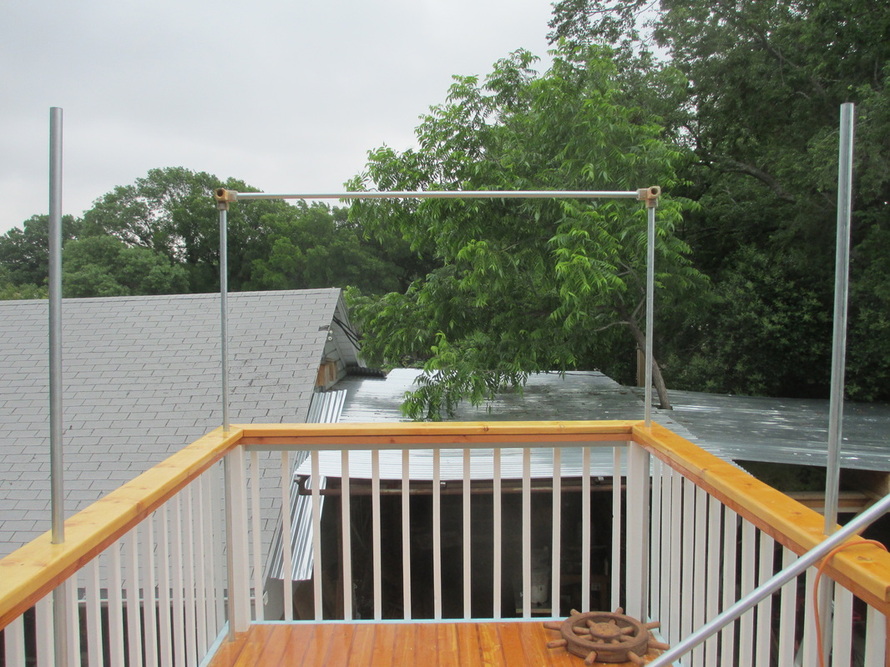
Cut poles and drilled holes to support them for canopy.
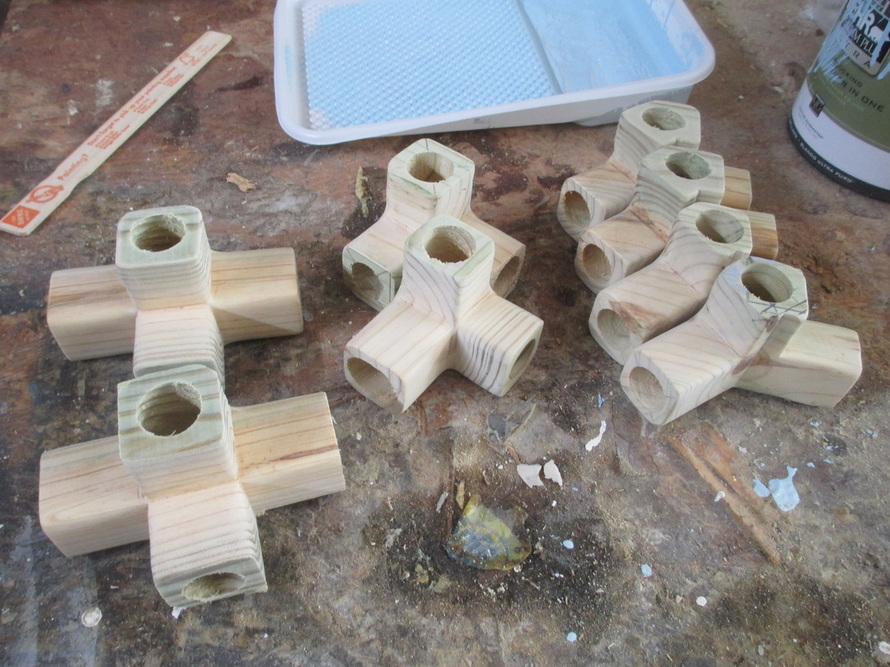
From 4"x4", I cut canopy frame connectors. I didn't know where I could buy them, so made them instead.
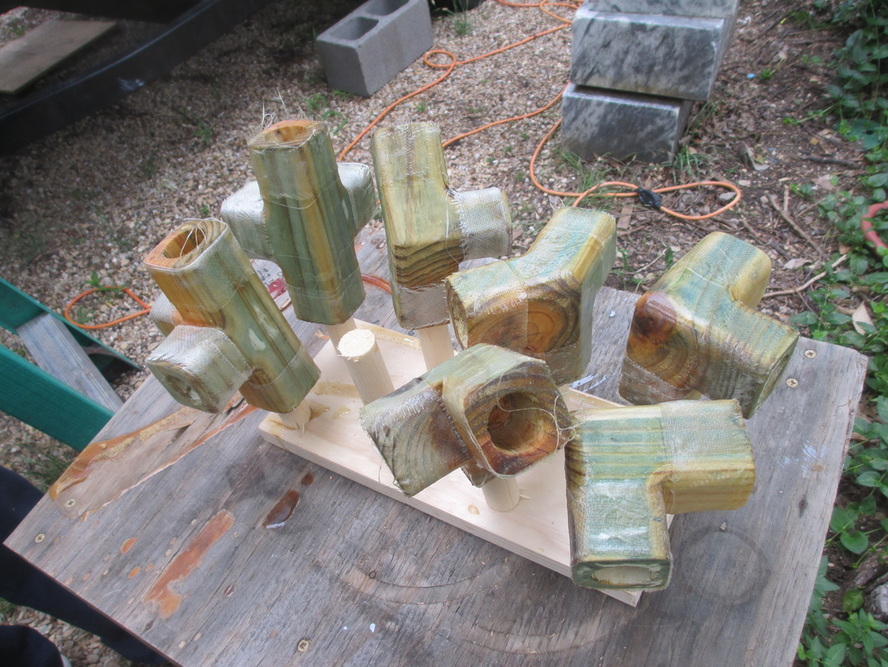
To strengthen them, I wrapped fiber glass cloth around all ends.
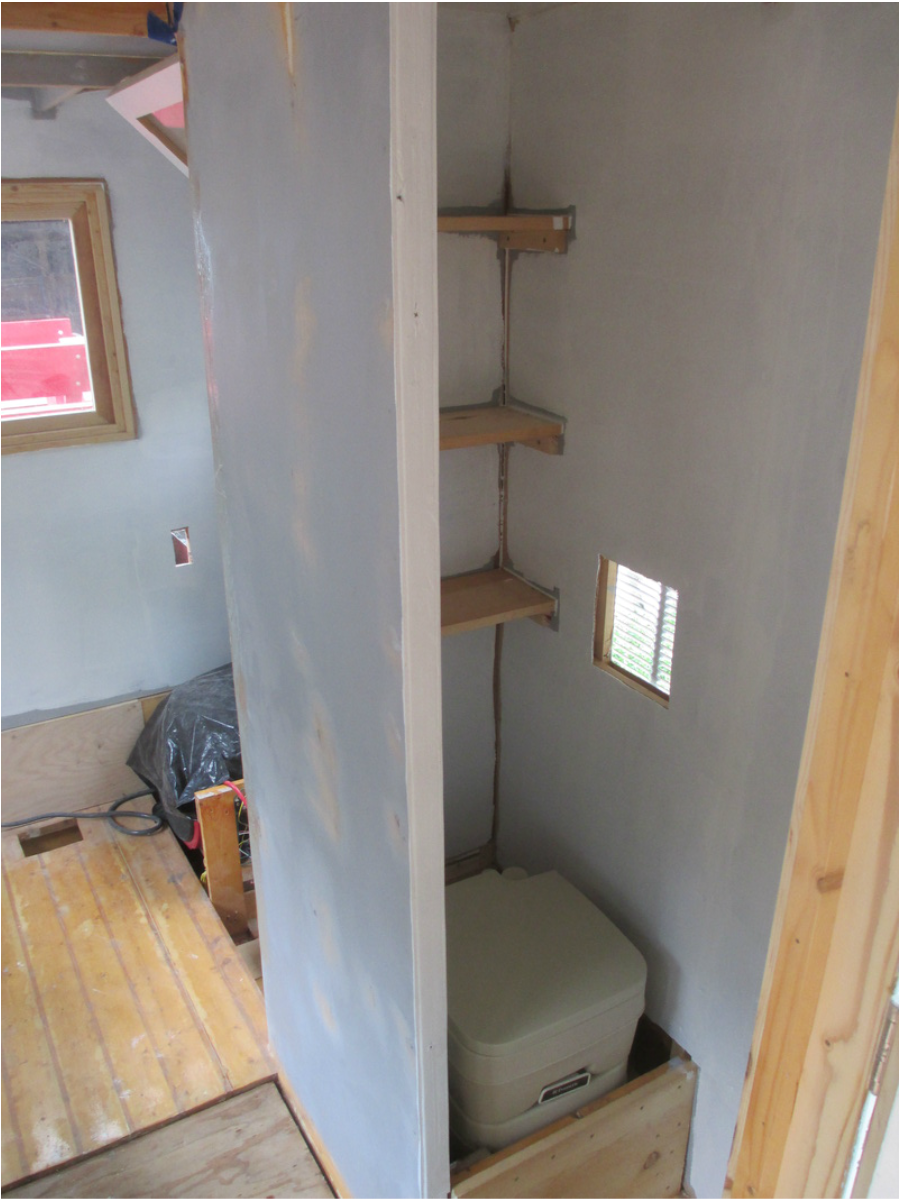
Portable chemical toliet arrived, and was installed. I found that I didnot need the entire space for the toliet, so I am placing shelves in as well.
I drilled through the decking down to teh plywood subfloor. This way it will help secure the pole yet not allow pole to slip through floor.
You can see the framing taking shape.
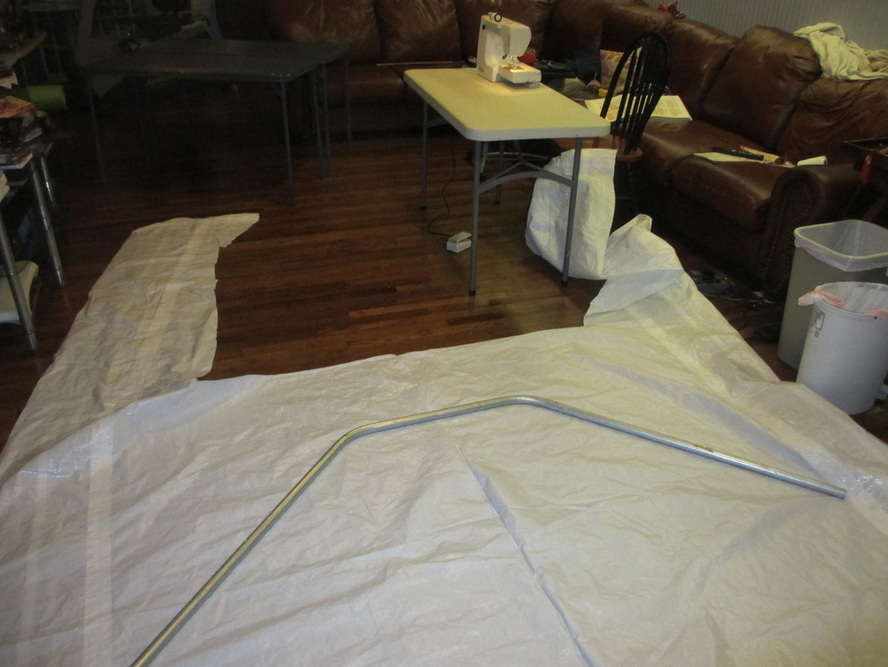
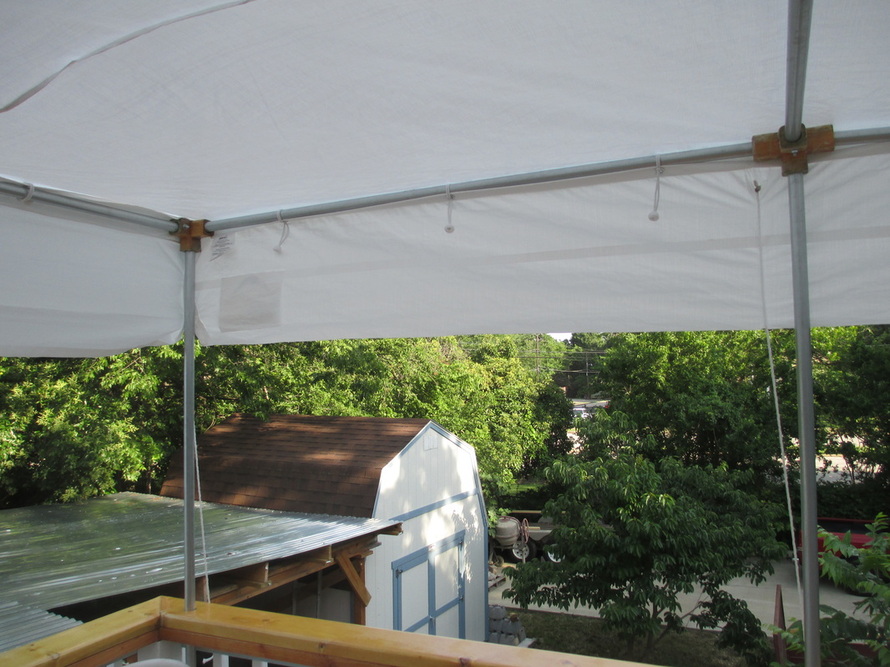
I bought a 10'x20' tent, and broke out my mom's old sewing machine and studied her sewing manuals. Making the first cut was the hardest. The canopy would need to cover a 80"x138" space not including the foward section, represented by the framing bar above.
The canopy framing is up.
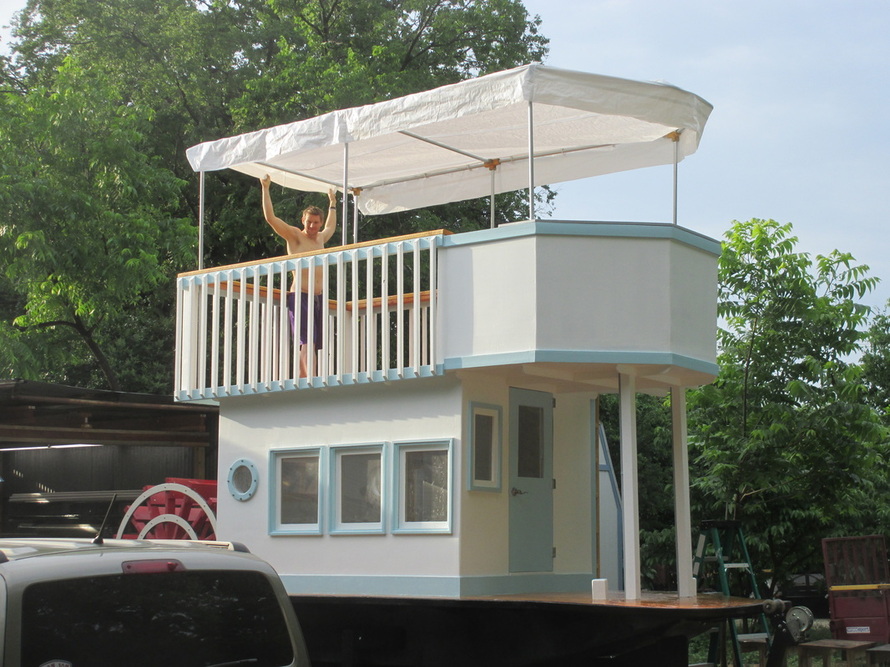
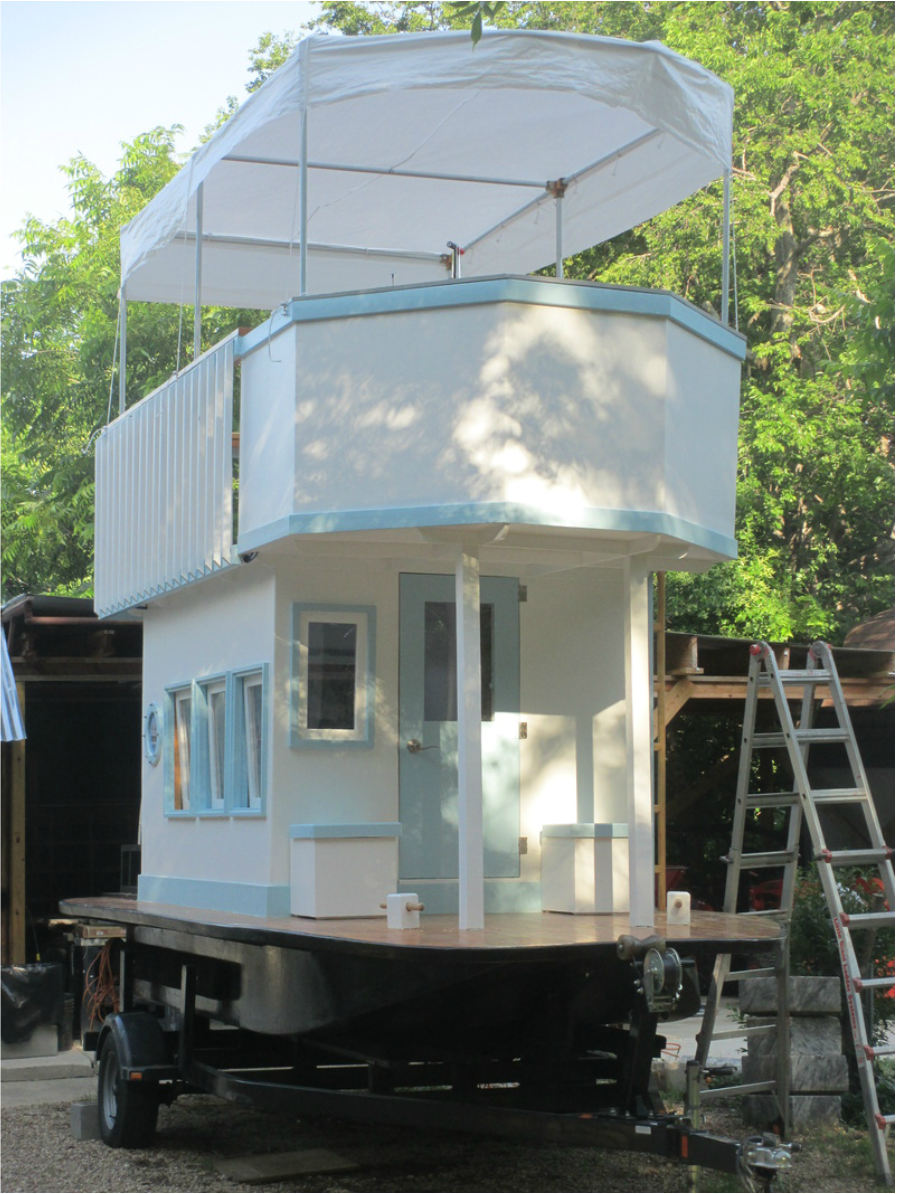
Canopy is completed. I plan maybe to add red stripes.
Made to seat lockers for rope and anchor. They also are raise1/2" so can be filled with ice and the melt can just easily drain away. A blue saftey cushion will go on top of the lockers, held in place by the 2" lip. Also drilled the hole for the dowel on the bullards, so now we can tie her up to a dock.
Soon as the main deck it sanded and the final layer of resin is laid, the two lockers will be screwed to the deck.
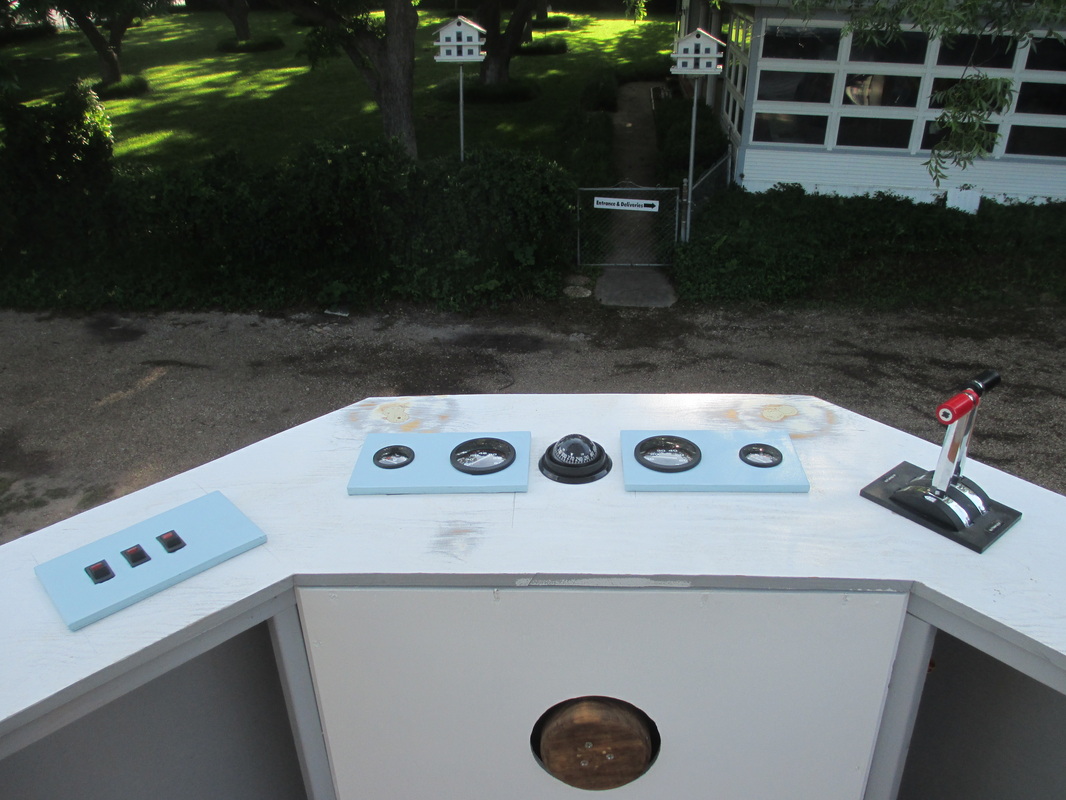
Dashboard is almost done. I cut holes for guages and just need to give dashboard a final good coat of paint.
I decided to add ropes at each corner. I sewed the ropes in. You can see the wooden connectors I made.
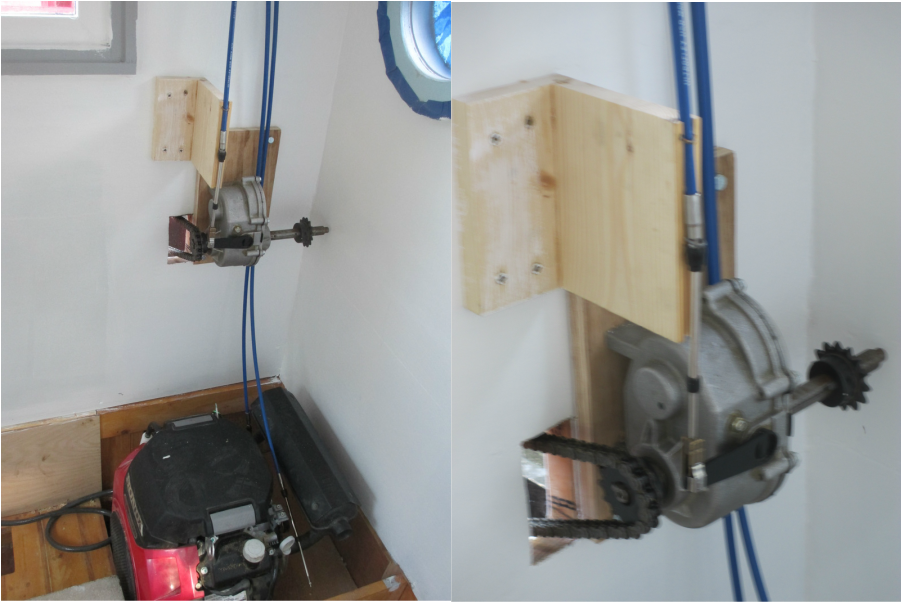
Got the ger box installed and the outer chain hooked to teh paddle wheel. Even got the control cable connected from the gear box to the throttle shifter in the pilot house. Waiting for the engine mounts and a muffler which points towards the aft cabin wall before hooking engine up.

Finally finished wiring diagram. The above is interior cabin wiring, the lower is pilot house wiring. Missing fuse info, waiting for rest of items to arrive.
| main_wiring.bmp |
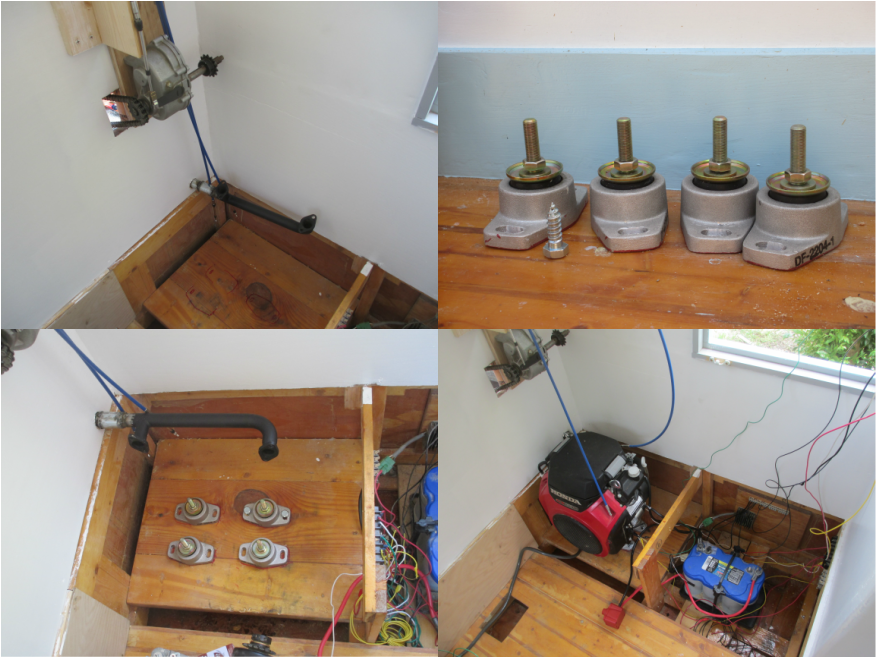
Muffler installed. Have marked mounting bracket locations. Mounts are great. The rubber will greatly reduce vibrations being transfered to the hull. Engine installed. Also installed a battery cut-off switch.
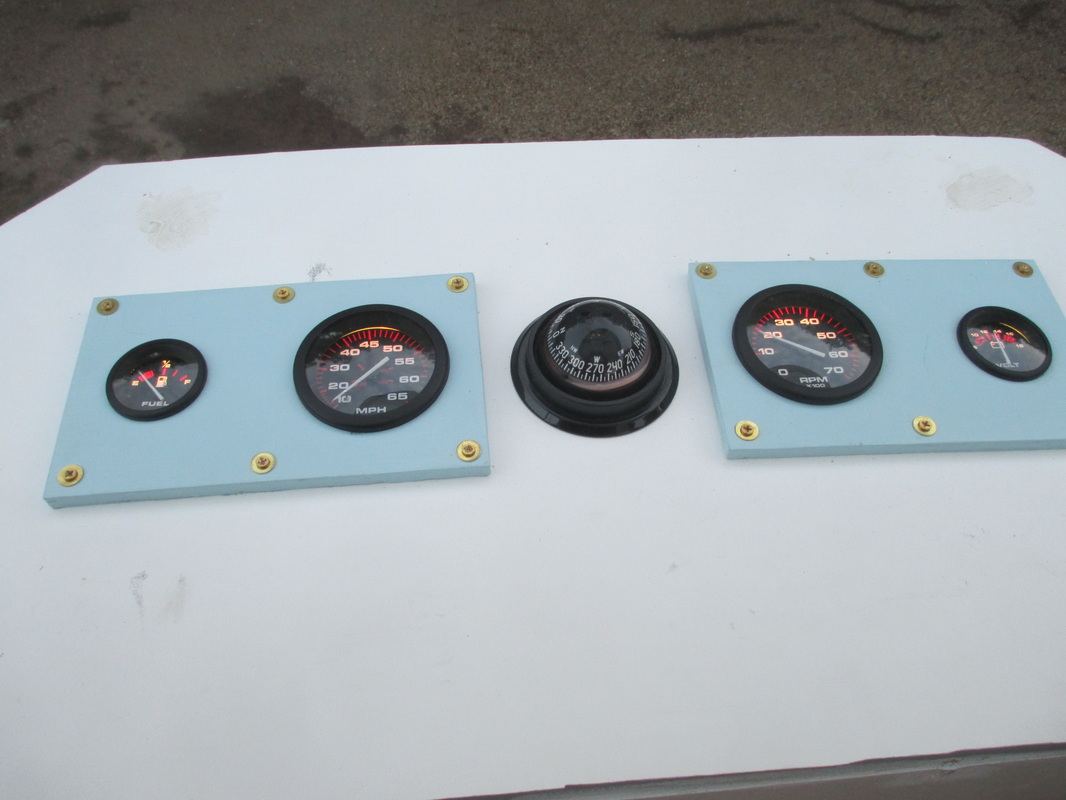
Dashboard gauges all lit up!
Running lights, and interior light working. I installed one in the bathroom, on inside cabin, and on under the pilot house.
Boat looks like it is ready to be on the water.
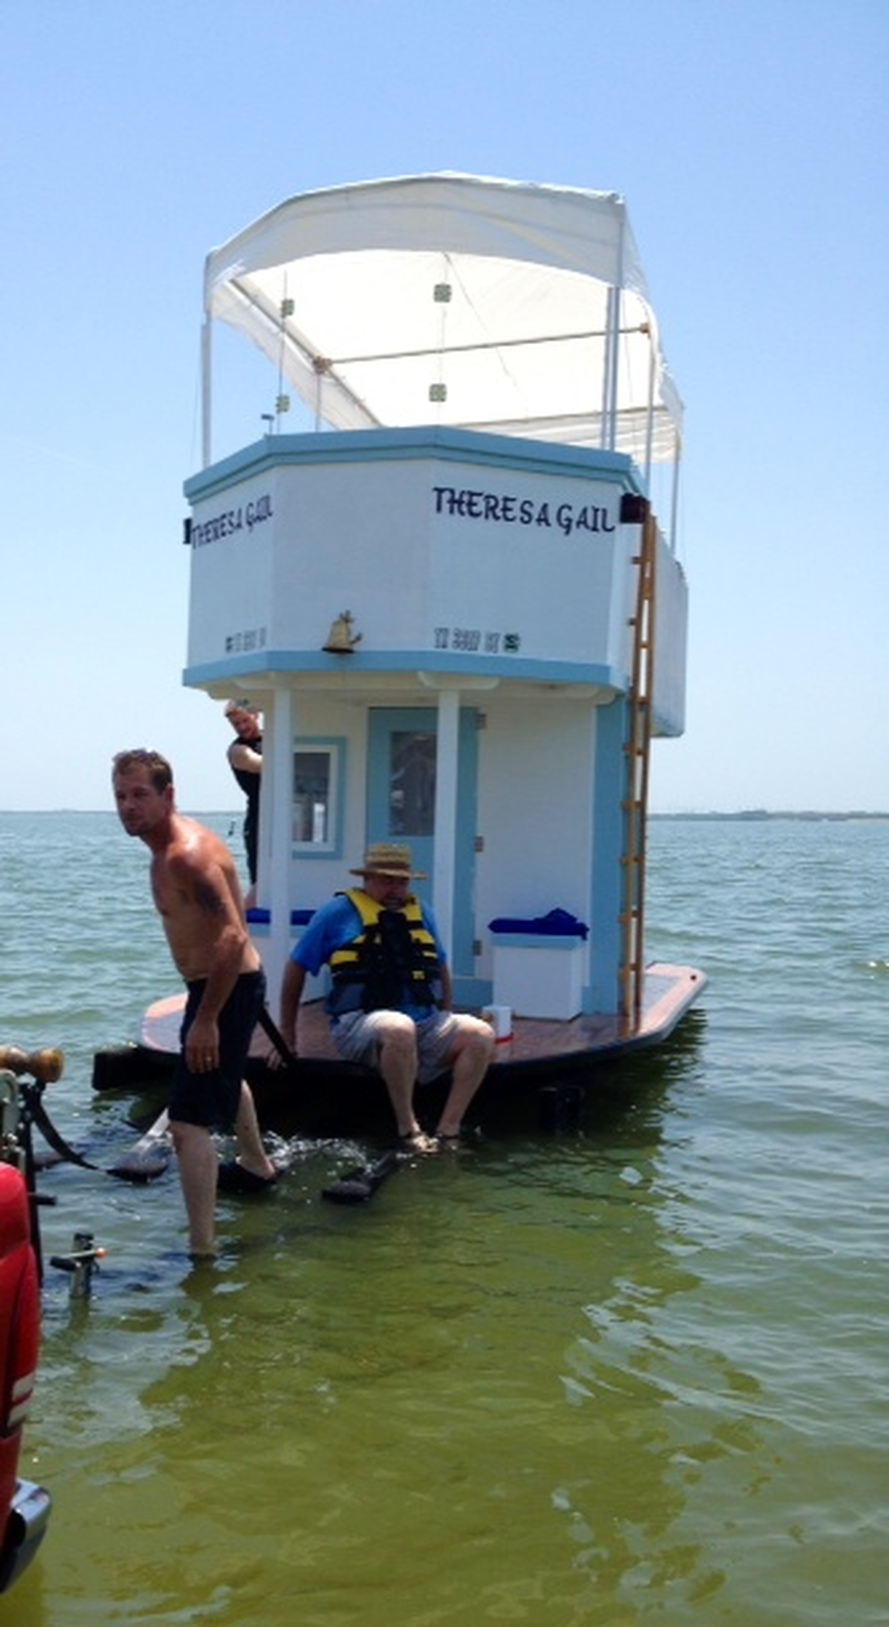
Passed inspection. Took boat to lake, and struggled to get boat to leave trailer. Problem was my truck was so overloaded that there was not enough tilt to get the boat off. We worked at it and finaly got the boat afloat.
Luckily we then tried to use the paddle to move the boat before we completely left the trailer. The plywood mount holding the gear box gave way. Need to use solid wood. Also the clutch was wearing out.We quickly got boat back onto the trailer and checked for leaks. No leaks!!, everything worked, just had a mechanical problem. After reading, found my clutch was rated for a 13 hp engine, I was using a 22 hp. Well, luckily I have a clutch rated for 40 hp, and I discovered my gear rating was too high. Clutch gear is 17 and wheel gear is 40..that is a ratio of about 2.35:1. I need one around 6:1. Well new clutch will be 10 and will replace wheel with 66 tooth gear making 6.6:1. So while waiting for parts, will finish painting boat.
Luckily we then tried to use the paddle to move the boat before we completely left the trailer. The plywood mount holding the gear box gave way. Need to use solid wood. Also the clutch was wearing out.We quickly got boat back onto the trailer and checked for leaks. No leaks!!, everything worked, just had a mechanical problem. After reading, found my clutch was rated for a 13 hp engine, I was using a 22 hp. Well, luckily I have a clutch rated for 40 hp, and I discovered my gear rating was too high. Clutch gear is 17 and wheel gear is 40..that is a ratio of about 2.35:1. I need one around 6:1. Well new clutch will be 10 and will replace wheel with 66 tooth gear making 6.6:1. So while waiting for parts, will finish painting boat.
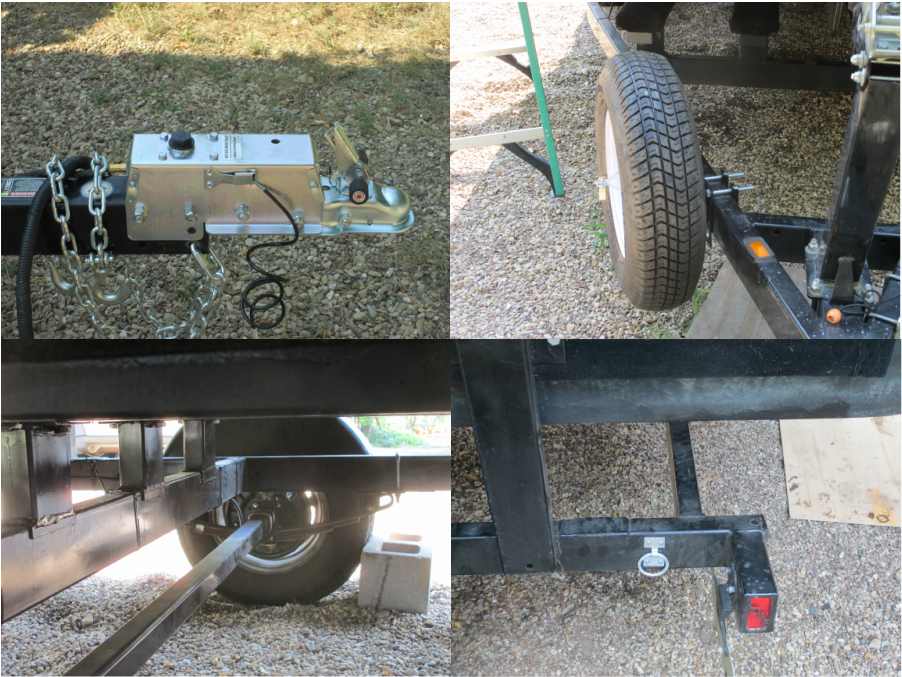
I have not been idle the last week. While waiting for parts to arrive, I recalled how the trailer behaved behind the towing vehicle. So I did some research and decided the trailer was built to carry 3500 lbs, and the total weigth of boat and trailer is now around 4800 lbs. So it looks like I will need a second axle. So while waiting for my second axle to be delivered, I added brakes. I read that out of the three types of brakes for trailers (electric, hydraulic, or surge) surge brakes would be best since the others require a special connection to the towing vehicle. SO replaced hitch with a surge accuator hitch rated for 6000 lb trailers. Installed 10" brake drums and shoes(was a lot easier than I had feared.) Added a spare tire as well and a set of brackets so I can strap down the rear of the boat to the trailer.
When my second axle arrives I will replace the leaf springs for those rated for 3000 lb a pair, and also replace the tires for 13" rims which will have a load capacity of 1360 lbs @ 50 psi.
When my second axle arrives I will replace the leaf springs for those rated for 3000 lb a pair, and also replace the tires for 13" rims which will have a load capacity of 1360 lbs @ 50 psi.
OK. Took a lot of effert to get the boat to leave the trailer, but at last the boat was afloat. Two problems surfaced. The boat is offically top heavy. It floats nicely until I climbed up top. Second, we just don't seem to be getting
enough power to the wheel. The new clutch was smoking as well. I recalled the diagram of the gear box, and it had two devices added in the drive chain. I figured out one was the clutch, but never knew what the other was. On a new mission, I discovered it was a torque converter. Not sure what it realy does, I ordered one. In fact I bought a set. The Comet 500 series torque converter system is based on the old salsbury clutches. It will handle up to 25hp 2 cycle engines and 16 hp 4 cycle engines. The drive clutch comes with either a 3/4" or a 1" bore. The driven clutch comes in either a 7-1/2" or a 8-1/2" diameter unit, the bore size can be either 3/4" or 1". So hopefully this will take care of the drive system problem. Unfortuantly it looks like I will have to cut the entire upper deck off and replace the cabin roof with 1/2" plywood. This will also make the boat a lot lighter, and maybe make it easier to leave the trailer. I will drop the pilot house and place it on the foward deck. At least I will stop banging my head on the underside of the pilot house. My sister-in-law suggested we could just install some outriggers to keep the boat stable. I will have to think about all my options. I really need to redesign the trailer and lower the boat, but that still requires me placing the boat somewhere.
enough power to the wheel. The new clutch was smoking as well. I recalled the diagram of the gear box, and it had two devices added in the drive chain. I figured out one was the clutch, but never knew what the other was. On a new mission, I discovered it was a torque converter. Not sure what it realy does, I ordered one. In fact I bought a set. The Comet 500 series torque converter system is based on the old salsbury clutches. It will handle up to 25hp 2 cycle engines and 16 hp 4 cycle engines. The drive clutch comes with either a 3/4" or a 1" bore. The driven clutch comes in either a 7-1/2" or a 8-1/2" diameter unit, the bore size can be either 3/4" or 1". So hopefully this will take care of the drive system problem. Unfortuantly it looks like I will have to cut the entire upper deck off and replace the cabin roof with 1/2" plywood. This will also make the boat a lot lighter, and maybe make it easier to leave the trailer. I will drop the pilot house and place it on the foward deck. At least I will stop banging my head on the underside of the pilot house. My sister-in-law suggested we could just install some outriggers to keep the boat stable. I will have to think about all my options. I really need to redesign the trailer and lower the boat, but that still requires me placing the boat somewhere.