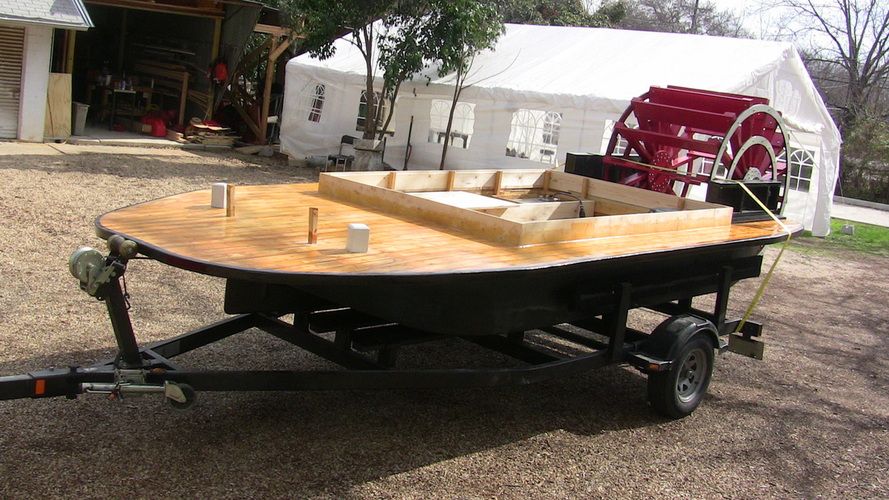
Went and weighed the boat today. Boat weighs 1980 lbs. I calculated that the hull displaces 7300 lbs. Just the cabin area alone (74" x 100" x 18" / 12^3-to convert to feet volume) x 62.4 for fresh water displacement (64 for salt) = 4810 lbs displaced water.
I believe this will allow the boat to carry 10 adults safely. Even if the deck become awash with water, I built in a 6" splash guard around the cabin. I also calculated that the boat will sink 2.6" for every 1000lbs, so the boat should sit empty with a draft of 10".
I believe this will allow the boat to carry 10 adults safely. Even if the deck become awash with water, I built in a 6" splash guard around the cabin. I also calculated that the boat will sink 2.6" for every 1000lbs, so the boat should sit empty with a draft of 10".
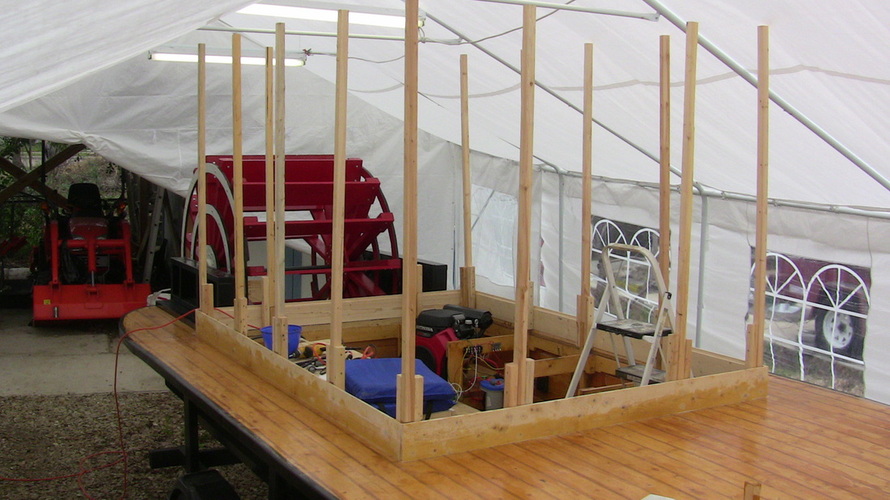
Time to splice the cabin wall risers. Making the cabin 5.5' tall from the deck, so I can walk more easily on deck with just a slight bending over to get to the cabin door. Terry and I ran around the city seeing what the bridge heights were to get to the highway and on them. Found the lowest to be 15' 11". At this moment the boat is 9.5" tall from top of cabin to ground. For safety I like to only make the boat 14" from ground to top of pilot house. The smoke stacks can be place on after you arrive at the lake, also I plan to have a canvas canopy for the second deck.

I had cut the cabin risers short when building the hull to make it easier to flip the boat, but now we need to splice them back on. As the splice will be inside the walls, it does not have to be pretty, but I would recommend at least 6" on each side of the splice.
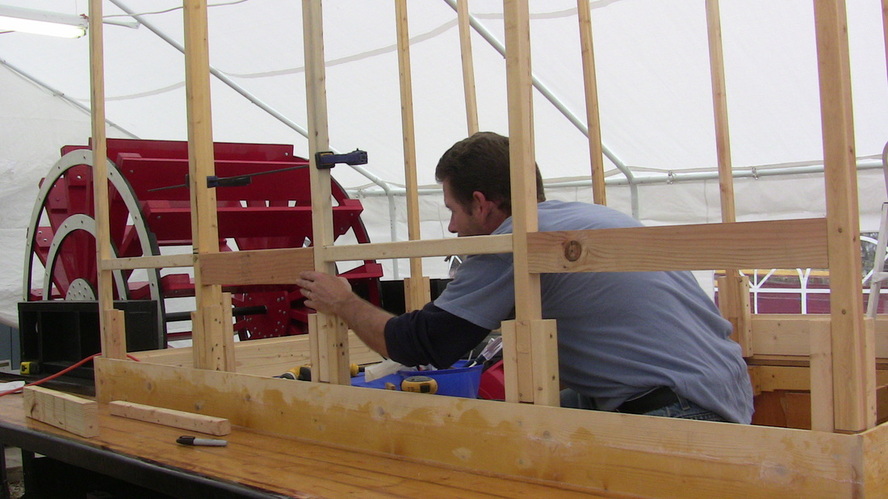
Framing the windows. After finding a comfortable height from a sitting position in the cabin for the window sills, I found that 18" from the deck outside worked nicely. Since I had inverted the 6th frame so the engine base could have a ledge on both sides to sit on, the distance between cabin risers is not the same. With a littleadjusting I was able to get the first three spaces to be between 23.75" - 24" with the last space being 21.75". I'll just place a porthole in the last space. I'm going to make the windows 20" x 20", where a pair sits on top of each other. I'm going to make the windows able to open outward.
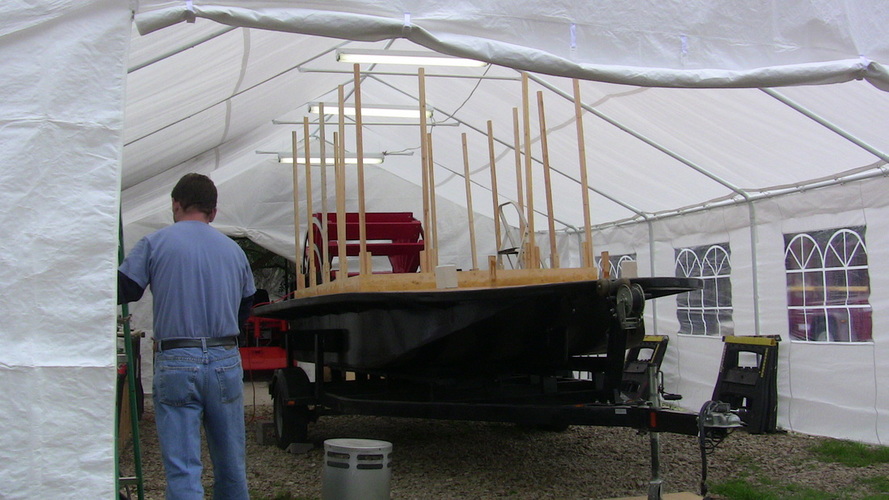
We had to move the light higher to clear the scond deck, but I believe we will still ahve to take the tent down before we can start planking the second deck.
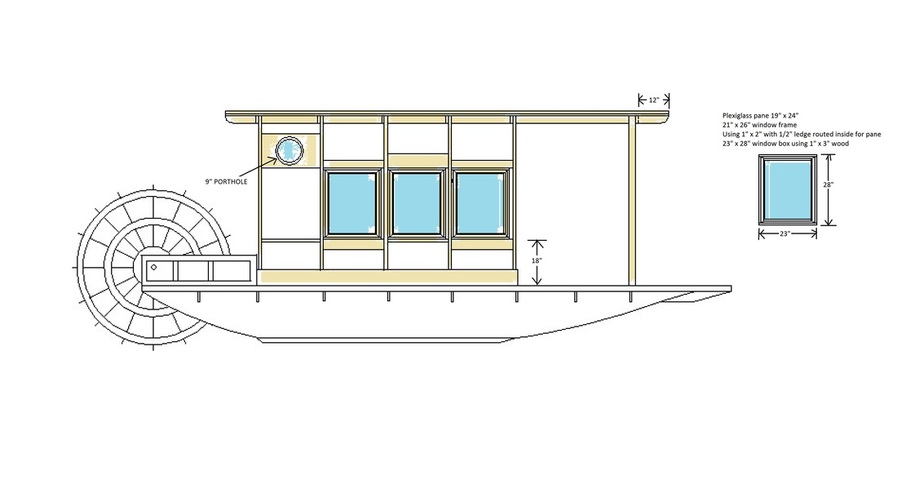
Here is the cabin framing drawing. The window box start 18" from deck (which is perfect for resting you arm on while seated on benches inside cabin.) I plan on using 19"x24" plexiglass for the windows, and using 1"x1.5" wood for a 21" x 26" window frame. I'm gonig to make a window box to hold the frame from 1" x 3". I plan to make a 9" dia. porthole. The second deck should extend from the front and rear by 12" and only 3" from the sides. I will use 1" x 3" for the cabin roof supports. The second deck will be of 3/4" plywood with 1"x 4" boards planked on top, as I did with the main deck. The inner and outter cabin walls will be made of 1/4" plywood.
OK..I'm Back. Been on the Amazon on a true river boat and came back with some new ideas.
Have done some redesigning. Going to place a chemical toliet in the cabin on the port side. Figured was going to place a ladder to the upper deck in place of the foward port side window, so might as well take advantage of the blank inner wall.
Alrighty then...I have not been idle, but I did drop my camera down some stairs about half-way in my vacation. Was the stairs leading to my cabin which was on stilts deep in the amazon jungle. If you ignored the monkeys, it was the best sleep I had! Also my son just got out of surgery and is home recovering. Plan to start working on boat again next week...got new camera and all.
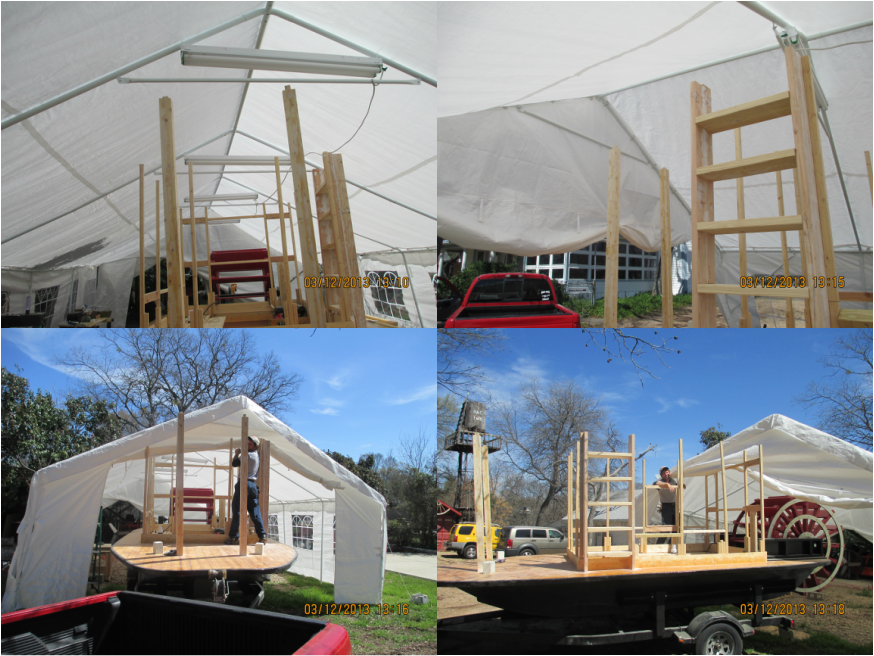
Moving the boat out from the tent! Had to have Terry lift the front and guide the cabin wall supports from under the tent. You can also see that we had sheathed the foward second deck support pillars. Also you can see we installed a ladder on the forawrd port side. The ladder will be accessed from the outside.
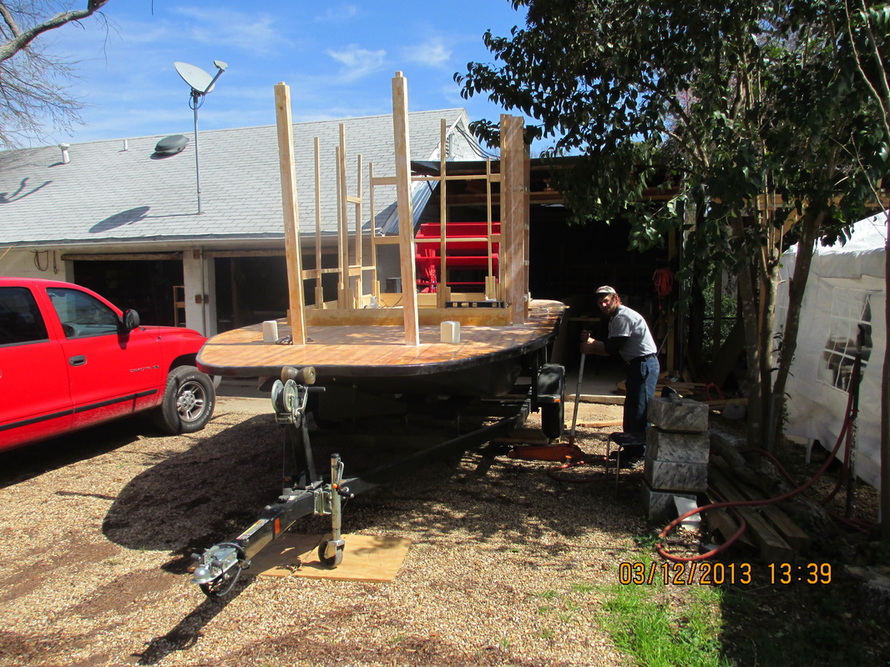
Boat in place......Hmmm..I think this is the very same spot the boat was in before it went under the tent. Leveling the trailer to make it easier to make sure the second deck supports are installed level.
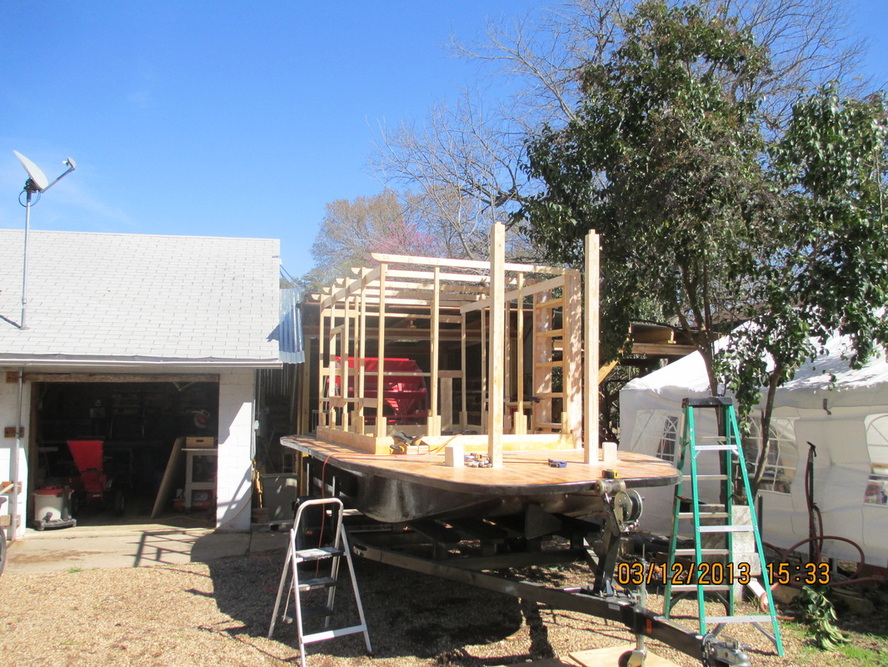
I first had made sure the boat was level, then using the splash guards as guides, I began at the cabin's foward port corner. Very important to place a set of boards running along the top of the cabin foward to aft just below where the second deck supports will go. It will help make sure the cabin wall supports are straight up and down and also make sure the upper deck will be level and not have big bulgeds in it. I installed the second deck supports so that the upper deck would begin 5' 5"from the lower deck. ( this is 9' 6" from the ground while on the trailer, allowing a 5" 6" pilot house. This is needed so I can clear a 15' 11" underpass, the lowest I found around Dallas.) Made these from 1"x4"s. Also going to notch the foward second deck support to allow the support that will run to the foward pillars.
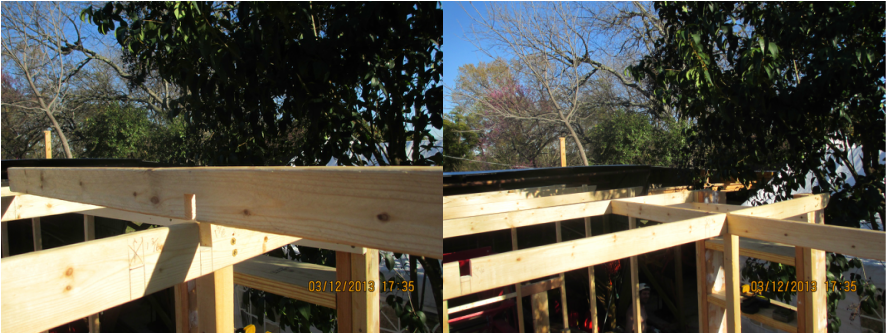
Foward pillar deck supports installed. Had to do a lot of pulling to get the pillars to realign and unwarp.

Upper deck supports installed. Still have a few more supports to install, the aft second deck extention supports (only will extend 12" out. and forward pillar upper deck supports, which will help get the pillars to align. The upper deck supports extend 3" out the sides, 6" foward, and will be 12" aft. I had planed to have the deck supports extend 12" foward, but while standing on the bow of the boat, noticed 12" caused too much of an obstruction to stay bakanced and stand up straight, but 6" worked out great. The upper deck will further extend 2 1/2" out to match how far the ladder steps stick out.
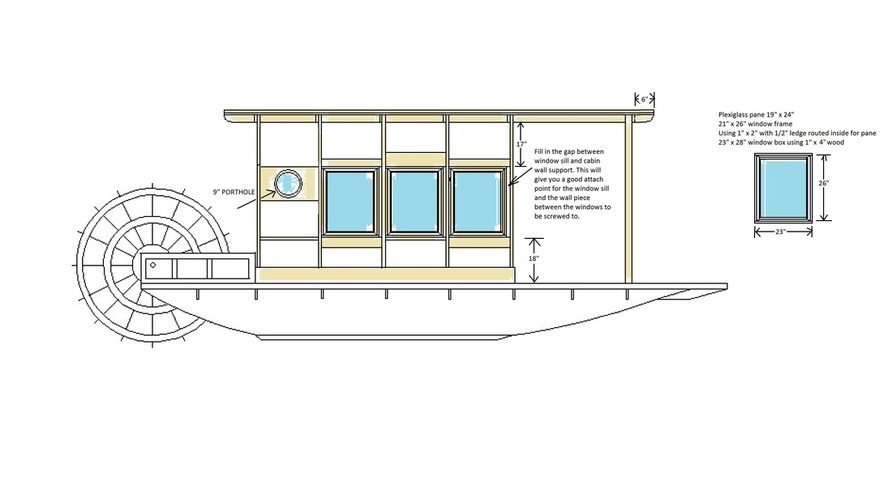
Updated drawing with some more diminsions.

Here is a picture of the ladder on the foward port side. I made the ladder risers of 2"x4"s and the steps out of 2"x8"s. The steps go al the way into the wall and will rest against the inner cabin wall. I plan to add at least a 1/2" kickplate between each step. The first step starts 7" above the deck and each step that follows has a 10" gap between them. This was the spacing for my step stool, so decided to use it as my pattern. I plan to use the upper deck as the last step and extend it out the same as the other steps. This will be about 2 1/2" beyond the upper deck supports. I plan to have a railing system for the upper deck and will bolt from under the upper deck the main 4"x4" rail supports. By adding a 2"x3" along the under deck edge, it will cover the bolt heads and also allow the rail slats to have about 3" to be attached to along the edge.

I used the entire space between the foward port cabin wall supports for the ladder. This gave the steps a 21 1/2" wide x 8" (at least till I add the back kick plate) step to climb on. I screwed the ladder risers from under the deck. I also plan to install a hand rail about 1" in from the risers flush against the steps, also screwed from the underside of the deck and to each step. I just need enough spacing for easy hand access, but should still give a 15" step width. I left a small gap between the outter raiser and the cabin wall to allow good water flow.
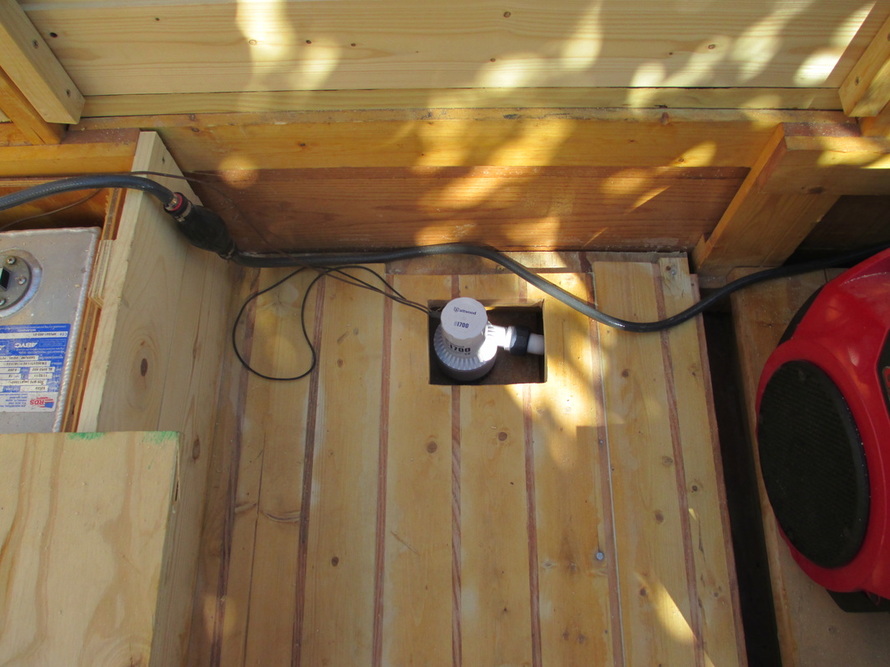
While I have not yet placed the deck cloth down on the cabin deck, I did get it sealed with a thin layer of resin. Also as an after thought I cut a hole where I can install my bildge pump. Will have to make a thick hollow bock to fit over it. Took a while and a trip to the auto store, but finally go the motor wire correctly to the ignition switch and the motor ran beautifully. Never ran the motor before, so in my mind although the other boat was painted and pretty much completed, the motor being started put this build way ahead of the last one.
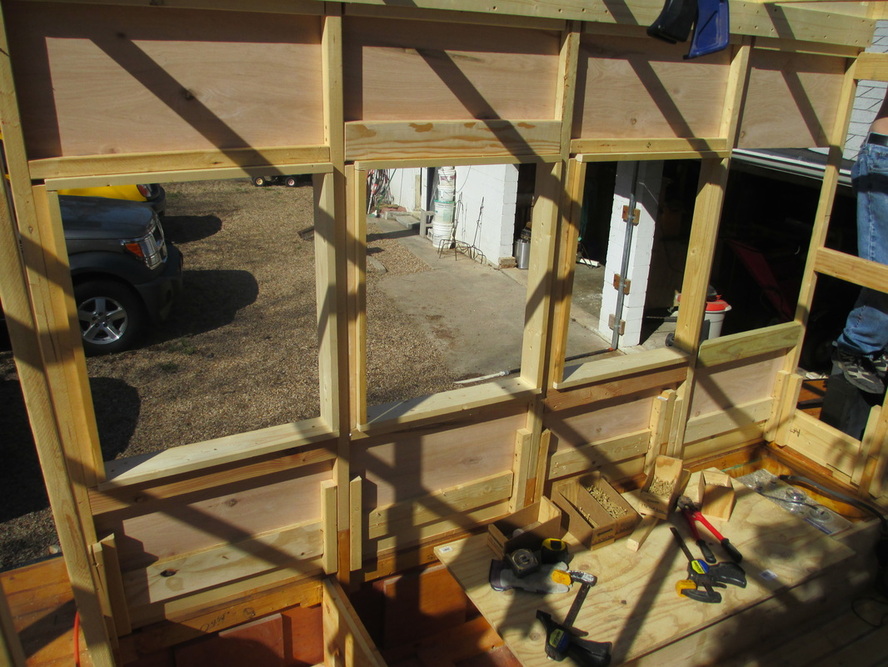
Wish I had a picture of tjust the framing, but we just did not build the cabin wall that way. Planning as we go, I know I wanted the window sills to start 18" from the deck so we placed the sill support first. Then I cut a 1/4" plywood sheet to fit snuggle on top of the 6" splashboard and to the top of the sill supports. After fastening that piece I then installed all three window bottom sills. I set the 23" x 4" x1" sill pieces flush against the aft cabin wall supports. I think it will look better to have a little spacing between the forward cabin wall and the first window. I then measured the gab between the sill and it's forward cabin wall support for each window and made cut a piece to fill that gap for that entire side (the raising sill pieces are 26" long, so you can make the gap filling pieces the samre or a little bigger, but remember that we are going to add a upper sill wall support as well, to must fit under that.)

You may notice that the sill supports, both upper and lower are of different sizes, I did this so I could screw straight in on all pieces, first installing the smaller ones then the larger. By alternating the sizes you can ensure to have a good straight access point to insters the screws. Of course you then cover the smaller piece screws withe the larger and therefore make it harder to go back and do any corrections. Also a side note: make sure you drill pilot holes for all your screws. You will save so much grief and suffering with split wood, or trying to screw into another unseen screw.
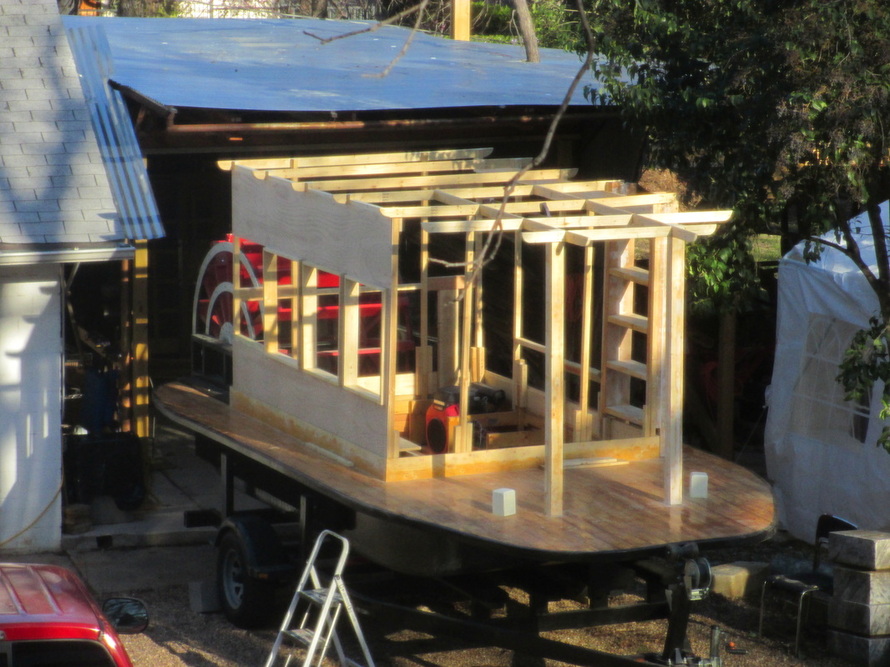
Starboard cabin outer wall just about done. Still have to install a port hole. Since the original plans had one, and I have some port hole picture frames from Carnival Cruise, going to put one in. Can't remember if I blogged this before, but the cabin upper deck supports are 1"x 4" x 78" with the ends rounded. This will give a 3 3/4" extension from the cabin sides. The foward upper deck support running port to starboard is the same as the cabin supports, with a notch cut 25" in from the ends to fit the notches cut in the foward to aft foward upper deck supports. The bow uper deck support is 49 1/2" long and have notches cut 11 1/2" from the ends. I paln to have the pilot house have two 45 degree walls on either side of the foward bow pilot house wall. I was planning to have round 6" curved corners, but since I am putting up rails, it would be easier to do this with 90 degree corners. I plan to draw this out soon.
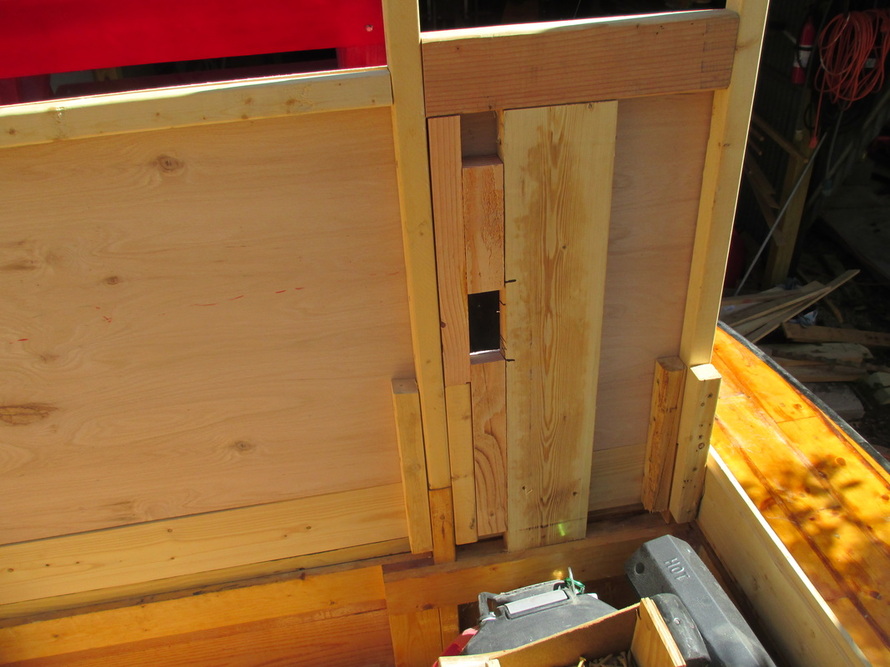
Framed the power chain hole. Started by running the chain and marking where the bottom chain was at a 15 degree angle. I figured was a good angle to ensure water would not run along the chain and into the boat. placed the transmission with gear on back wall and then ran top chain and marked it.
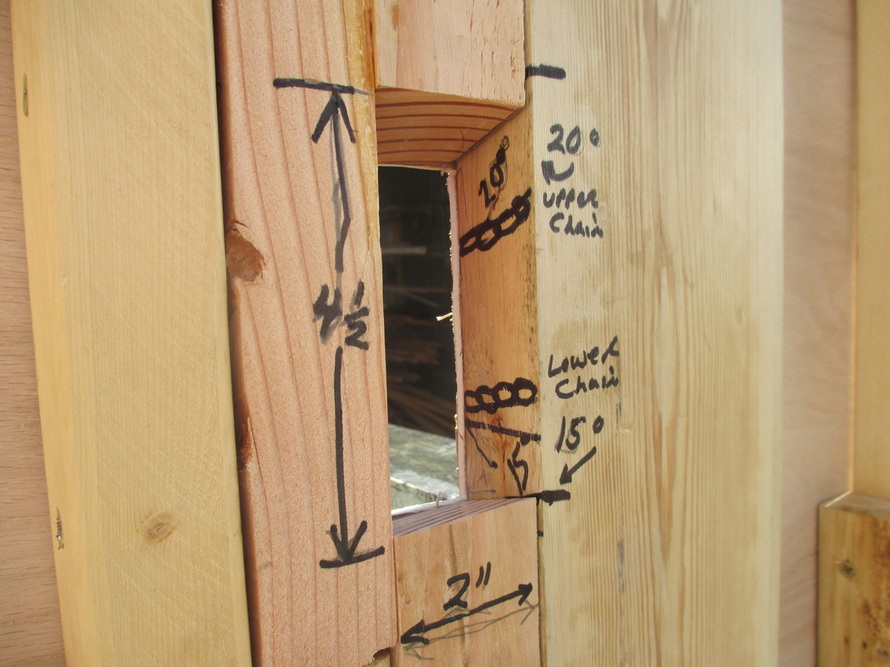
I wanted to have a good 1" clearance all around the chain. The bottom chain I made to be 15 degrees, and it just so happened the top formed a 20 degree angle. Cut the wood and framed the hole.

For the port holes I want the space between the cabin walls to be filled. So I glued three 2"x6"s together and after they dried, routed a 9" hole. (And no I am not about to burst a blood vessle. It was sunny yesterday and I forgot to wear my hat and got sun burnt on the head.) To make a routed circle is easy. Just mount the router on a board and then measure from the outer edge of the bit and mark the radius of your cirle. Then just use a screw as an axle fo rthe router to rotate around. Was going to use some plastic port hole picture frames for the outside of the port hole, but decided to make the covers instead. The plastic frames had a cheap window, and I wanted a nice glass thickness.
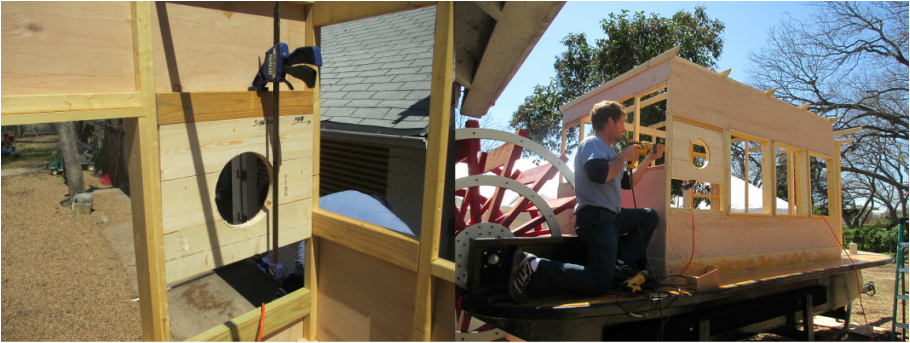
Here we are mounting the port hole interior. Later I will rout the outer and inner covering using plywood. I will also run several bolts around the port hole just for looks.
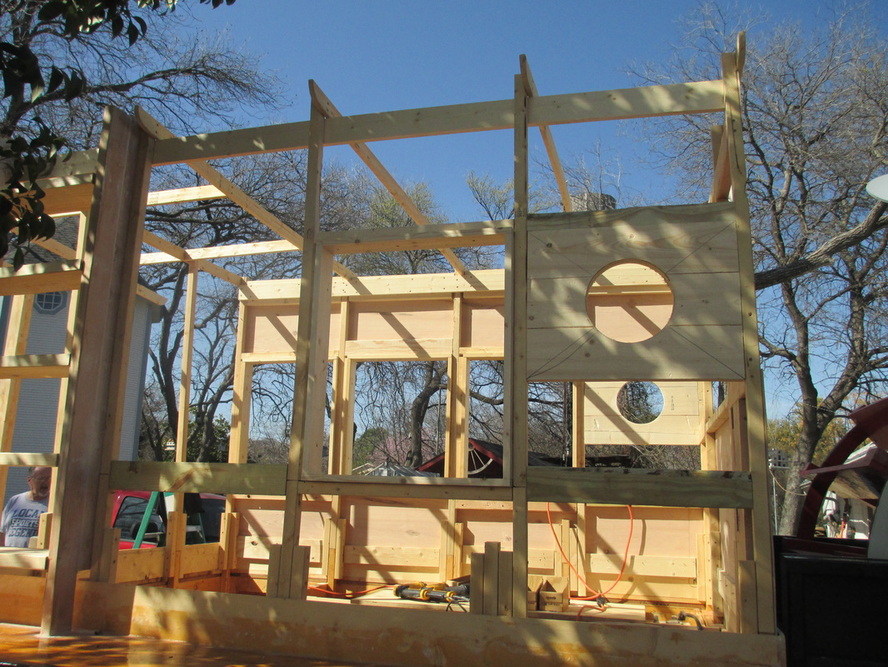
Here is the port sdie cabin wall frame. It only lacks the bathroom vent hole frame. I need to run to the computer store and check out the cpu fans. I wanted a thin fan to fit between the cabin wall. The port wall supports the ladder leading to the second deck, the bathroom vent, one window and a porthole. I am now planning to mount a countertop under the port windo and over the engine. This wil also allow more storage space under the window. The window is the same size as the ones on the starboard side. The ports hole was centered on the three 2"x6"s and mounted flush against the brace placed at same level as the brace for the top window sill..this goes for both sides.
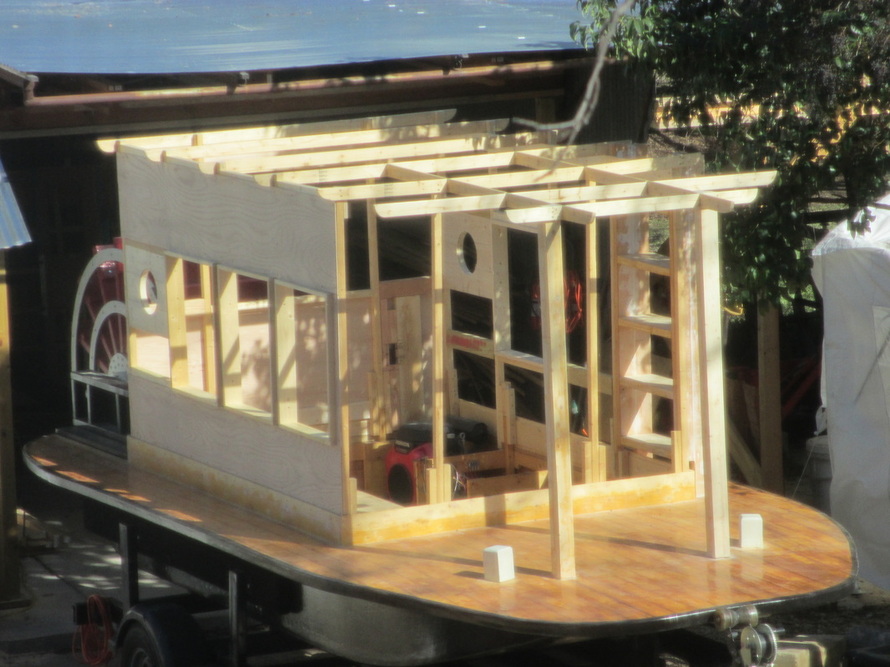
Almost got the cabin outer walls framed, just need to frame the bathroom vent and the cabins foward wall. I also need to remember to install the ladders kick plates.
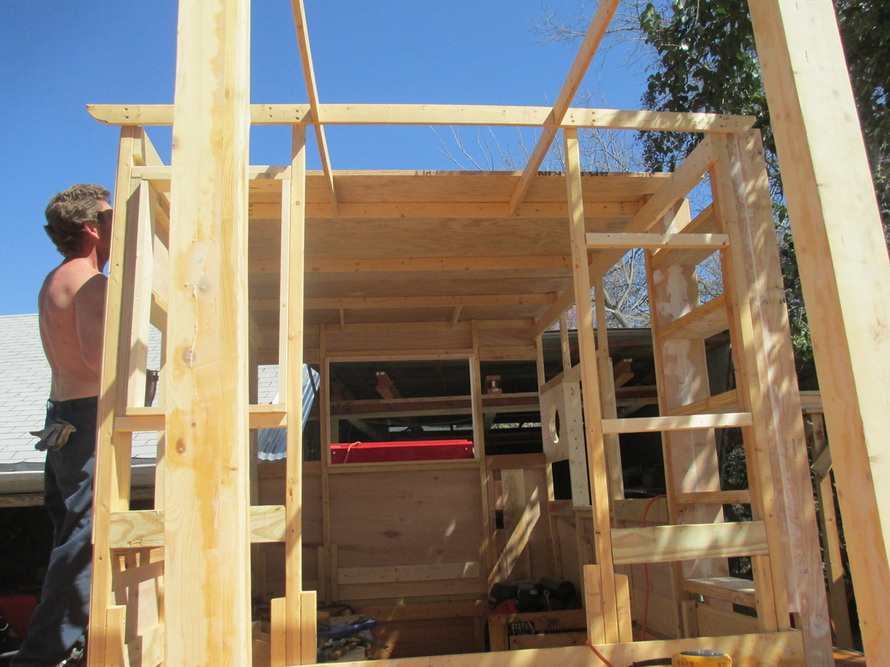
Bought the 3/4" marine grade plywood today. Running them long-ways from side to side. Trimed the pannels to 81", which gave it a 2" over hange past the upper deck supports, but yet matched the steps of the ladder. Installed the second to last one aft, first, so I could make sure it was aligned with the ladder steps, then installed the aft most. Before I did this, I did place in the aft upper deck supports. They extended 12" out and I made them run evenly spaced (26" spacing). I attached the ends to the next inner frame and rested them on the aft frame by notching it as well. When installing the sub-floor, I marked the deck supports on the edged and then finding their center marked the plywood. As we screwed the plywood down along the mark, I would adjust the deck supports from inside to make them straight. They tend to bow and not run straight without a little help.

Here is the last panel of plywood, this is the floor of the pilot house. I meant for the floor to be flush against the supports, but oops. I forgot to adjust for the circular saw plate and just missed it. Oh well, I can just lop off the extra support and who is to know. I wanted a 45 degree set of walls for the pilot house, since I was not going to make is a smooth curve like the lower deck, and I thought a squared pilot house would not have as much charm. With some more shifting we were able to get the pilot house pillar supports level and straight.
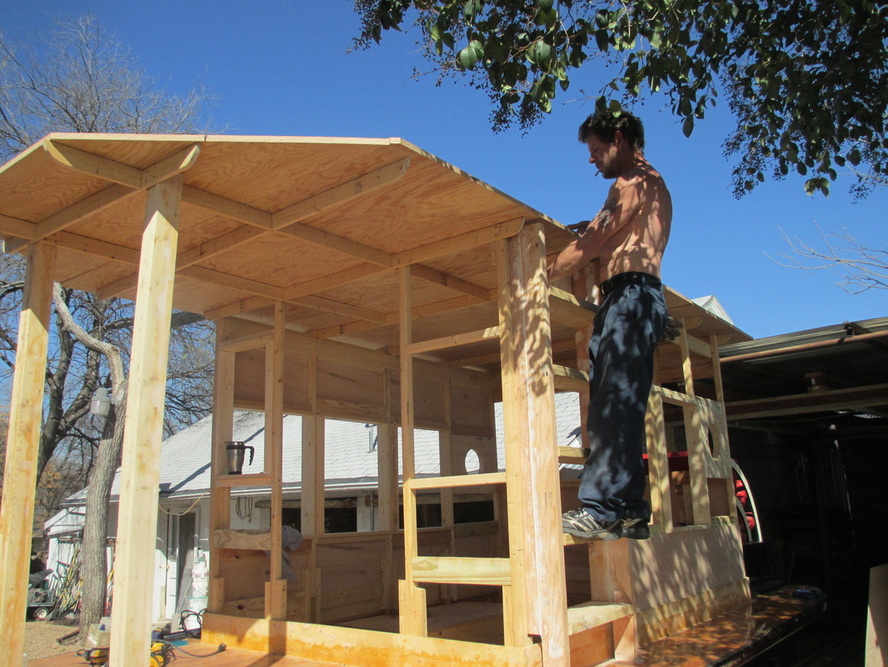
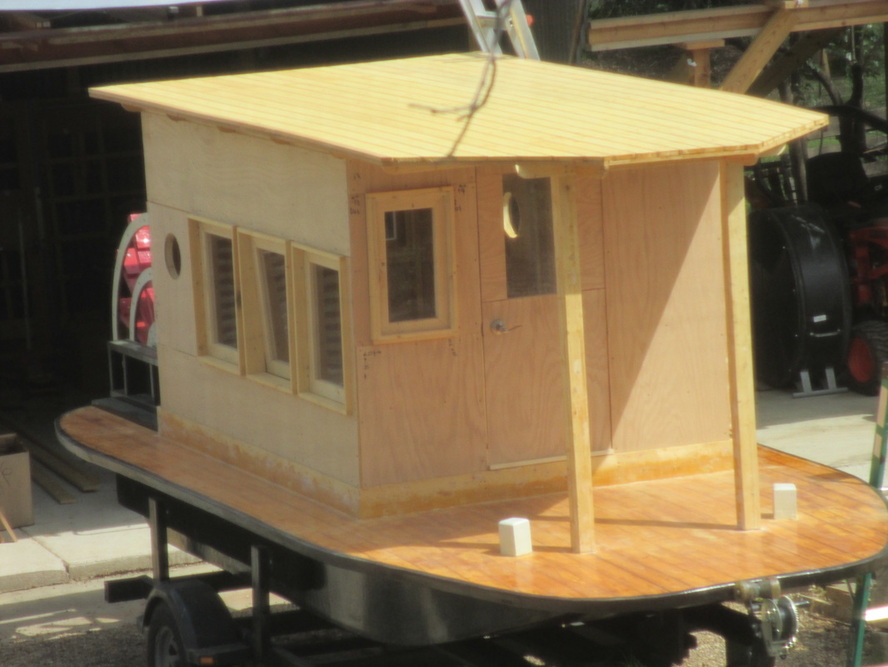
After I get the second deck planked, I will be able to install the upper deck railings and the ladder handrail, to make climbing much easier. Here you can see the cabin's foward window sill supporting Terry's coffee mug. All that is left is to frame the door, and bathroom vent , then finish paneling the outer walls, then we can start using resin putty to fill in the gaps. I did not use splicing butt boards to splice the upper deck plywoods. I am going to trust that the upper deck planking will act the same.
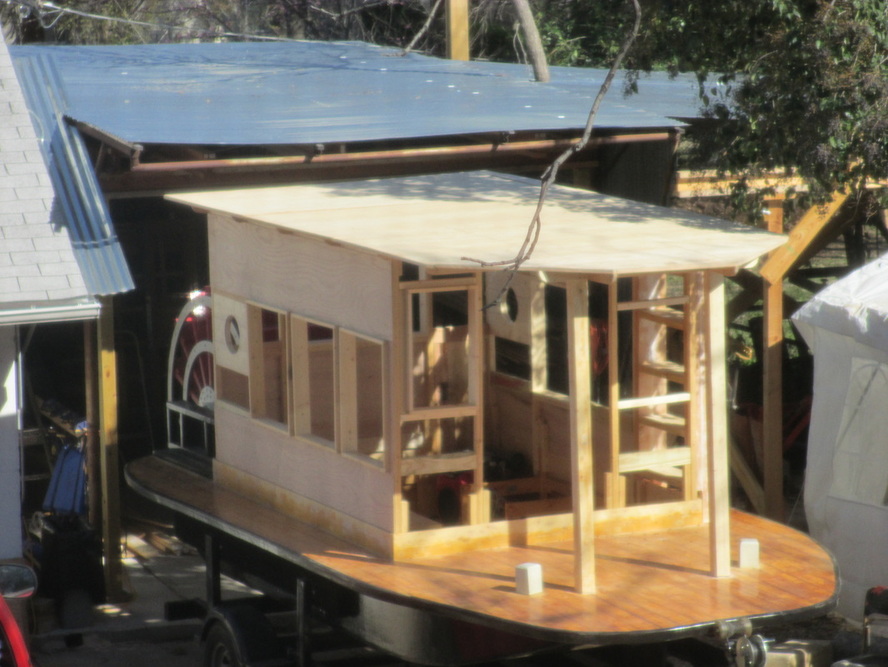
Here is the upper deck sub-floor completed. We walked around up there and it felt very sturdy.
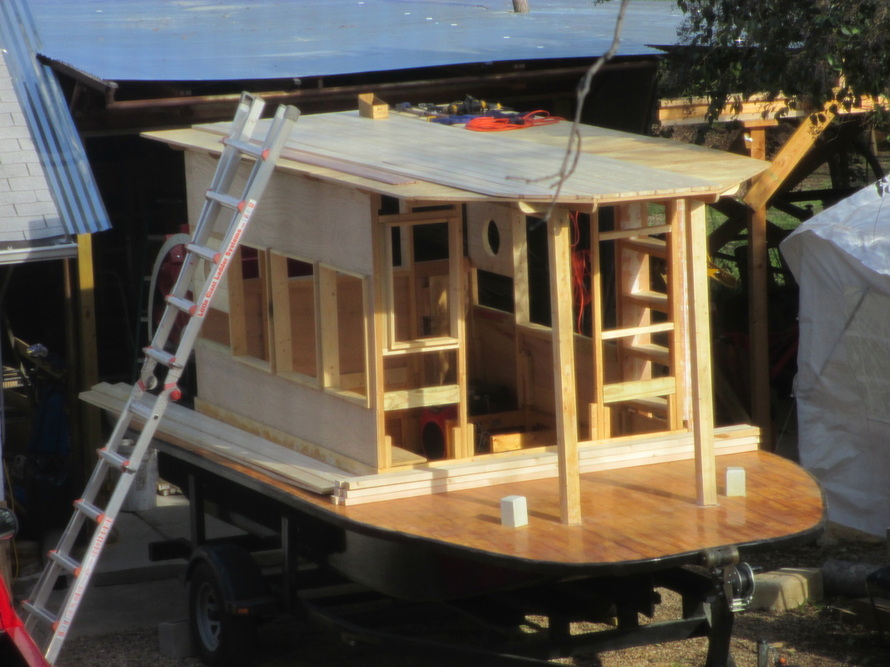
Began planking the second deck. Using 4" white boards and ripping red oak into 1/2" strips.
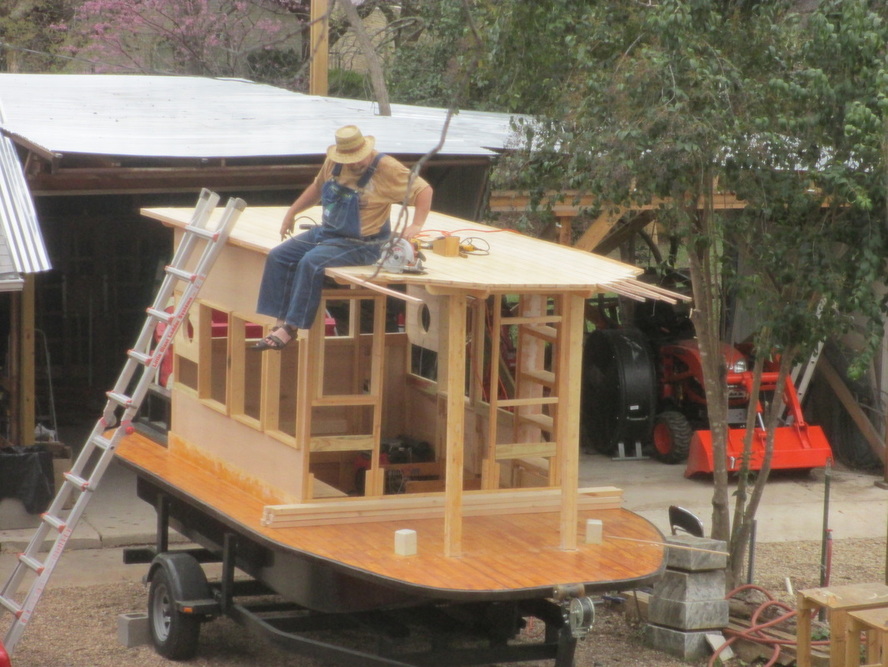
Hand cutting the foward planks to match the 45 degree slant. Ok, as I enlarged the picture, I now remeber that I got tired doing that and grabbed the circular saw.
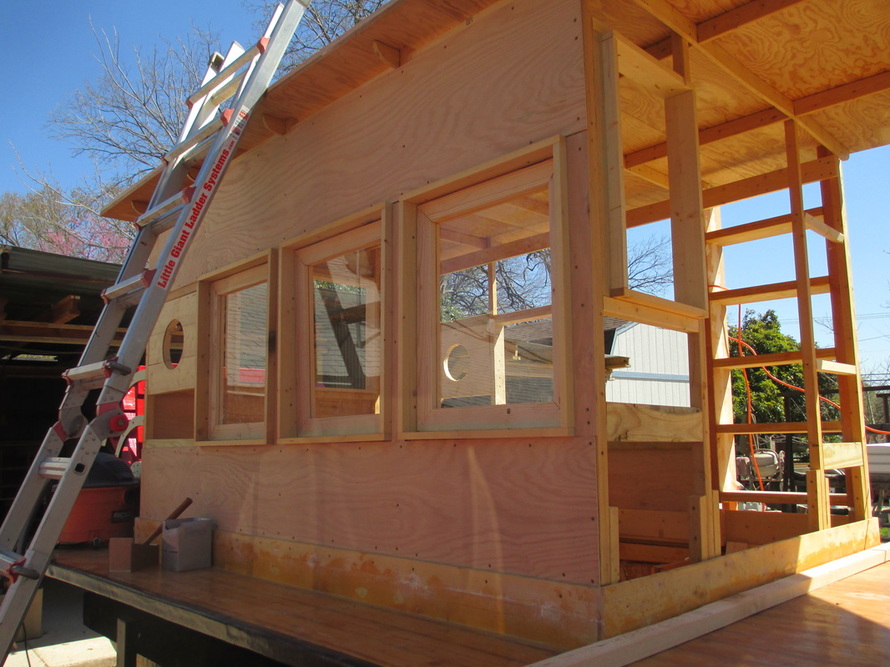
Installing the windows. I used 1/4" plexiglass and 2"x4"s. The window frame is 26"x21 1/2". I cut a 1/4" groove 1" deep for the plexiglass to sit in. I had to do a little trimming to make them fit, yet not too tightly. I plan to place strips along the outter edge to prevent the windows from swinging out.
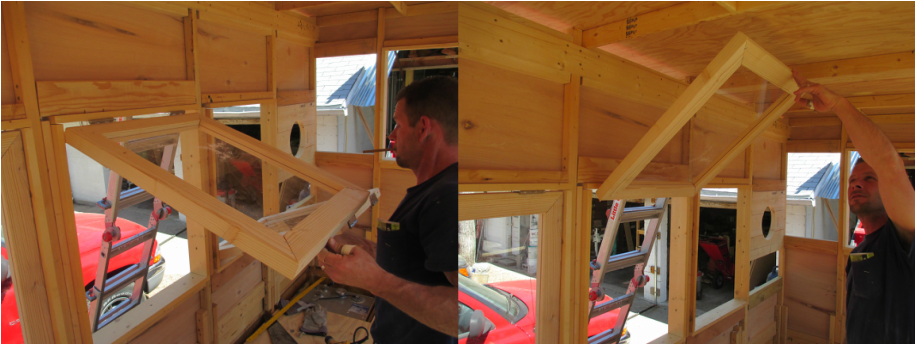
Here you can see I have the hinges on the inside. This allows the windows to swing in and they will be able to be secured on the ceiling.
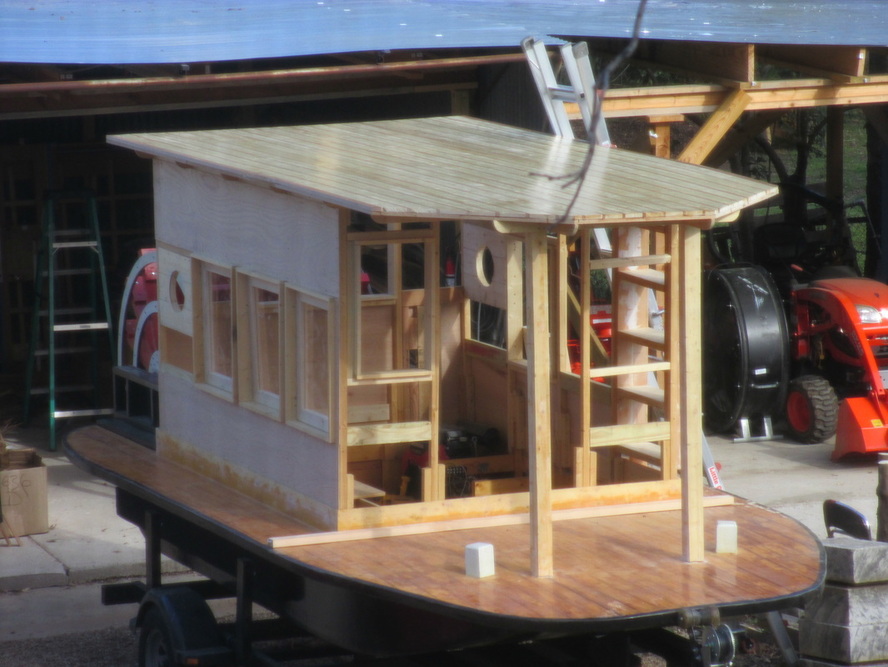
Have the first coat of resin on as a sealer. Hopefully will have the fiberglass cloth on before the weekend. I hope after the cloth and the two coats of resin the decks more closely match in color.
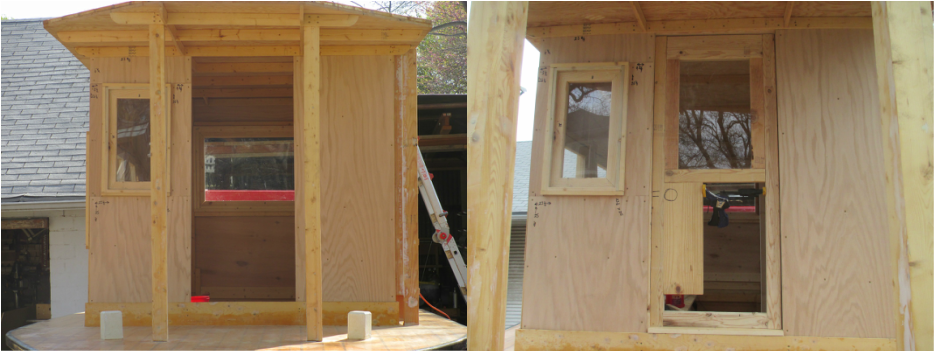
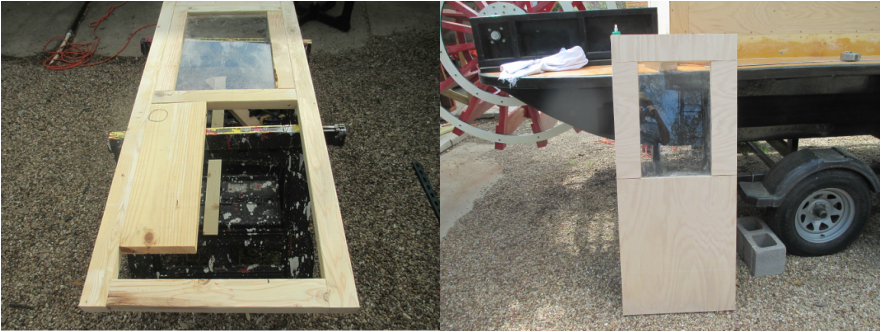
When making the door I cut grooves for the window pane. The 8"x20"board was installed for when I will drill tthe hole for the door handles.
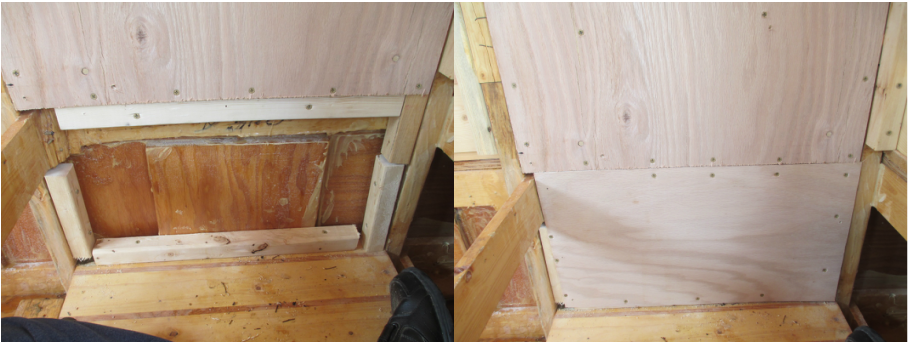
I had to place wooden supports to be able to attach the panel to.
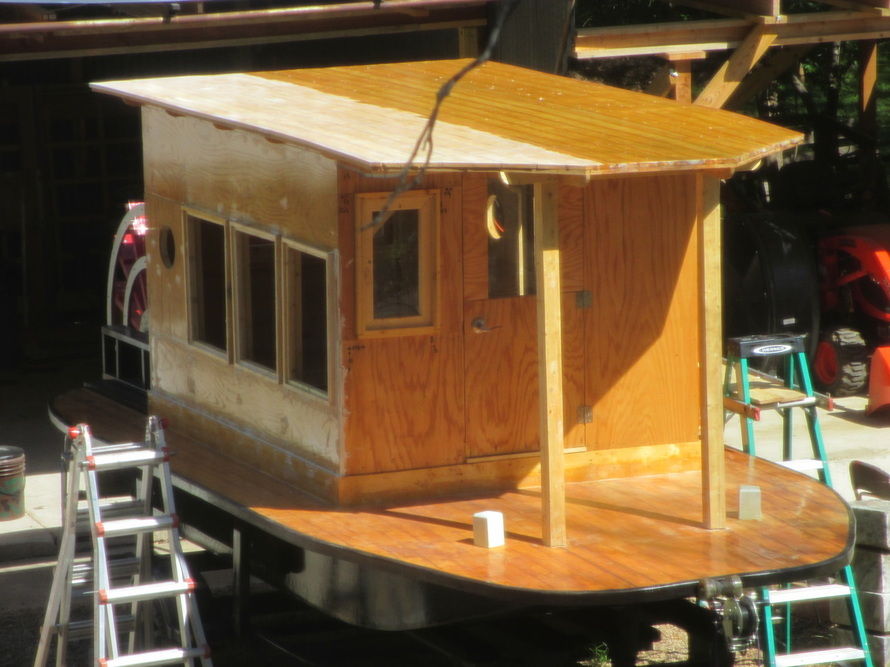
Finally have a few nice days. Placed one half of cloth on second
deck, and plan to place last piece next week. Started filling gaps with resin
putty, and sealed outer panels with resin.
deck, and plan to place last piece next week. Started filling gaps with resin
putty, and sealed outer panels with resin.
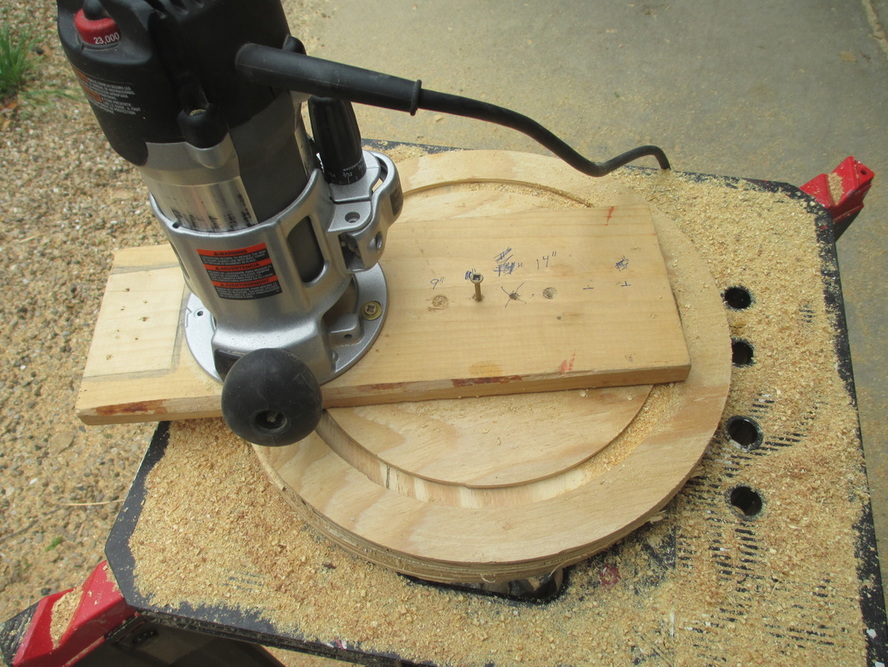
Cutting the porthole covers. Outer edge is 14", used router to cut circles. Routed 1/4" deep groove circle with 11" diameter. Cut 9" inner hole and then cleaned out inner ring 1/4" deep for glass.
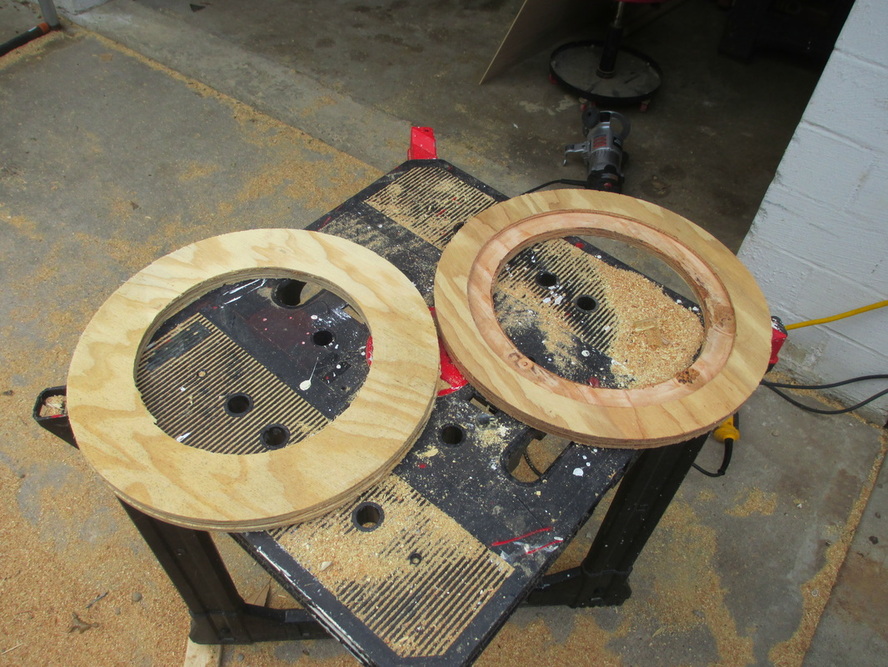
Here are one pair of porthole covers. The inner ring does not need the inner ring routed out. Going to place glass on the outer cover only.
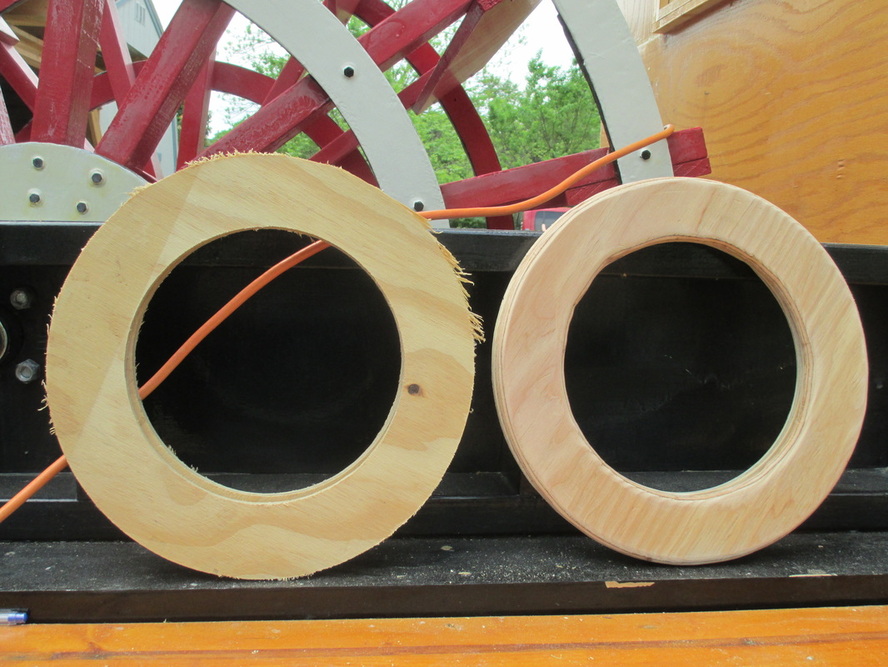
Routed the outer edge, both outer and inner rims using 1/2" curve. Then sanded entire cover smooth.