
Here is a diagram of new tank requirements.

Here is the basic pattern for the paddle wheel. I plan to use 3/4" marine plywood for the hub and circle braces, and 2x4 for the spokes. The floats will be made of 1x8s. Need to make 4 since the chain drive is in the center of the axle with two identical paddle wheels on each side. Alright, decided need only two. Going to put chain drive on the end.

Will make support beam using 2x12s. Make two.
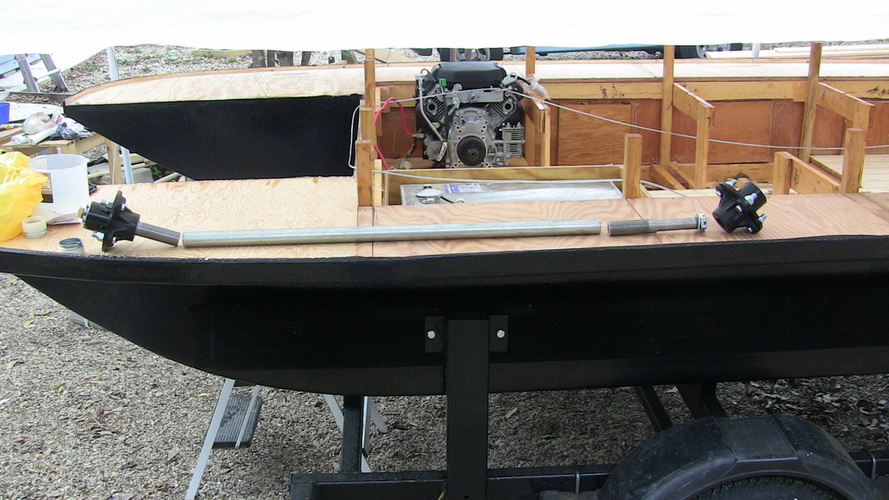
Axle must be put together. Bought the axle spindles and hubs from northern tools. Spindles are 1" inner/outter dia and 1 1/4" dia strut. Got a 1 1/4" pipe from Home Depot cut to 45" and had them thread both ends. Then inserted spindle struts into pipe and welded together. Wanted the pipe threaded so could put on flanges to bolt the wheel to. I have been struggling on the axle for weeks. First time I welded it, it was a little off and caused a wobble, and then one of the welds broke. Second time Marcus welded it, no breakage, but still a noticable wobble. We just can't seem to weld the axle straight. Going to have to find a proffessional.
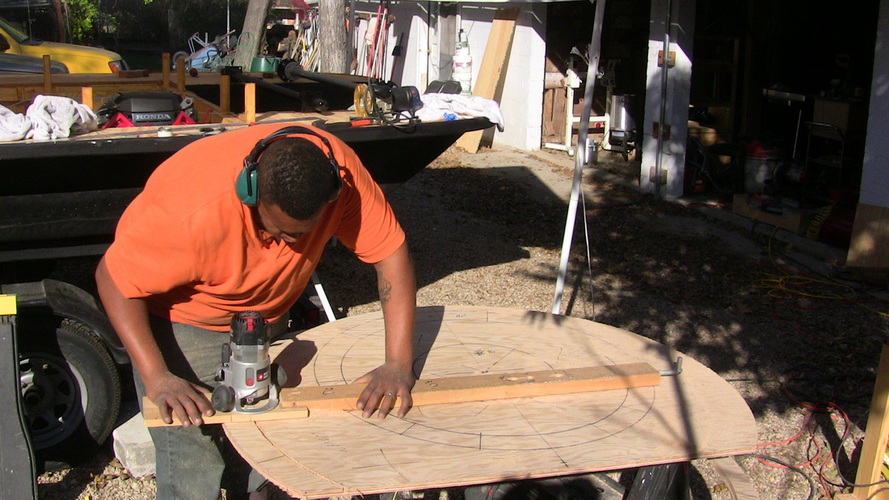
Marcus is routing the circle supports. They will be 60", 38", and 16" in diameter, with the 16" one being solid and the others are 3" thick rings. The 60" can't be cut entirely from a sheet of 4'x8', so will have to do some splicing.
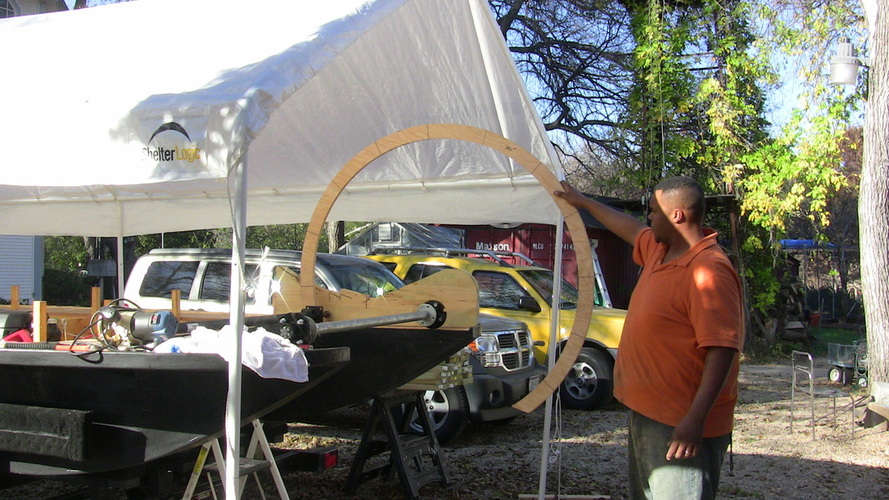
Working on making the Paddle Wheel. 60" diameter! 5' 4" high wheel, once the floats are on. Had to weld the axle together. Just waiting for Marcus to finish routing the round wheel supports, then will cut the spokes and bolt everything together.
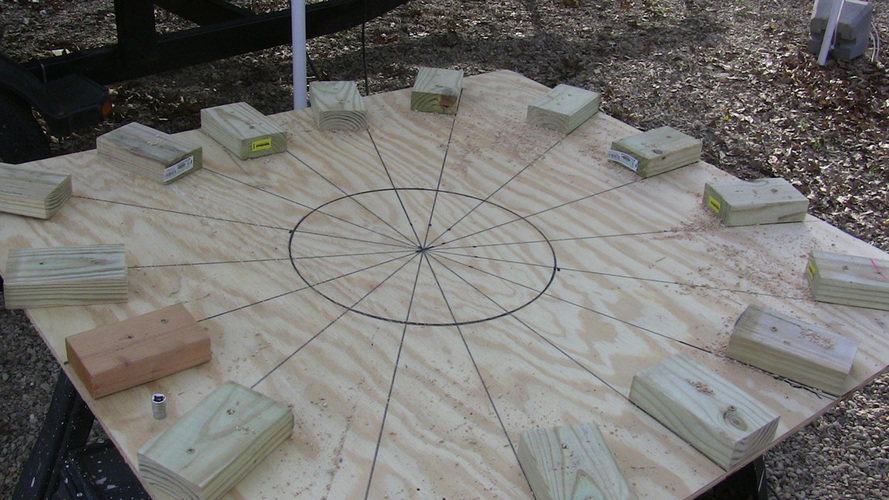
Made a jig for spoke placement. Make sure to carefully align the jig. I used a long ruler and butted the block up against it to get the angle just right.
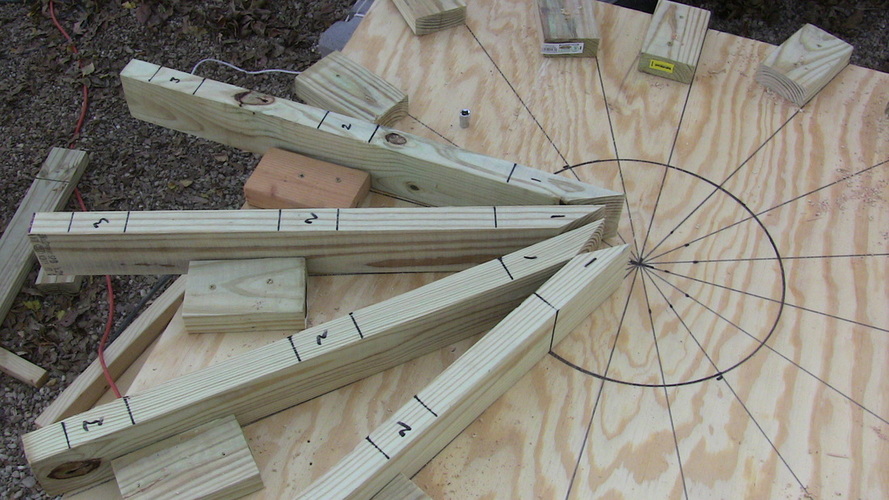
Had to cut spoke ends into 60 degree angles, that way could still have plenty of spoke to double bolt into the center hub. Lines spokes up with one side against line.

Make sure to have the spokes face the same direction. When fastening the hubs, I found inserting one bolt most the way down first, then another a few spokes away, will help keep the hub centered. Then proceed to screw all the bolts down tightly. Use a washer to prevent the bolt from embedding into the wood.
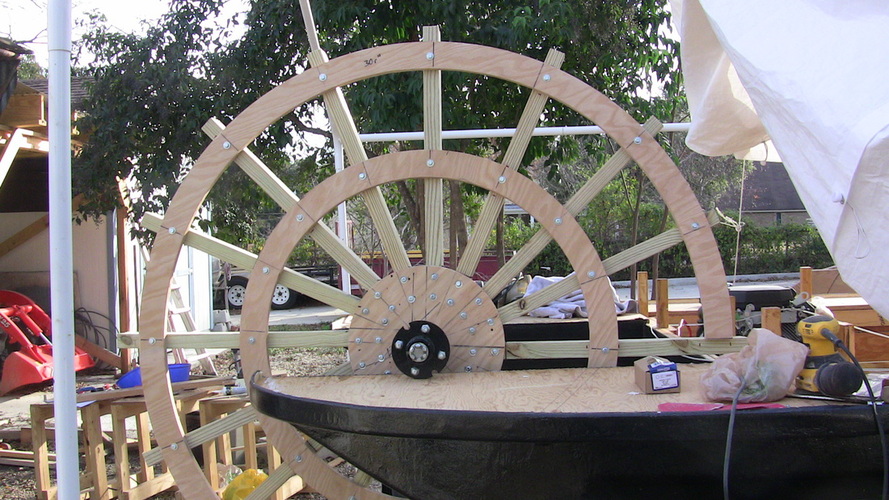
One side done. I used a single bolt for the outter rings.
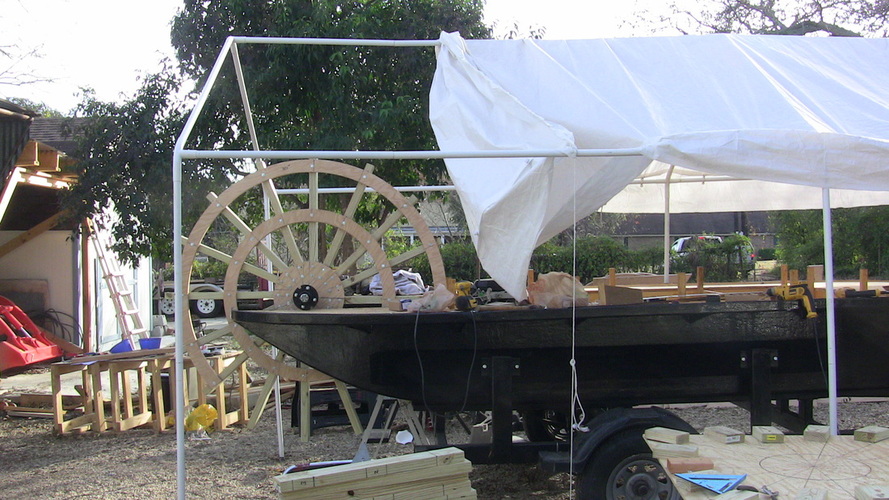
Marcus was impressed about how large a ratio the wheel was to the over all length of the boat.
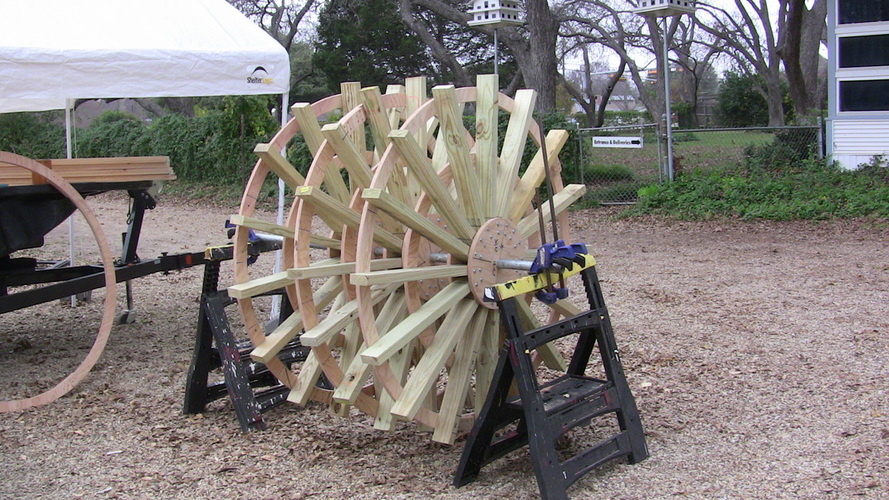
It was while building the fourth wheel, that I decided I really needed only two. I was going to have the chain drive in the center, but found it would be simplier if I had the chain drive on the side. With the engine on the side, I would only need two chains, one from the engine to the transmission and from there to the wheel axle.
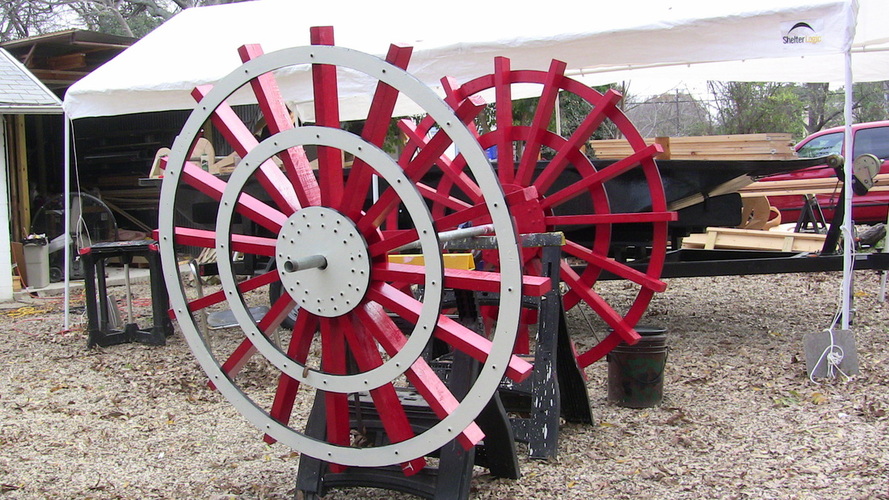
Wheels all painted. Just some touch up and then two coats of resin. Still got to take axle to a professional place to get welded straight. Can't find anyone who can do a welding job. Made a wooden jig and welded the axle myself. Worked like a charm. Need to stop just eyeballing it all the time.
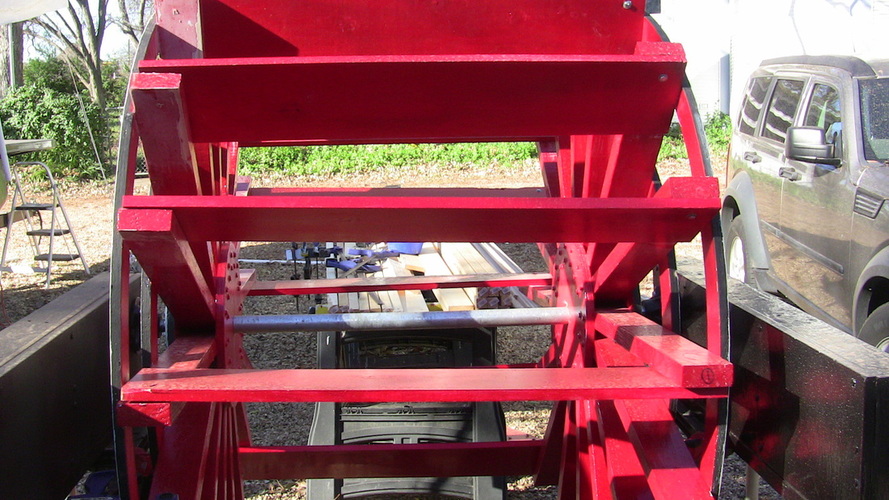
Another bad case of where eyeballing it failed me. I designed the jig to make the wheels where the spokes whould all be aligned on the right side of the lines drawn. This is fine, but I made all the wheels the same. So when it came to placing on the floats there was a problem. I decided to just alternate the ends of the float so that they were on the correct side of the spokes for each wheel, but then the eyeballing part caused the trouble. The floats were still not straight. Apparently I failed to ensure that the outter ends of the spokes were evenly spaced. Figure easiest is to just redo them, this way I can also paint inside the wheel hub and make sure the entire wheel is water proofed.

Had to redesign axle support when first one split due to wieght of both wheels and axle. Due to length of lug bolts, had to make main support 1" thick, but added 2"x4" bracers.
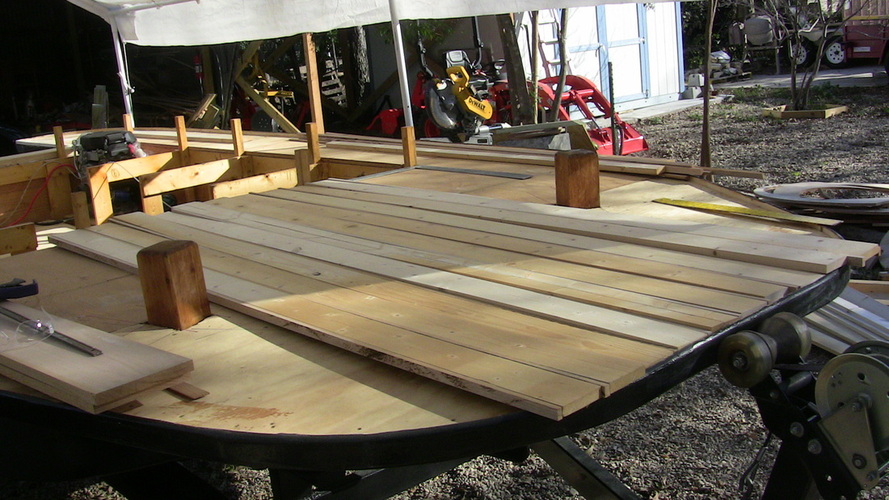
Getting ready to begin laying the deck, but first I need to cut notches in the subfloor for the foward top deck supports. Will fasten the ends of the deck supports to frame 2, same frame that the rudder is attached to. Thank God my son lost a lot of weight, he was able to fit under the subfloor and bolt the supports on.
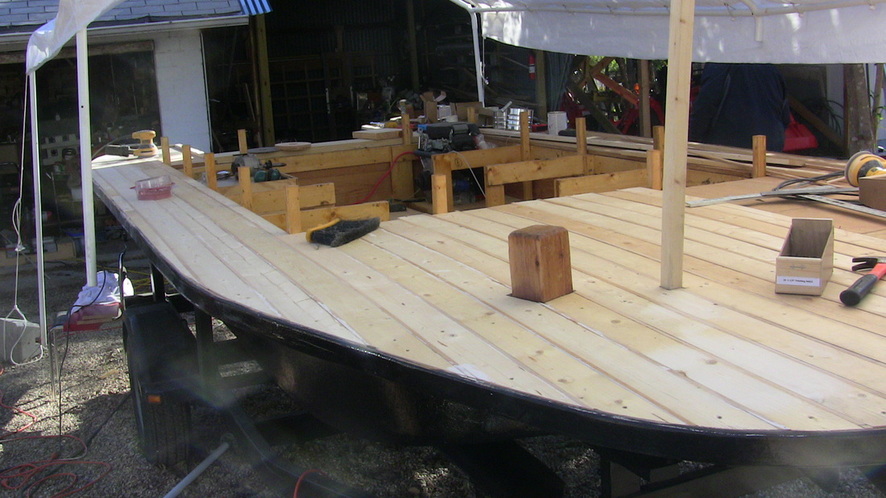
Planking deck with 1/2" strips of red oak and 4" planks of spruce. Have to carefully notch around the bullards and front supports for upper deck. Also sanding the wood to fit nicely along the curve is important. I originally was gluing the small strips to the plank, but as temperatures dropped below 40, had to resort to just using finishing nails to hold the strips to the deck. Due to not knowing the final height of the upper deck I did not cut the upper deck supports, which caused the tent to not be stable. Think will have to remove it and just use top as a tarp to cover boat in case of rain.
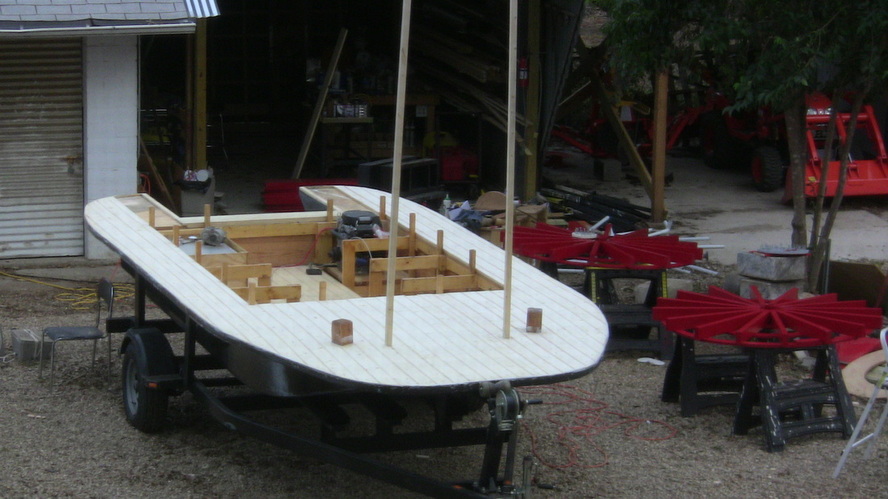
Planking main deck done! Made some resin filler and filled the
gaps along the edge. Will later sand smooth and paint nice black strip along
edge, then resin entire deck. I bought some 4 oz. fiberglass cloth, this cloth
is suppose to be transparent when applied. Remade the wheel. Discovered it is
very important to ensure the outter end of the spokes are spaced exactly the
same. Apparently appearing to be perfectly aligned and being perfectly aligned
are not the same thing. Note: I finally used a very thin strip of wood to measure the spoke spacing. Found using a string caused problems, since the string tended to stretch. A cloth tape measurer would have been lovely.
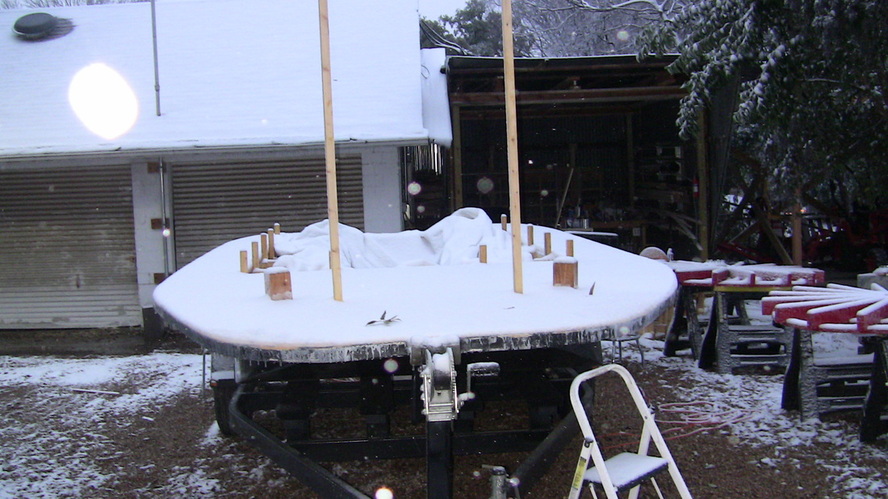
Merry Christrmas Everyone! Here in Texas we had a rare white Christmas.
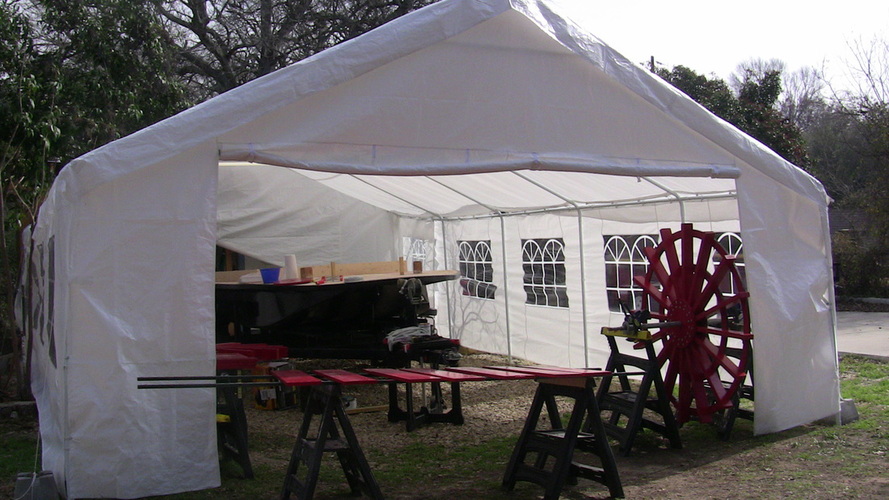
Bought a new tent to work in. Can't paint or use resin in tempatures below 50 degrees. Luckily my brother-in-law loaned me his 80,000 btu heater. ALso can use tent later for weddings.
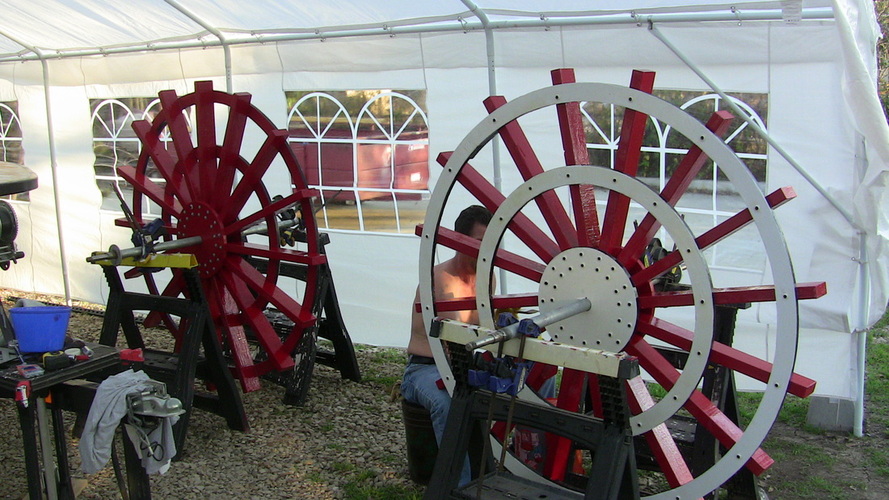
New wheels realigned, painted and getting a nice coat of resin to seal them. Terry is putting the final touches on the last wheel.

Before I got the tent I tried to seal the deck by laying a thin layer of resin down. Unfortuantly, it rianed that night and the next morning there were white patched on the deck. So I had to sand them off, and the I noticed the deck was warping a little. Now under the tent I was able to belt sand the deck smooth and keep it dry in preparation for fiberglassing it. I placed a 6" splash guard aroung the cabin. I also notched the top of the splash guard so my cabin walls can be easily inset onto them.
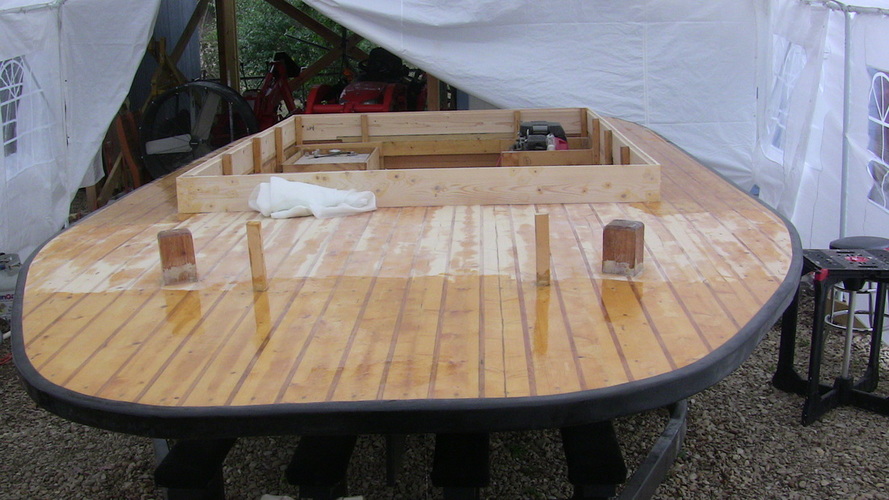
Got 3 out of 4 pieces of fiberglass laid on deck, and it looks beautiful. Very happy with how it is turning out. Was not certain how transparent the 4 oz. cloth would be, but the results are outstanding.
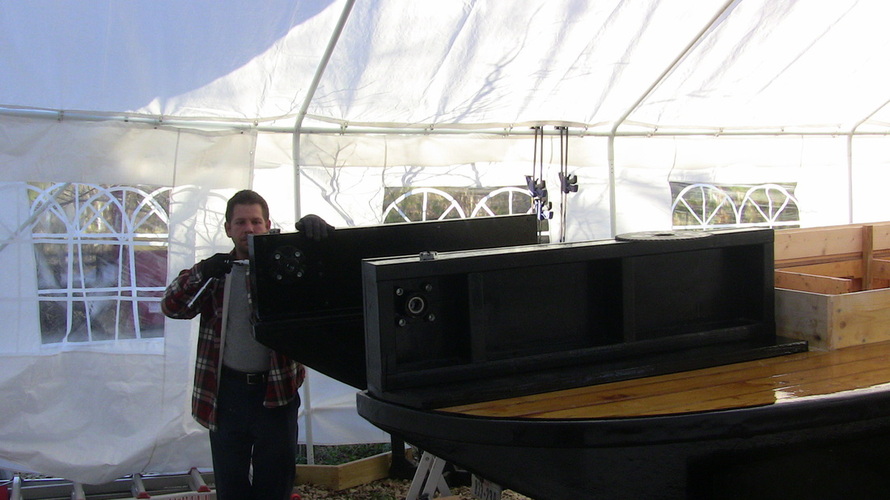
I have Terry mounting the hubs to the axle supports. Deck looks great, unfortuantly ran out of resin and was only able to put down one coat. Axle supports will eventually be bolted to the deck.
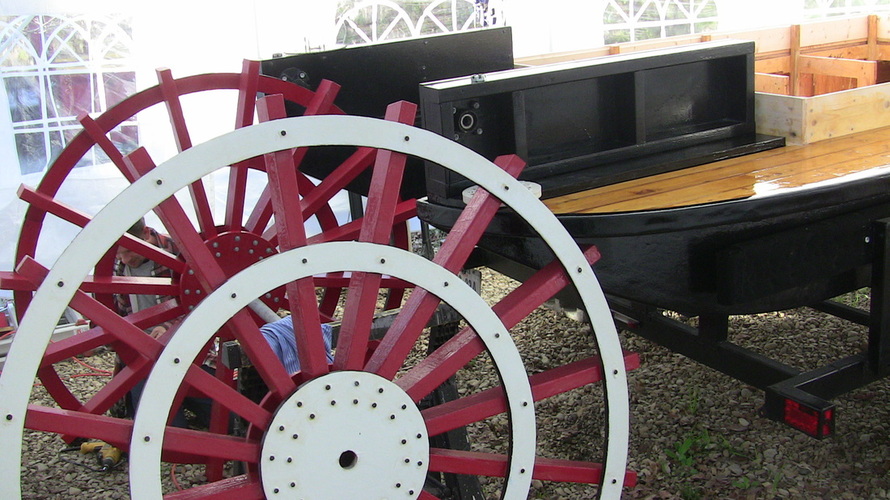
Getting the wheels into position. Need to bolt them to the axle before lifting them into place.
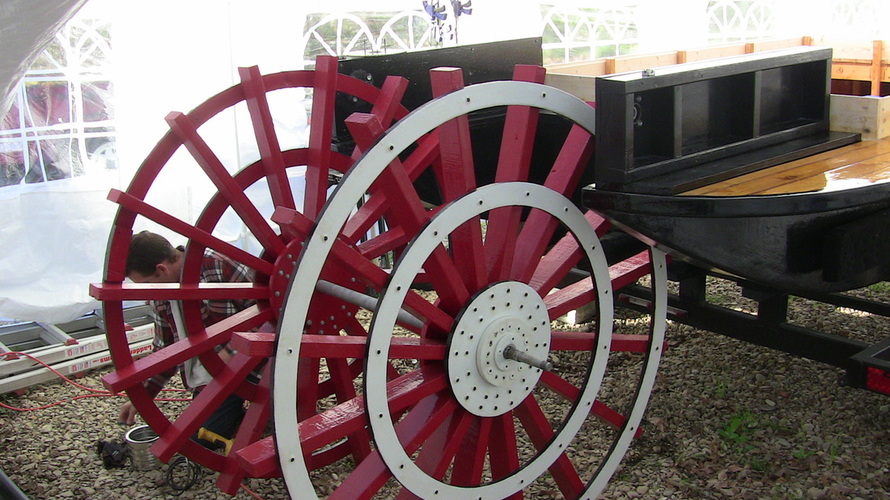
Once wheels are on axle a spacer hub is installed. The spacer hub center hole is drilled to allow a flang to fit smuggly into it. The flang prevents the wheel from moving along the axle and also allows the wheels to be adjusted for aligning the paddles.
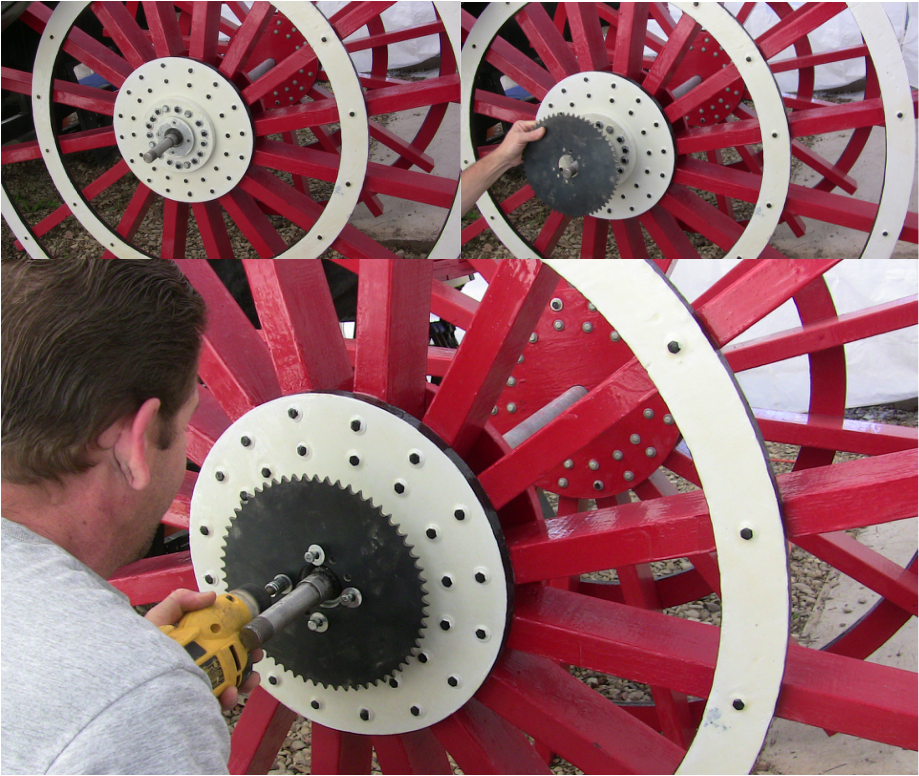
The left side of the axle is where I am plassing the main gear. I had to drill holes in the gear to correspond with those in the flangs. The hub spacer also prevent the chain rubbing against the wheel.
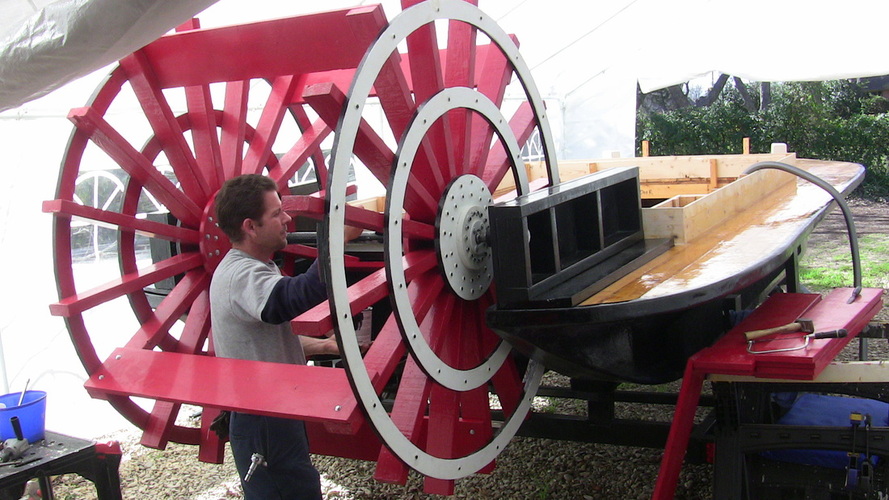
Before we install all the paddles, I sent Terry inside to paint the axle. To bad no one was around to take pictures while I strong backed the entire wheel and axle assembly into place while Terry positioned the axle support boxes.
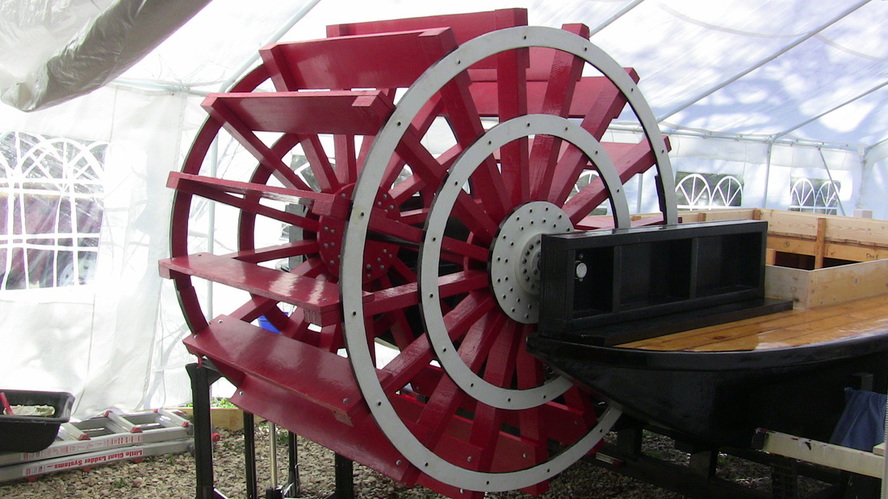
Paddles installed. Paddle wheel completed!
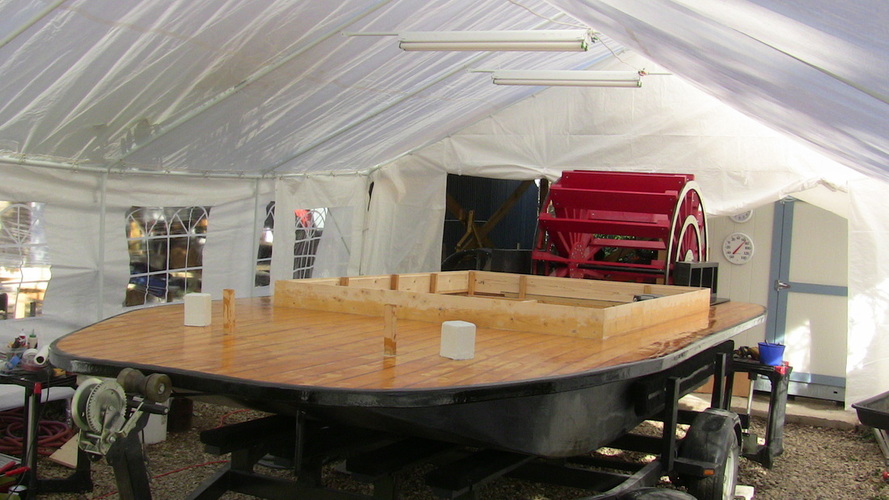
Deck pretty much done except for last coat of resin. Paddle wheel completed. Now time to start working on the engine and electrical system.
